WithWindows 10’s end of life looming, users are beginning to consider their next steps. In the past, upgrading to the latest Windows release might have been the obvious path, butWindows 11-- with its tighter hardware requirements, bloat, problematic updates, insistence on a Microsoft account, and an increasing focus on unwanted AI features -- may no longer be the first choice for many.
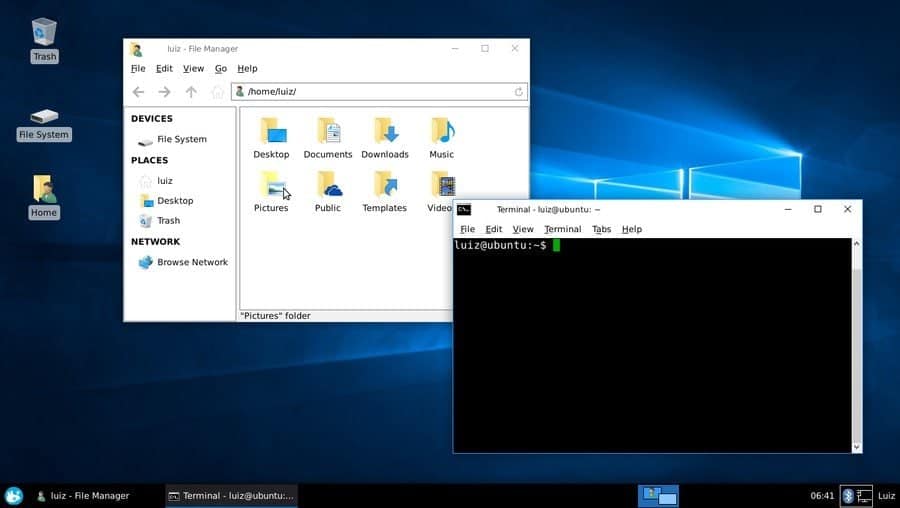
Thankfully, Windows 11 isn’t the only game in town. Several Linux operating systems have been developed to appeal to Windows users looking to jump ship. AnduinOS is one such distribution, combining the familiarity of Windows 11 with the power of Ubuntu, and it's just been updated to version 1.3.0.
The OS continues to focus on ease of use, especially for those users moving over from Windows. It's built on the latest version of Ubuntu -- 25.04 “Plucky Puffin” -- and features GNOME 48, offering a desktop that closely resembles the look and feel of Windows 11, complete with a centered taskbar, app launcher, and rounded window corners.
AnduinOS 1.3 introduces several major improvements, including an integrated app store based on Flatpak that expands the range of available applications beyond the standard Ubuntu repositories.
GNOME Software now comes pre-installed, allowing users to browse and install software directly from a graphical storefront. There’s support for HDR displays and a new Super + V shortcut to toggle clipboard history.
One noteworthy fix in this release is improved Firefox localization, resolving past issues for non-English users.
AnduinOS 1.3 is available for download from the official website. Unlike many distributions that rely on in-session language packs, there are separate ISO files for each supported language, making installation easier for international users.
You can also download a copy here: https://distrowatch.com/table.php?distribution=anduin
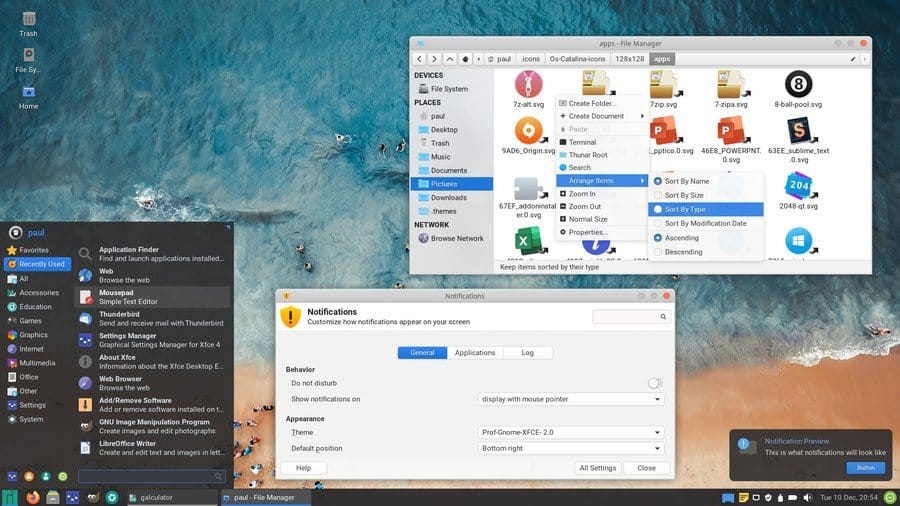
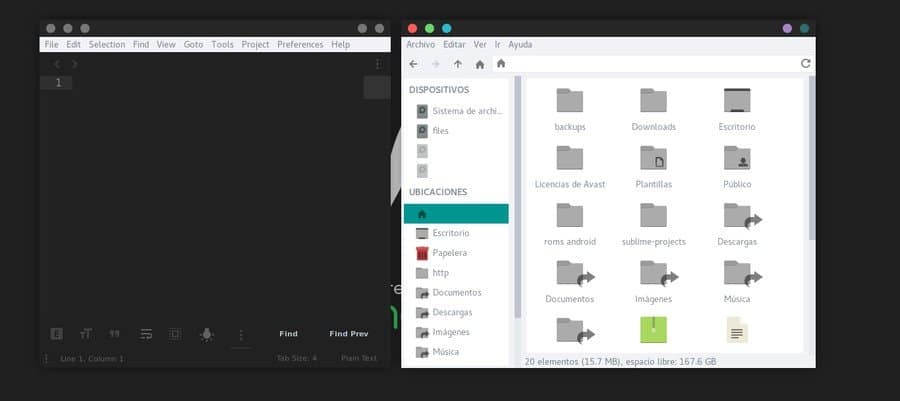
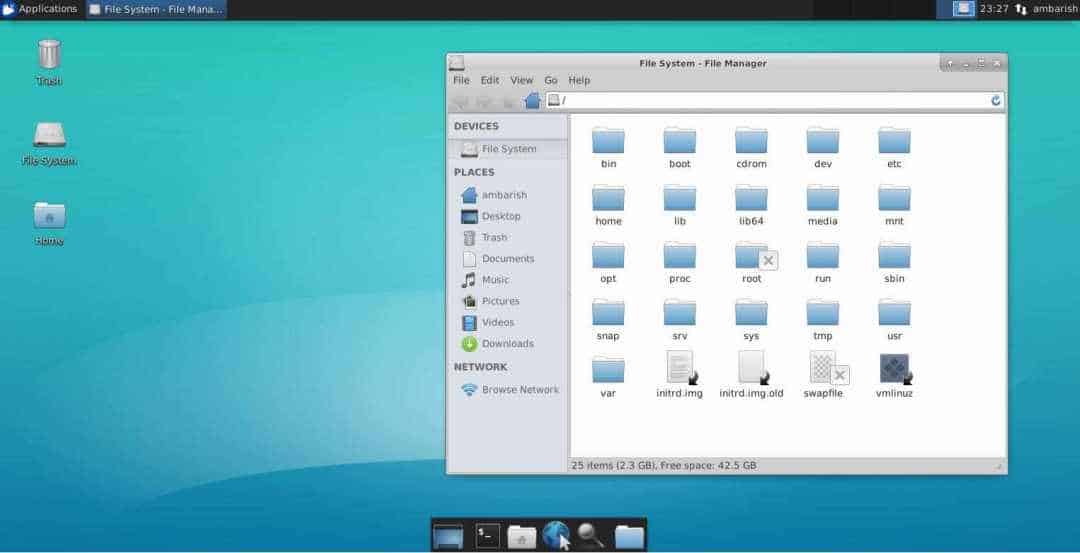
------------------------------ Anduin is a lean desktop built on Gnome. It does not have many applications. So you will have to add your own from the Synaptic Package Manager and Software Manager. The Gnome desktop is clean, and with the launcher, it navigated very much like Win11. I installed my own favorite apps: Thunar, Chrome, Chromium, Deluge, OnlyOffice, Conky Sys Monitor, and the VLC, Deadbeef, and Audacious music players. Below are my own installed screen shots. Enjoy.
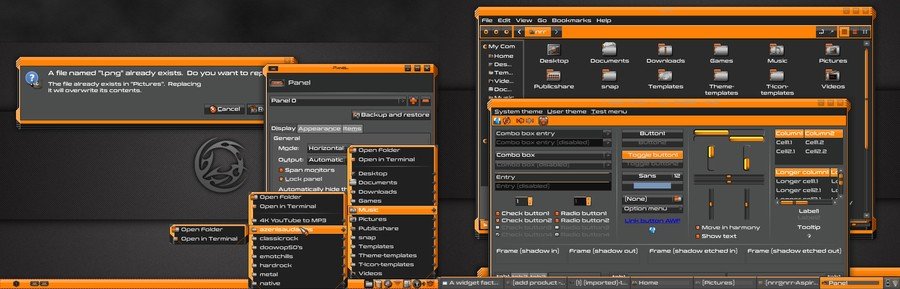
Theming and customization is a huge aspect of the Linux world. No other operating system offers such kind of flexibility in customizing the desktop. Everydesktop environmentis great for customizing the look of the Linux system. The Xfce desktop environment is no exception. Instead, it has a massive library of themes and large community support. They are consistently developing Xfce themes for your desktop. Installing and customizing Xfce themes for Linux is also very easy. This article is going to be a handbook for Xfce desktop customization and tweaks.
Best Xfce Themes for Linux
The huge Xfce themes library leads to the biggest confusion of choosing the best Xfce themes for one’s desktop. No one can try out every free theme and experiment with them. But we got you covered. We have enlisted the best 20 Xfce themes here to get you started with the Linux customization game. Though the taste of every individual is different, we believe that this list will be sufficient for anyone to give their desktop a gorgeous and unique look.
1. PRO Dark
PRO Dark is one of the most popular Xfce themes for Linux. It is compatible with any version of the Xfce desktop environment since it has three different editions for different versions of GTK and Thunar file manager.
It is very clean and doesn’t strain the eyes. This is why it is very useful for those who use their desktop regularly. GTK2 and GTK3 applications look no different in this theme. Users can customize different aspects of this theme. PRO Dark uses the Xfwm window manager as the compositor.
Prof is a simple and minimalist theme for the Xfce desktop environment. The author of the theme is “PaulXfce,” and is famous for another popular theme PRO Dark. The motto of the creator is to create such kind themes that do not cause any strain on the eyes. So, you will see that this theme doesn’t have modern dark color schemes.
Rather it uses a light color scheme and clean typography. It has a translucent application launcher and notification panel, which has a black tint on to that. The custom icons make it a beautiful flat Xfce theme for the admirers of flat design language.
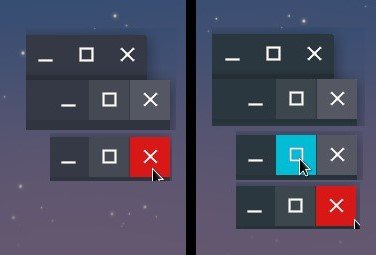
Dots is a popular flat theme for Linux. This Xfce theme will not completely change the look of your desktop environment. It will only change the window panels. There are two color schemes, black, and white used in this theme. The title bar buttons will be replaced by red, green and blue in the white variant.
In the dark variant, all the buttons will be gray colored. You can separately control the color scheme of the background and title bar color. The users can enter into the Linux Window Manager and apply this amazing theme.
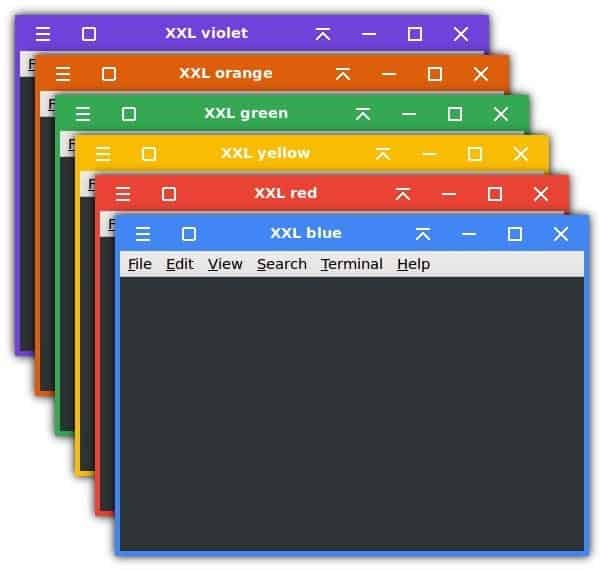
OneColor is an interesting Xfce theme for Linux users. It is very simple and lightweight. It will bring a unique and colorful attire to your window title bar. The buttons will look just like the buttons from Windows operating system. But the design is a bit rounded, which we see in the material design language of the Android operating system.
It will give a modern flat look to your desktop. You can choose from six different bright and bold colors for the window title bar and border, such as red, blue, yellow, green, orange, and violet. It has a HiDPI version for 4K displays and is an XXL version for the touch screen devices included with the package. You can set it up with solid flat colored wallpapers to get a minimal desktop setup.
This is a clone of Cupertino’s flagship operating system. It is based on the latest version of macOS named Catalina. The creator tried to replicate every detail to give almost the same look and feel of macOS for the Linux users. It has two different variants that are dark and light.
This theme works great with the latest Xfce version 4.14. The default application icons are customized to look like Apple’s icons. This theme also changes the look of the title bar and buttons. You can move the taskbar to the top of the screen and add a dock panel to get the complete macOS feeling.
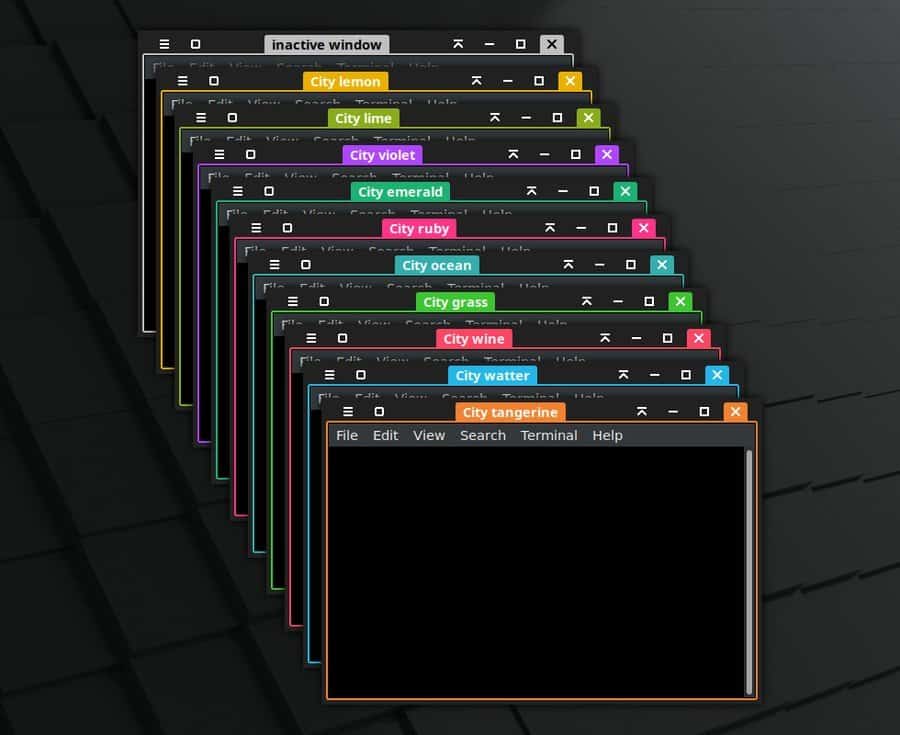
The City is a beautiful and elegant dark theme for the Xfce desktop. It effectively changes the color of the title bar and window panel. This theme is from the same author who created the OneColor theme. The buttons and icons of this theme are similar to those on OneColor. But unlike OneColor, it doesn’t pain the whole title bar.
Rather it colors the close button, window title, and window borders. There are more than ten variants of this theme, including Wine, Grass, Ocean, Ruby, Emerald, etc. There is an additional version of this theme that doesn’t include any preset color. Users can freely customize the color of their choice.
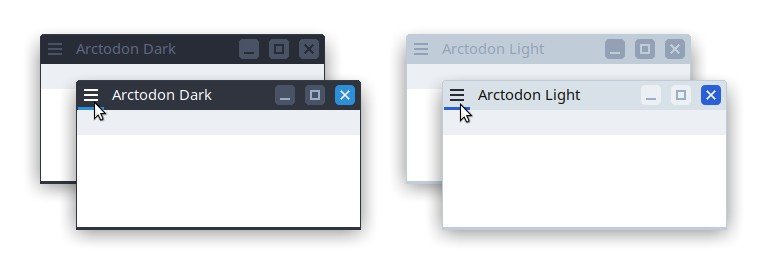
Arctodon is a simple changemaker for the Xfwm window manager, a default for the Xfce desktop environment. For this reason, this theme changes the look of the window and title bar of different applications. It is one of the best add on for the popular Arc theme. It also looks good with the Qogir theme.
The title bar buttons are flat with colored highlights. The title bar icons look like old-school Windows XP icons. But the total attire of this theme is quite modern and eye-soothing. It has both dark and light variants to choose from.
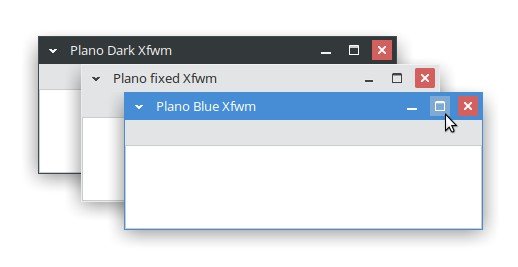
Plano is a neat and clean Xfce flat theme. This window manager theme is highly inspired by Microsoft’s very own Windows OS. It has three different variants, including Normal, Modern, and XP. The latest XP variant brings back the classic maximize button along with 2px borders.
On the other hand, the Modern variant is borderless to bring an immersive vibe to the window panels. Users can use Alt+RMB+drag to change the window size in the Modern variant. This flat theme has three different colored versions called Fixed, Blue, and Dark.
Pop is a simple and minimal theme for the Xfce desktop environment. It is highly inspired by the Pop GTK theme from the Pop! OS. It has two variants that are light and dark. The dark variant is the default and normal variant for this theme. The title bar buttons are placed nicely in this theme.
The icons are inspired by material design language. There is rounded padding on the close button. The active and inactive windows show different colors on their exit buttons. You can set it up with the Pop GTK theme to get a complete experience of the theme.
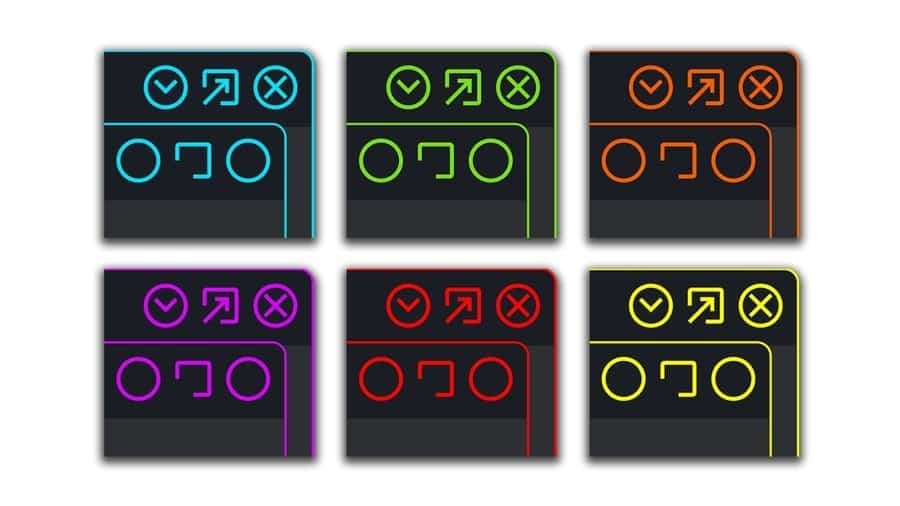
Neon Knights is a modern-looking theme inspired by neon light design. It looks beautiful with complete dark or pitch-black backgrounds. The title bar buttons have a very minimal appearance in this theme. There are two different variants for the button icons. One set is rounded with less detail, and another set has got a better detail on them.
There are several customization colors for the theme, including blue, green, red, yellow, and orange. The author of this theme recommends Neon Knights GTK theme, Neon Knights folder icons, and Neon Knights wallpapers two used with this window manager theme.
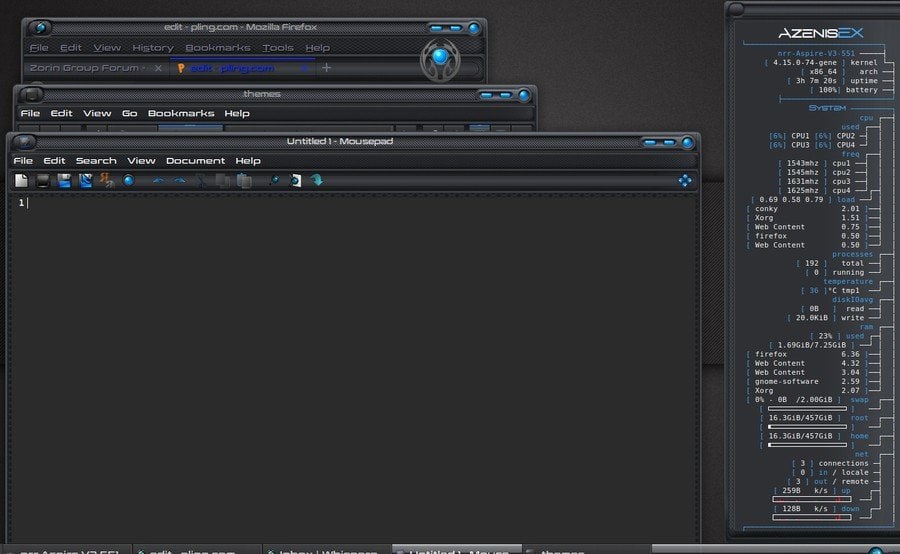
Azenis is a different-looking theme. It has a futuristic techno vibe. The window of applications has beveled edges. The title bar is quite modern and beautiful. The buttons have got a 3D effect on them. The title bar has a carbon fiber texture painted on it. The default typeface is a modern designed san serif font.
For this reason, the total setup will remind you of the supercomputer from a sci-fi movie. The window panels and title bars can be customized through the window manager software. The improved version of this theme has repositioned title bars and bold borders with more ergonomic spacing.
Download
12. Ninja
Ninja is one of the most vibrant looking Xfce themes for Linux. But it was originally developed for the Windows operating system. Later it was ported for Linux distributions. This theme is all black, but its orange accent helps it to bring a bold and elegant look into it.
You can easily customize the toggle buttons and other aspects by using the Xfce theme manager. The folder icons have a stainless steel-like metallic texture on them. It is also compatible with the popular customization tool, A Widget Factory.
Download
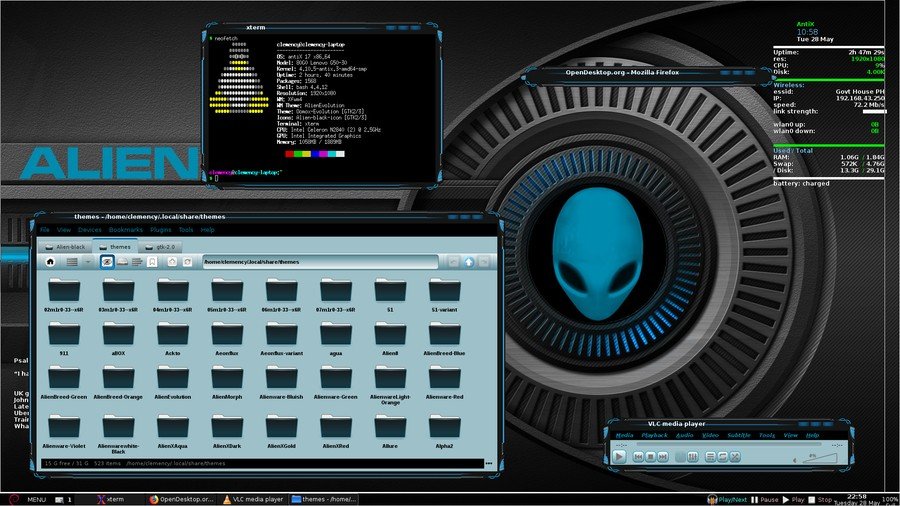
13. Alien Evolution
It is a very popular theme for Linux. It is highly inspired by a Windows paid skin named Alienware Evolution. The theme has a dark color scheme with a blue accent. But the background of the applications has a light cyan tint. All of the title bar buttons use the same icons, and there is no visible difference between them.
This thing can confuse some users. The window panel borders have a beautiful design. The windows are not rectangular, like other Xfce themes. Instead, the unconventional look will make your desktop setup unique and gorgeous.
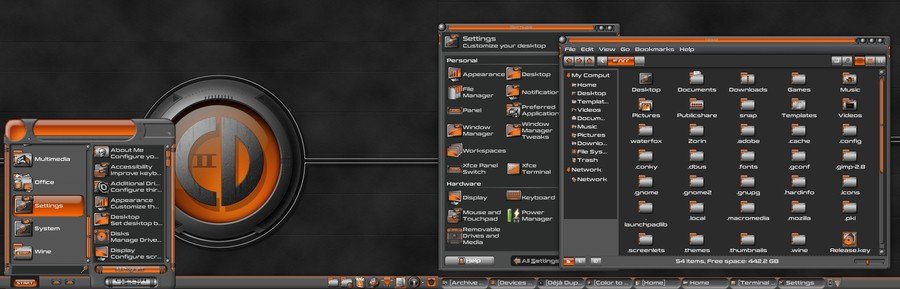
CopperDeck is a heavily customized appearance for the Xfce desktop environment. It has an orange accent on its dark background. The default application icons and folder icons are heavily customized to blend with this theme. The folder icons are metallic textured.
The buttons have fine detailed highlights and shadows so that it brings some depth to the design. The theme is very clean and has enough ergonomic spacing though the creator tried to keep it compact. Very few themes are as complete and versatile as this theme. Those who want a robotic vibe into their desktop can give it a shot.
Download
15. Hitori
It is a newly released flat theme for Linux. Hitori is a very simple and minimal theme compatible with the latest version of the Xfce desktop environment. It is an Xfwm window manager theme that matches the color palette of the popular GTK theme Adapta.
The title bar of the theme is blended with the main background because it has a borderless material design. The title bar buttons are rounded and flat. The button arrangements, window title alignment, and title bar font style can be adjusted using the Xfce theme manager.
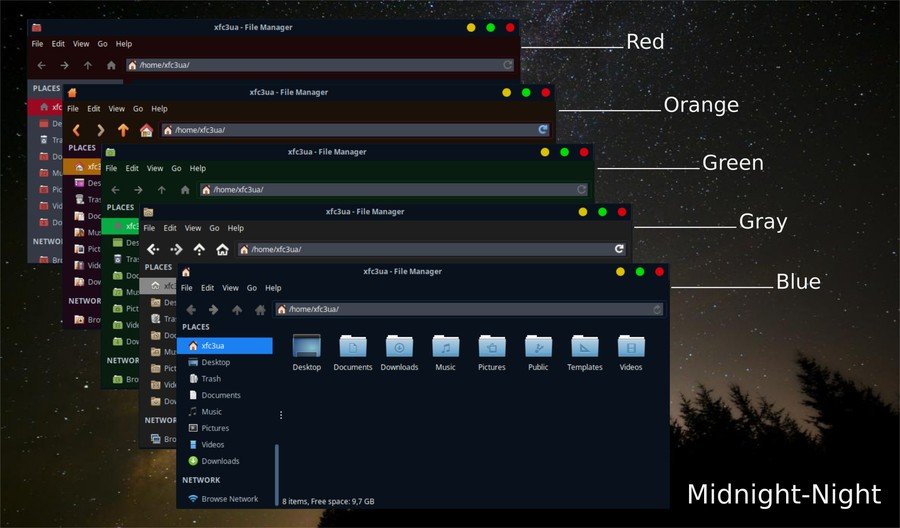
Midnight is one of the most popular Xfce themes for Linux. The author created it on the base of the popular GTK theme Arc. It is fully compatible with the Xfwm4 window manager. The title bar buttons have bold and bright colors, just like the macOS. The application background, title bar, and search bar have different color schemes.
There are five different color variants of this theme: Red, Orange, Green, Gray, and Blue. Each color variant has both light and dark modes from which the users can choose their favorite one.
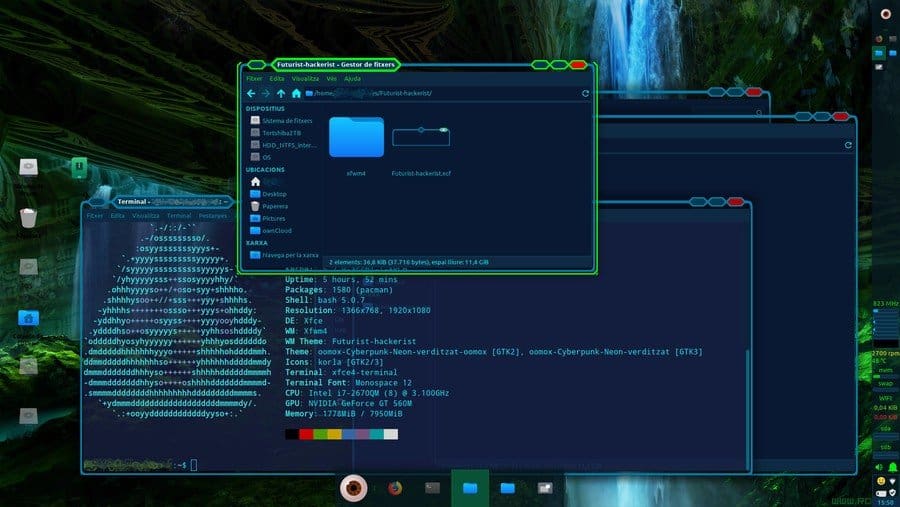
As the name suggests, this theme will bring a futuristic hacker vibe to your desktop. It will remind you of the popular video game Watchdogs. This theme is compatible with the Xfce desktop environment. The backgrounds have a dark blue tint.
The inactive window has cyan borders, while the active window will be visible with glowing green borders. The title bar buttons have a hexagonal shape, which is kind of unconventional. But the overall look and feel of the theme are pretty classy.
Cyanogen is a complete theme package for Linux. It works great with the Xfce desktop environment. You have to install Adwaita and Murrine theme engines before installing this theme. It has got another version named Cyanogen Mini for the smaller screen devices.
The windows, app icons, wallpapers, launcher, and almost everything is painted with Cyan color in this theme. The color is refreshing and eye-soothing. The buttons, menu, borders, and other aspects can be customized using the software named A Widget Factory.
This theme resembles the title button of Google’s very own Chrome OS. This is a full HD version, and this is why it looks great, even on large displays. Adapta and Arc are two of the very popular Linux desktop themes. Chr-title-buttons has two extra variants that blend with Adapta and Arc themes. The original variant has blue, gray, and dark buttons to suit best with any flat themes out there. This modern Xfce theme will be like by every minimal setup lover.
JacWin10 stands for “Just a copy of Windows 10.” As the name suggests, this theme resembles the visual aspects of Microsoft’s Windows 10. If anyone wants to get back to a familiar Windows look, this is the best option to go for. The developer tried to replicate even the fine details as far as he could.
The layout of this theme is fixed for the Xfwm window manager to resemble Windows 10 correctly. Application icon and window title are left-aligned, while the Maximize, minimize, and close buttons are right-aligned. You can set this up with Windows 10 icon pack to get the full experience.
The default look of the Xfce desktop environment is not bad. But if you want your desktop to look even cooler, you can customize the look by downloading Xfce themes and tweaking them. The above list has some great themes to get started with the customization of the Xfce desktop. You can even use some third-party applications like the Xfce theme manager to tweak the theme. Now it’s time to learn how to get gorgeous desktop attire.
1. Downloading the Theme File
Firstly, you have to download the theme file from your desired website. You can use the download buttons of the above list to download the best Xfce themes. Normally the theme files are in a compressed file format like ZIP, RAR, GZ, etc. For this reason, you have to extract the files in your desired directory after downloading them by using any of your favorite extractor software.
2. Applying the Desired Theme
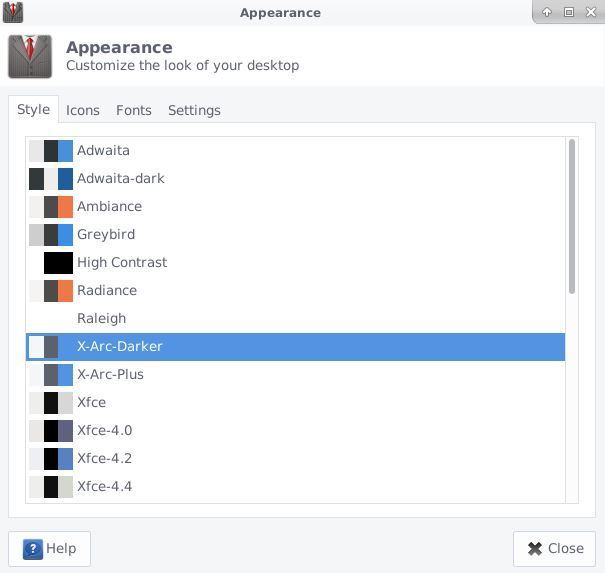
For applying the downloaded Xfce themes, you have to place the extracted files into the .theme folder located in your home directory. Then, open the Settings app and go to Appearance > Style. Here you will find all the installed themes, including the one you have recently downloaded and placed inside the .theme folder. Just select the theme, and you are done. Now log out of your account and log back in to see the changes.
3. Tweaking the Applied Theme
Different themes bring different changes to your overall look. The out of the box theme package won’t change everything on your desktop. You may want to change the wallpaper, fonts and set up custom matching icons to bring completeness in your desktop customization.
To change the wallpaper, right-click on the desktop and click on Desktop Settings. Choose Background from the folder option and select your desired wallpaper. There are thousands of free wallpapers available on the internet. You can always download and apply them.
Customizing the icons brings a huge change to the overall look. You can download your favorite icon packs, just like the themes from the internet, after downloading the icon file extract and put it in your home directory under the .icons directory. Then go to Settings > Appearance > Icons to select that icon theme. You can even change the typeface of your system, just like this method.
Wrapping Things Up
Linux distributions offer a huge customization option. The Xfce desktop environment is no different. Those who have to work on a computer regularly can get bored seeing the same old desktop. Trying out new themes is like reshuffling the furniture of your living room. It will drive you away from the monotony. The above list of the best Xfce themes will give your desktop a new life. Just install and try them out.
As you saw that, installing themes and tweaking the look is not rocket science. Anyone with basic navigation knowledge of Linux can do it. When you get stuck, the above guide is always here to accompany your customization journey. Share your favorite Xfce themes in the comment below, or if you are a theme developer, don’t forget to share your creation with us.
In this age of streaming music and cloud services, there are still people who need an application to collect and play their music. If you are such a person, this article should interest you.
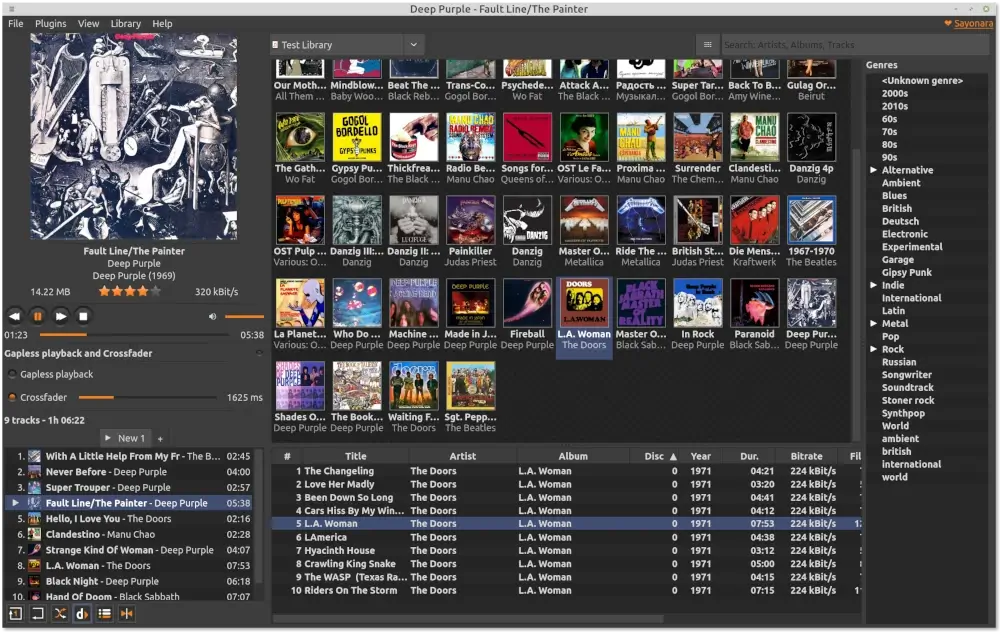
We have earlier covered Sayonara music player. Today, we will be taking a look at the Strawberry Music Player. Strawberry Music Player: A fork of Clementine
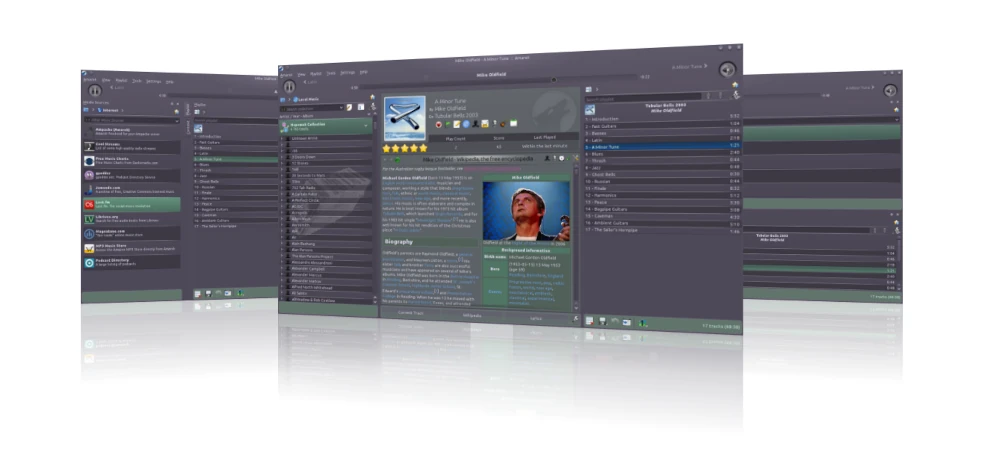
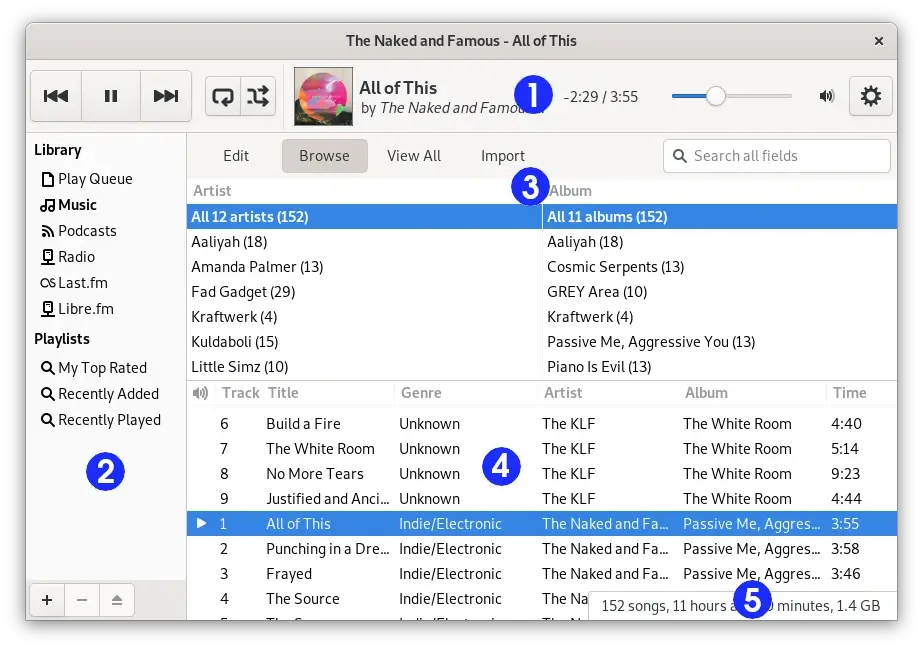
The Strawberry Music Player is, quite simply, an application to manage and play your music.Strawberry media library
Strawberry contains the following list of features:Play and organize music Supports WAV, FLAC, WavPack, DSF, DSDIFF, Ogg Vorbis, Speex, MPC, TrueAudio, AIFF, MP4, MP3, ASF and Monkey’s Audio Audio CD playback Native desktop notifications Support for playlists in multiple formats Advanced audio output and device configuration for bit-perfect playback on Linux Edit tags on music files Fetch tags from MusicBrainz Picard Album cover art from Last.fm, MusicBrainz and Discogs Song lyrics from AudD Support for multiple backends Audio analyzer Audio equalizer Transfer music to iPod, iPhone, MTP or mass-storage USB player Streaming support for Tidal Scrobbler with support for Last.fm, Libre.fm and ListenBrainz
If you take a look at the screenshots, they probably look familiar. That is because Strawberry is a fork of the Clementine Music Player. Clementine has not been updated since 2016, while the most recent version of Strawberry (0.5.3) was released early April 2019.
Trivia
You might think that Strawberry music player is named after the fruit. However, its creator claims that he has named the project after the band Strawbs. Installing Strawberry Music player
Now let’s take a look at how you can install Strawberry on your system. Ubuntu
The easiest way to install Strawberry on Ubuntu is to install the official snap. Just type:sudo snap install strawberry
If you are not a fan of snaps, you can download a .deb file from Strawberry’s GitHub release page. You can install the .deb file by double-clicking it and opening it via the Software Center.
Installing Strawberry on Fedora is much simpler. Strawberry is in the Fedora repos, so you just have to type sudo dnf strawberry. Strawberry is not available on Flatpak. Arch
Just like Fedora, Strawberry is in the Arch repos. All you have to type is sudo pacman -S strawberry. The same is true for Manjaro.
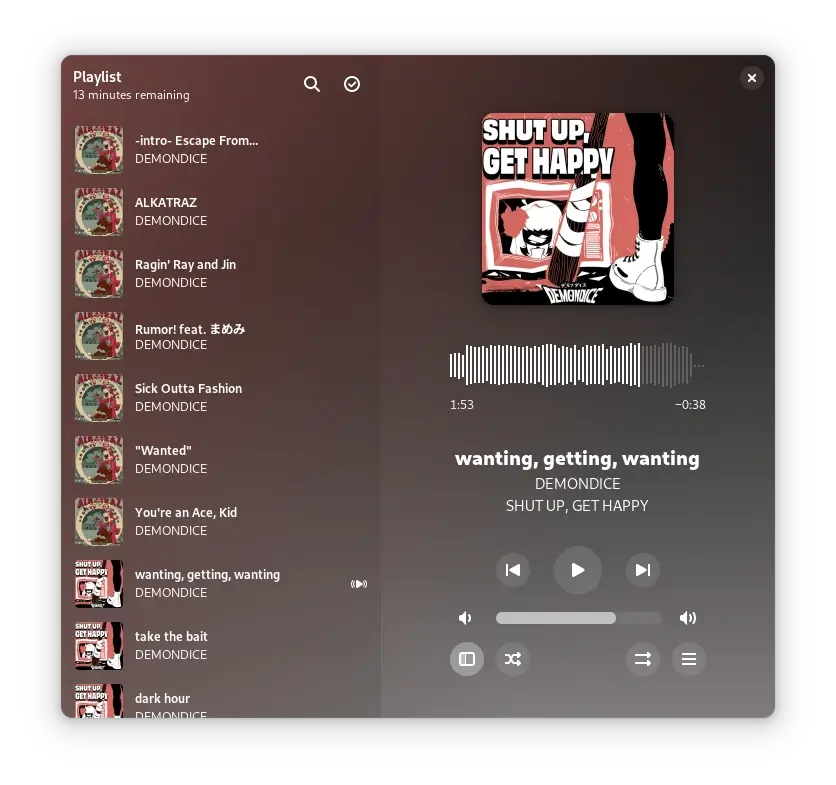
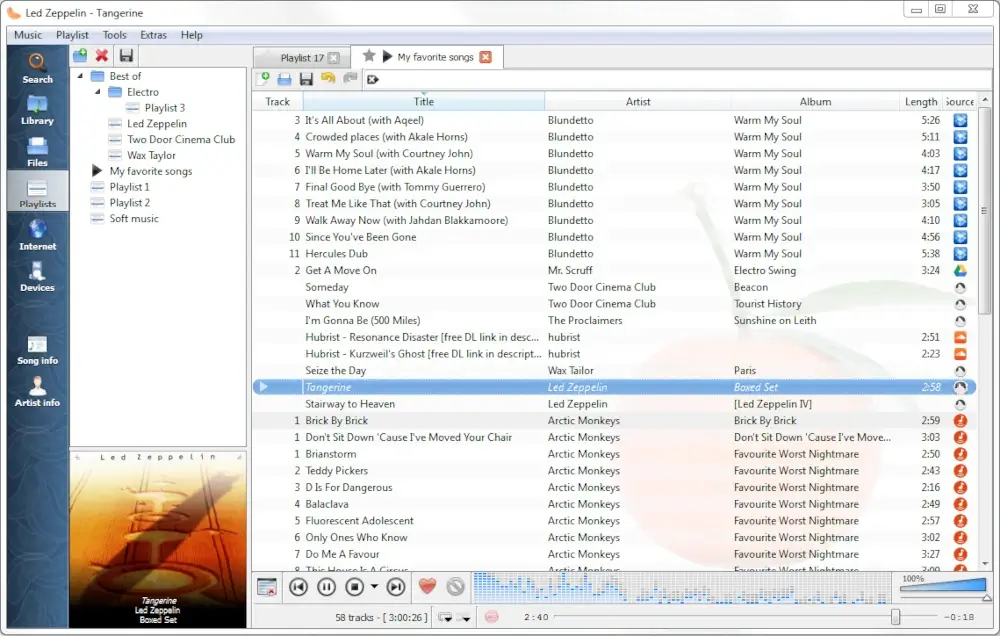
You can find a list of Linux distros that have Strawberry in their repos here. If you have openSUSE or Mageia, click here. You can also compile Strawberry from source. Experience with Strawberry Music Player Playing an audio book with Strawberry
I installed Strawberry on Fedora and Windows. I have used Clementine in the past, so I knew what to expect. I downloaded a number of audiobooks and several Old Time Radioshows as I don’t listen to a lot of music. Instead of using a dedicated audiobook player like Cozy, I used Strawberry for listening to these radio shows.
Once I told Strawberry where my files were located, it quickly imported them. I used EasyTag to fix some of the MP3 information on the old time radio shows. Strawberry has a tag editor, but EasyTag allows you to edit several folders very quickly. Strawberry updated the media library instantaneously.
The big plus for me was performance. It loaded quickly and ran well. This might have something to do with the fact that it is not another Electron app. Strawberry is written in good-old-fashioned C++ and Qt 5. No need to load a whole web browser every time you want to play music, or in my case listen to audio dramas.
I was not able to test the Tidal streaming feature because I don’t have an account. Also, I don’t sync music to my iPod. Final Thoughts
Strawberry is like a standard music player that makes managing and playing your audio library very easy.
The features that I miss from Clementine include the option to access your media from cloud storage systems (like Box and Dropbox) and the ability to download podcasts. But then, I don’t store my media in the cloud and I mainly listen to podcasts on my iPod.
I recommend giving Strawberry a try. You just might like it as much as I do.
Have you ever used Strawberry? What is your favorite music player/manager? Please let us know in the comments below.
If you found this article interesting, please take a minute to share it on social media, Hacker News or Reddit.
Searching for a better music player on Linux? See the below excellent article:
Some may describe it as their passion, while others may consider it a
stress reliever or a part of their daily life. In every form, listening
to music has become an inseparable part of our lives. Music plays
different roles in our lives.
Sometimes it makes us enjoy ourselves with enthusiasm; sometimes it
makes us feel pleasant and good. Other times, it reminds us of someone
or some feel-good moments from our past. Listening to music has
sustained generations, but the medium has changed.
Earlier, people relied on radios to listen to music,
while the present generation has iPods, smartphones, PCs, and other
gadgets for that purpose. When it comes to PCs, we have dedicated
software called music players to play our choice of songs or playlists.
While most generations have smartphones and iPods to listen to music,
these software applications are also a common source for enjoying music
that suits the mood of people who spend hours working on PCs and
laptops and find it convenient to listen using their daily companions.
Music Players and Linux
The growth of Linux as an accepted operating system in the market was
not significant a few decades ago, but the flourishing of this
open-source industry in the IT sector over the past few years has
created tremendous opportunities for many professionals who want to
contribute to this industry with their work. One such opportunity arose in the late twentieth century with the need for a Music Player on Linux. Since then, many music players have been added to various Linux distributions, some as defaults and others as externally downloadable options.
The main aim of any music player is to support all audio file formats
compatible with both Windows and Linux, as well as to provide support
for online music streaming, which is trending nowadays.
21 Best Music Players on Linux to Date
Below, we list some of the best music players
created on Linux to date. A music player can be characterized as the
best by considering the following features: supported formats, memory
consumption, online or offline streaming (or both), user interface
design, and feature set.
Some of the music players highlighted below guarantee all the above factors, while others guarantee only some of these factors.
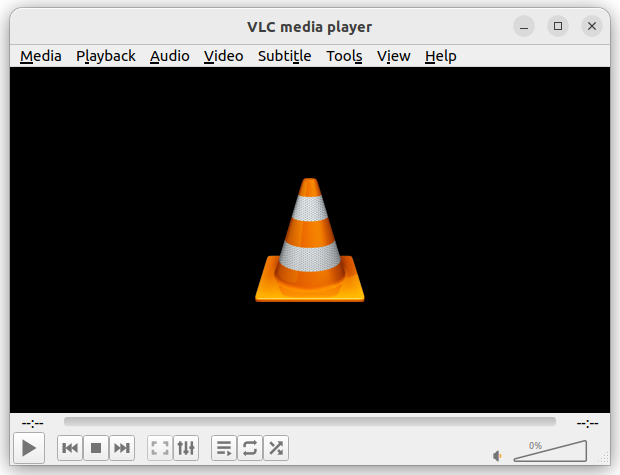
1. VLC Media Player
VLC Media Player
is a free, open-source multimedia player that works on various
platforms, including Windows, macOS, Linux, and Android. It can play
almost any type of media file, such as videos, music, DVDs, and
streaming content without needing additional codec packs.
VLC is known for its simplicity, speed, and powerful features. Users
can customize it with skins and extensions. Importantly, VLC is
completely free of spyware and ads, ensuring a user-friendly experience
without tracking. Overall, it is a versatile tool for anyone looking to
play multimedia files easily and effectively.
VLC Media Player
Install VLC in Linux
To install VLC on Linux, use the following appropriate command for your specific Linux distribution.
Strawberry
is a free music player and organizer designed for music collectors and
audiophiles, which allows users to play digital music, manage
collections, and stream online radio.
Developed as a fork of Clementine, Strawberry
is built using C++ with the Qt framework and GStreamer. While it’s
primarily available for Linux, macOS and Windows versions require a
monthly sponsorship for access.
Strawberry also supports features like album cover management and
streaming from services like Tidal. The project is open-source, inviting
community participation in its development and maintenance.
Strawberry Music Player
3. Tauon
Tauon Music Box
is a modern, free, and open-source music player designed for Linux
desktop users that allows you to easily manage and play your music
collection with features like drag-and-drop playlist creation, gapless
playback, and support for various audio formats, including FLAC.
The player also integrates with services like Spotify and Last.fm,
enabling you to scrobble tracks and manage playlists seamlessly.
Additionally, it offers network playback options and a user-friendly
interface, making it a versatile choice for music enthusiasts looking
for a streamlined listening experience.
Tauon Music Box
Install Tauon in Linux
The recommended way of installing Tauon is through Flatpak.
flatpak install flathub com.github.taiko2k.tauonmbflatpak run org.kde.elisa
flatpak run com.github.taiko2k.tauonmb
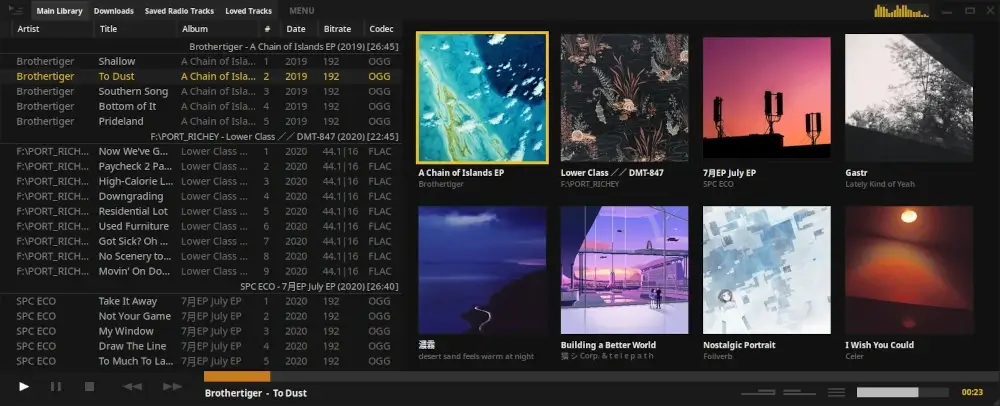
4. Sayonara Player
Sayonara
is a highly customizable, open-source audio player written in C++ and
supported by the Qt framework, which uses GStreamer as its audio backend
and is available for Linux and BSD operating systems.
Sayonara offers a clean and fast user interface, with optional
features that can be removed or hidden based on user preferences. It
provides various ways to manage and organize large music collections,
including artist, album, and track table views, an album cover view, and
a directory tree view.
Users can create playlists and take advantage of dynamic playback,
which automatically adds similar tracks to the playlist. Sayonara also
supports plugins that provide additional functionality, such as a
spectrum analyzer, equalizer, and crossfading.
Sayonara Player
Install Sayonara in Linux
To install Sayonara on Linux, use the following appropriate command for your specific Linux distribution.
Elisa
is a user-friendly music player created by the KDE community that
allows you to easily browse your music collection by genre, artist,
album, or track.
You can also listen to online radio, create playlists, and view lyrics. The player features a “Party Mode”
that showcases album art prominently. Elisa adapts to your desktop’s
color scheme on KDE Plasma but also offers standard light and dark
modes.
It is available for Linux and can be installed through various application stores like Flathub.
Elisa Music Player
Install Elisa on Linux
The recommended way of installing Elisa is through Flatpak.
flatpak install flathub org.kde.elisa
flatpak run org.kde.elisa
6. Amberol
Amberol
is a music player tool designed for the GNOME desktop environment that
focuses on simplicity and ease of use, allowing users to play audio
files effortlessly.
The tool supports various audio formats and offers a clean interface
for managing playlists. Amberol is developed as an open-source project,
meaning anyone can contribute to its improvement.
It aims to provide a lightweight alternative to more complex music
players, making it suitable for users who prefer straightforward
functionality without unnecessary features.
Amberol Music Player
Install Amberol on Linux
The recommended way of installing Amberol is through Flatpak.
kew is a command-line music player designed for Linux environments, enabling users to listen to music directly in the terminal.
It supports various audio formats, including MP3, FLAC, and OGG, and
features capabilities such as playlist creation, gapless playback, and
library searching with partial titles.
Users can control playback with simple commands and customize
settings via a configuration file. Installation options include package
managers like APT for Debian/Ubuntu and AUR for Arch Linux.
The tool emphasizes privacy, as it does not collect user data, making
it a suitable choice for those looking for a lightweight and efficient
music player.
Kew – Terminal Music Player
Install Kew in Linux
To install Kew on Linux, use the following appropriate command for your specific Linux distribution.
Originally started by Mark Kretschmann as an effort to improve XMMS, this software was initially named amaroK, after the name of a wolf, and was later changed to Amarok.
It can play media files in various formats, including but not limited
to FLAC, Ogg, MP3, AAC, and Musepack. Apart from playing offline
collections, it can stream online music by integrating with various
services like Magnatune, Jamendo, MP3tunes, Last.fm, and Shoutcast.
In addition to basic services, Amarok provides advanced features such
as fetching music, transferring music to or from digital music players,
moodbar support, and dynamic playlist support.
Amarok Music Player
Install Amarok on Linux
To install Amarok on Linux, use the following appropriate command for your specific Linux distribution.
Released in February 2010, Clementine is a cross-platform software designed to address the criticism surrounding the transition of Amarok from version 1.4 to 2.0.
Clementine is a port of Amarok
version 1.4 to the Qt4 and GStreamer multimedia frameworks. It is
written in C++ (using the Qt framework) and released under the GNU
General Public License.
With features similar to those of Amarok, Clementine offers
additional functionalities such as remote control using an Android
device, Wii Remote, MPRIS, or a command-line interface.
Clementine Music Player
Install Clementine in Linux
To install Clementine on Linux, use the following appropriate command for your specific Linux distribution.
Lollypop is a GNOME music player that is a free and open-source project hosted on GitHub. It is written entirely in Python and Gtk3.
It is very lightweight and has a visually appealing user interface
with the ability to play MP3, MP4, OGG, and FLAC files. It provides
features to read artist biographies from Last.fm or Wikipedia and lyrics
of the songs from Wikia.
Additionally, it offers features like browsing through the collection
by artist, album, or genre, and a party mode effect for playing music.
This player can only play downloaded audio tracks and does not allow
streaming audio.
Lollypop Music Player
Install Lollypop on Linux
To install Lollypop on Linux, use the following appropriate command for your specific Linux distribution.
Cmus is a console-based music player
for Linux operating systems. Written exclusively in C and released
under the GNU General Public License, this music player runs in the
terminal and is operated via the keyboard using commands prefixed with a
colon.
Being console-based allows Cmus
to load quickly, even with a large number of songs. It supports various
audio formats, including Ogg, MP3, WAV, MPEG-4/AAC, and WMA.
While it benefits from the speed and efficiency of a console-based
application, this also affects its user interface, which is not very
glossy. Additionally, Cmus can be controlled through the cmus-remote
program and is known to work on many Unix-like operating systems, such
as FreeBSD, OpenBSD, and Cygwin.
Cmus Commandline Music Player
Install Cmus in Linux
To install Cmus on Linux, use the following appropriate command for your specific Linux distribution.
Released in August 2015, Aqualung is a cross-platform audio player originally targeted at GNU/Linux but also compatible with macOS, Windows, FreeBSD, and more.
It is written entirely in C and is available in multiple languages,
including French, German, and Hungarian. This software supports various
audio file formats, such as Ogg, Vorbis, FLAC, and MP3.
What sets it apart from most music players is its ability to play
gapless music. Other features include multi-language support, the
ability to manage multiple playlists simultaneously, customizable skins,
support for MPEG formats, and the ability to play audio CDs.
Aqualung Advanced Music Player
Install Aqualung in Linux
To install Aqualung on Linux, use the following appropriate command for your specific Linux distribution.
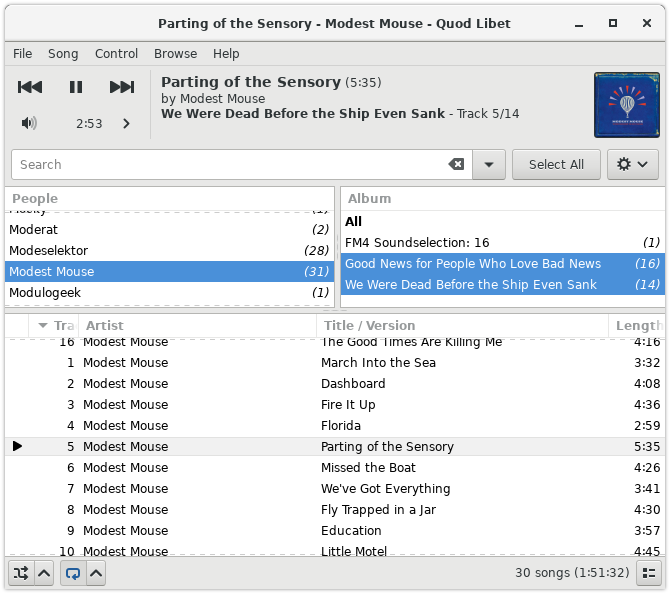
Quod Libet
is an open-source, cross-platform music player and tag editor. Written
in Python using GTK+ and released under the GNU General Public License,
this software supports Linux, Windows, and macOS, requiring plugins for
Python and PyGObject, as well as OSS and ALSA-compatible audio devices.
With a user-friendly interface and Pango support for dynamically
positioning tags, Quod Libet offers a variety of features, including
support for audio backends via the GStreamer plugin, ReplayGain support,
the option to shuffle the entire playlist before repeating, an
extensive set of features for tag editing, saving the play count of
songs, downloading lyrics, and fast-refreshing the entire library
Quod Libet Music Player
Install Quod Libet in Linux
To install Quod Libet on Linux, use the following appropriate command for your specific Linux distribution.
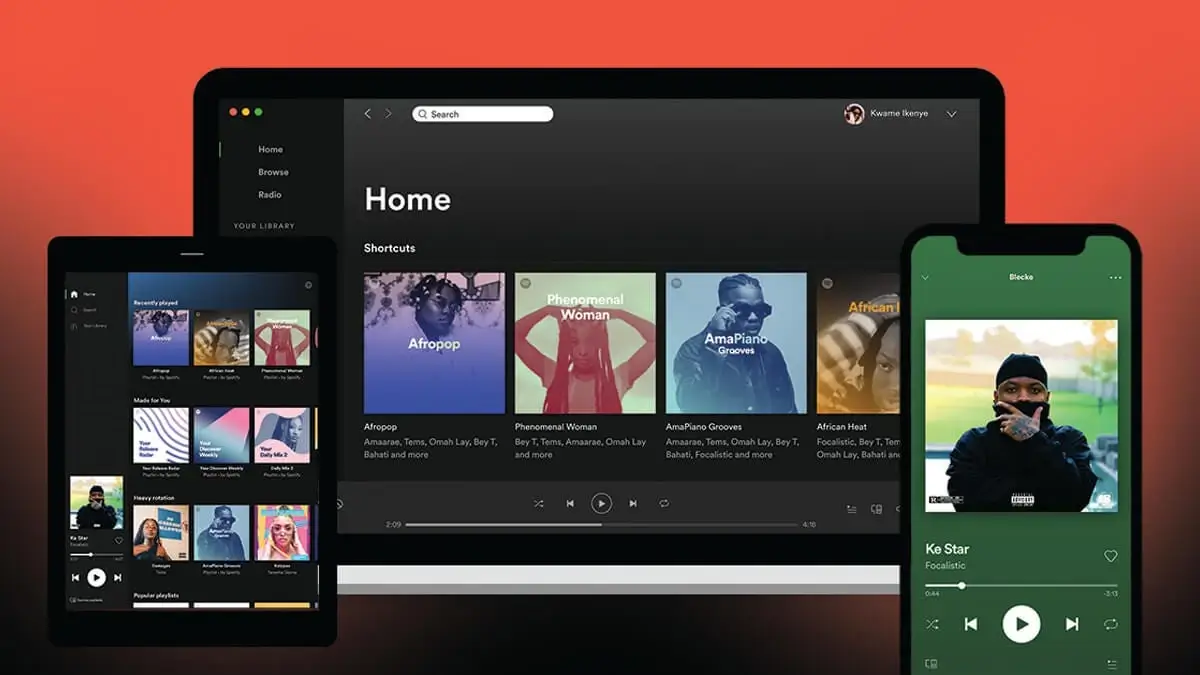
Spotify
is a Swedish commercial music streaming, podcast, and video service
that provides users with an online audio player. It is a cross-platform
service available on almost all devices.
Released in October 2008 by the Swedish startup Spotify AB, it
quickly became popular, attracting over 10 million users. By June 2015,
the platform had gathered a substantial user base of around 75 million,
which included 20 million paying subscribers.
Currently, Spotify boasts 615 million monthly active users, with 239
million of those being paying subscribers, which reflects a substantial
growth in both total users and subscribers over the past nine years.
Spotify allows users to browse or search for music by artist, album,
genre, playlist, or record label. It offers two music streaming options:
Spotify Free, with a bitrate of 160 kbit/s, and Spotify Premium, with a
bitrate of up to 320 kbit/s.
Spotify Media Player
Install Spotify in Linux
To install Spotify on Linux, use the snap package manager for your specific Linux distribution.
sudo snap install spotify
15. Exaile
Exaile
is a cross-platform music player whose latest release, version 3.4.2,
was in November 2014. It uses the GTK+ widget toolkit rather than Qt and
is written in Python with the GStreamer media framework.
With a plain yet appealing user interface, this music player bears a strong resemblance to Amarok in many of its functionalities, including Last.fm support, fetching lyrics, and editing tags.
Additionally, it provides device support through external plug-ins.
Beyond these basic features, it also includes advanced options like
ReplayGain support, Moodbar integration, and the ability to preview
tracks via a secondary sound card
Exaile Music Player
Install Exaile in Linux
To install Exaile on Linux, use the following appropriate command for your specific Linux distribution.
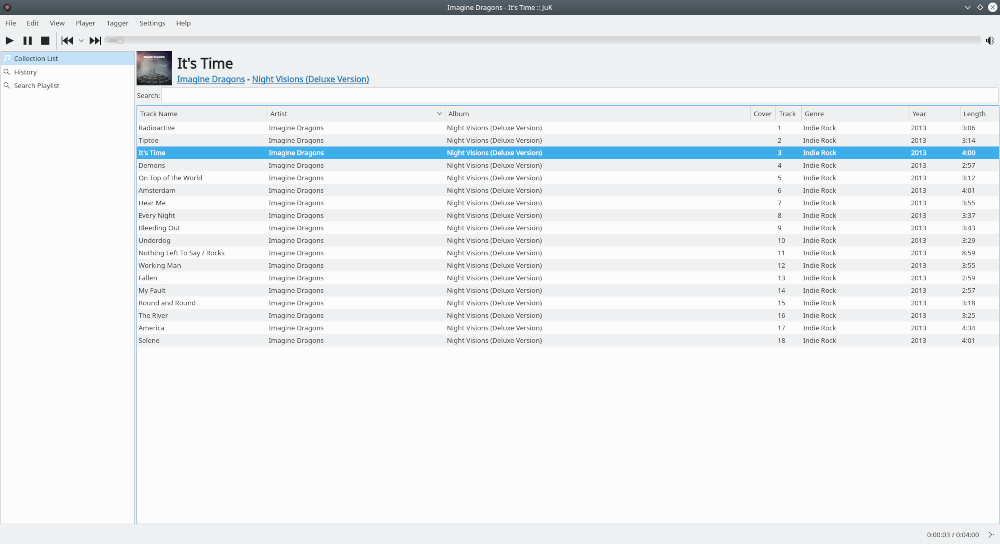
JuK
is another cross-platform audio player designed for Unix-like systems
and Windows, released in February 2004. It is written in C++ and is
released under the GPL.
JuK supports a collection of audio files in formats
like MP3, Ogg Vorbis, and FLAC. Some features that make it a part of
this list include dynamic search playlists that are auto-updated, an
auto-sync feature that automatically detects newly added songs in the
music directory, and support for guessing tag information through online
lookup, as well as tag reading and editing.
Juk Music Player
Install Juk on Linux
To install Juk on Linux, use the following appropriate command for your specific Linux distribution.
MPD,
or Music Player Daemon, is a music player server written in C++, which
was released in February 2015 and is available for Unix-like operating
systems and Windows, distributed under the GNU General Public License
(GPL).
Unlike other music players discussed so far, MPD
operates as a daemon server that runs in the background and requires a
client for user interaction. Once initiated, the daemon uses an
in-memory database of audio files, allowing any local client to play
back audio after connecting to the server via sockets.
MPD supports a wide range of audio file formats,
including Ogg, Vorbis, FLAC, Opus, WavPack, MP3, and MOD. Although it
operates as a daemon and lacks a built-in user interface, it offers
various features such as buffer support for playback, seeking and
crossfading capabilities, and remote control over the network.
Additionally, it supports multiple audio output systems including
ALSA, OSS, JACK, and PulseAudio, and is compatible with OS X and
Windows. While MPD itself does not provide a complex user interface,
there are several clients available that offer simple interfaces for
users to interact with the daemon
Install MPD in Linux
To install Juk on Linux, use the following appropriate command for your specific Linux distribution.
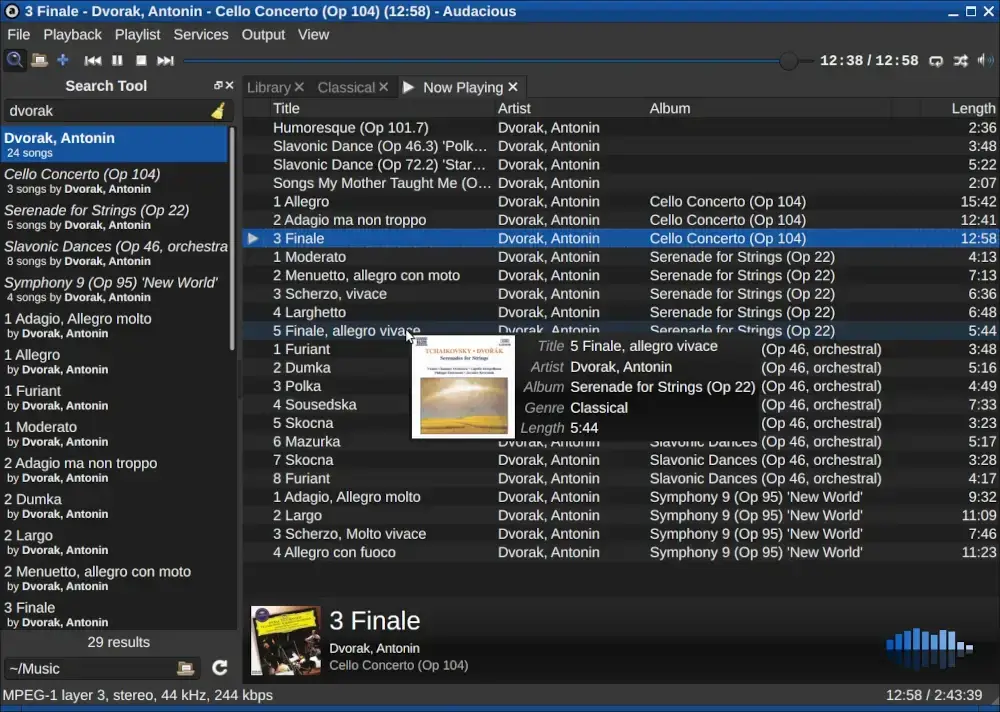
Primarily designed for POSIX-compatible platforms like Linux, with added support for Windows, Audacious
is an open-source audio player and the default music player for Lubuntu
and Ubuntu Studio. It is entirely written in C++, with the latest
version being 4.4, released in July 2024.
Audacious offers a wide variety of features, most of which are
available through external plugins, including Decoder, Transport,
Output, and Effect plugins. Additionally, it supports a wide range of
codecs, including MP3, FLAC, WavPack, TTA, Shorten, and MIDI.
The player has full support for Winamp 2 skins, with all skins
typically rendered in PNG format, allowing users to adjust the RGB color
balance themselves. Although it is a standalone player, it accepts
connections from client software like Conky
Audacious Audio Player
Install Audacious on Linux
To install Audacious on Linux, use the following appropriate command for your specific Linux distribution.
Written in C and released for Unix-like systems such as BSD, GNU/Linux, and Solaris, Rhythmbox
is an audio player that plays and helps organize digital music. It is
the default music player for Ubuntu Linux systems and works well under
the GNOME desktop environment with the GStreamer media framework.
With a visually appealing user interface, Rhythmbox
provides various features such as gapless playback, Last.fm support
(which allows it to stream online music), audio CD burning, and music
importing.
It can integrate efficiently with numerous platforms. Versions of
Rhythmbox above 0.10.0 support DAAP sharing. Additionally, it uses the
udev subsystem of Linux to detect the device selected for playing music
Rhythmbox Music Player
Install Rhythmbox in Linux
To install Rhythmbox on Linux, use the following appropriate command for your specific Linux distribution.
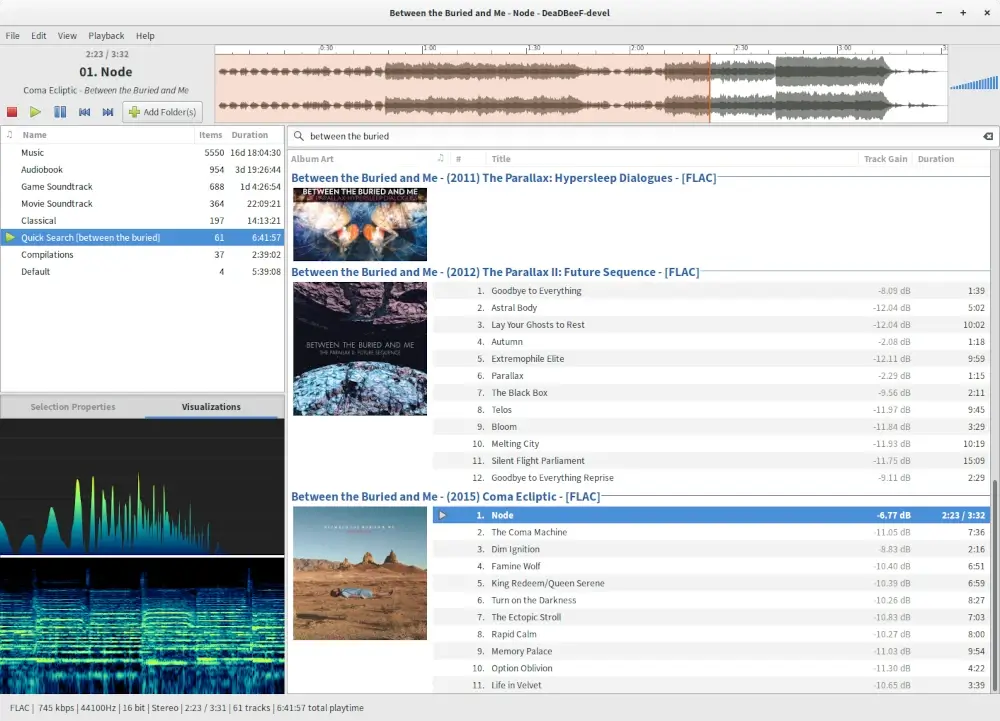
Written in C, DeaDBeeF
is a lightweight yet powerful music player released under the GPLv2 for
Linux and Android. Most of the external plugins supported by DeaDBeeF
are written in C++, and the interface uses GTK2.
One of the major advantages it has over many audio players is its low
memory consumption. It can play a wide variety of formats, including
but not limited to MP3, Ogg, WAV, and M4A.
Other notable features include online and offline streaming of music,
18-band equalizer support, gapless playback, cue sheet support, and
Last.fm support.
DeaDBeeF Audio Player
Install DeaDBeeF in Linux
To install DeaDBeeF on Linux, use the following appropriate command for your specific Linux distribution.
MOC is another text-only music player somewhat similar to MPD
but with some changes. Written in C and based on ncurses, this console
audio player is specifically designed for Linux/Unix-based systems. It
was originally developed by Damian Pietras and is currently maintained by John Fitzgerald.
The console-based nature of this audio player offers several
advantages, including a simple yet powerful interface and low memory
utilization. Additionally, it has a separate thread for the output
buffer, which helps it avoid high-load situations.
MOC features customizable interface layouts and
supports ALSA, OSS, and JACK outputs. Like MPD, it also has a
client/server architecture, but it does not support remote network
accessibility through any graphical client.
MOC Commandline Music Player
Install MOC in Linux
To install MOC on Linux, use the following appropriate command for your specific Linux distribution.
sudo apt install moc         [On Debian, Ubuntu and Mint]
sudo yum install moc         [On RHEL/CentOS/Fedora and Rocky/AlmaLinux]
sudo emerge -a sys-apps/moc  [On Gentoo Linux]
sudo apk add moc             [On Alpine Linux]
sudo pacman -S moc           [On Arch Linux]
sudo zypper install moc      [On OpenSUSE]
sudo pkg install moc         [On FreeBSD]
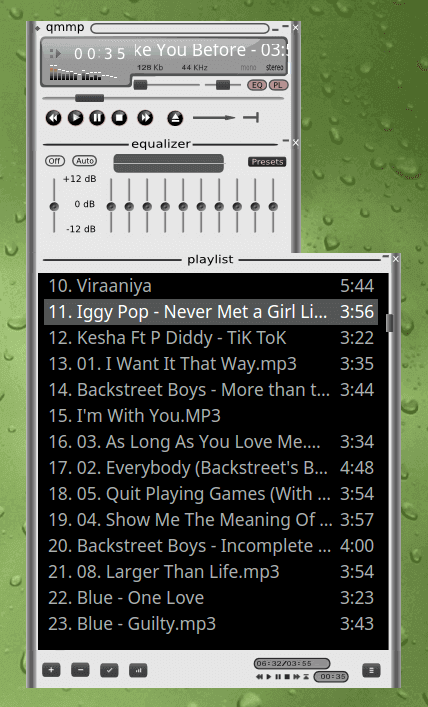
22. Qmmp Music Player
Qmmp is a cross-platform, Qt-based audio player similar to Audacious and Winamp. It is easily available for almost all Linux distributions without compilation unless you need the latest build.
It supports a wide variety of audio formats, including FLAC, Ogg
Vorbis, MPEG-1, and AAC, along with support for cue sheets. It can have
skins similar to Winamp, and you can even customize your skins.
Qmmp also supports volume normalization, which is a built-in option.
Many other features can be accessed in this player using external
plugins. Additional features include Last.fm support, ReplayGain
support, viewing lyrics, crossfade, and support for ALSA, OSS, and JACK
audio outputs.
Qmmp Music Player
Install Qmmp in Linux
To install Qmmp on Linux, use the following appropriate command for your specific Linux distribution.
We have made this list based on our research. If you think of any
other music player on Linux which should have been listed here then you
can mention its name in the comments.


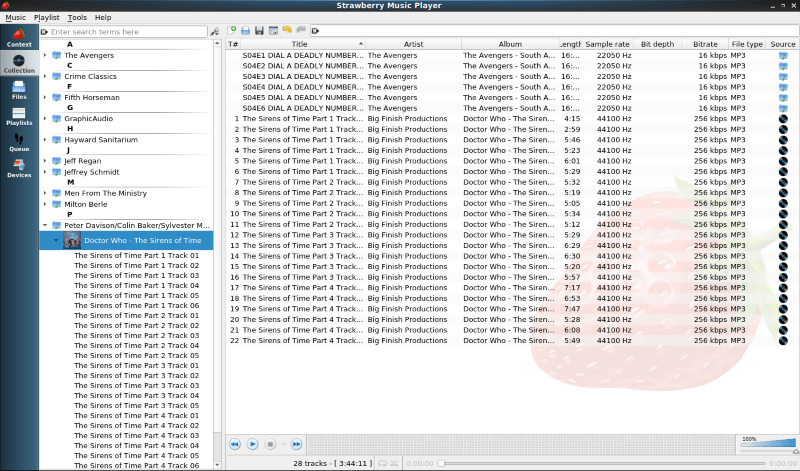 Strawberry media library
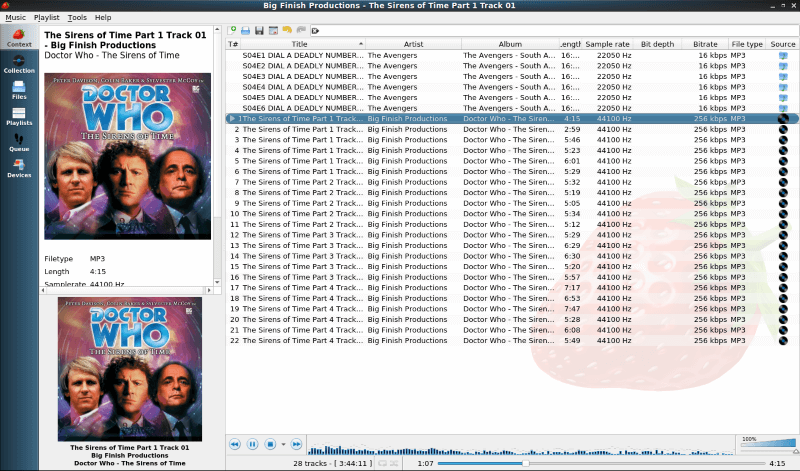 Playing an audio book with Strawberry