February 23, 2022

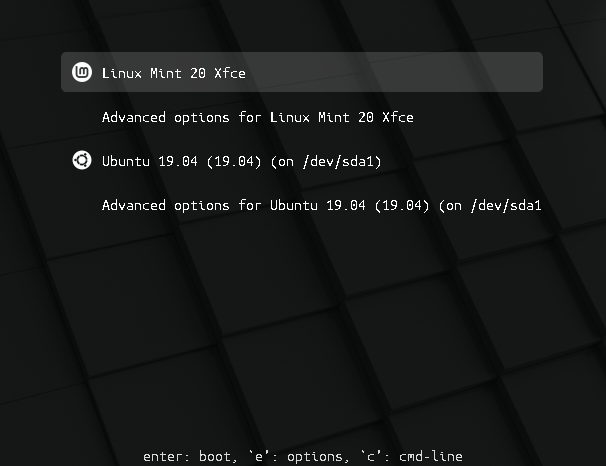
How to change the GRUB Bootloader Screen Resolution


To edit it with Gedit as
 root run:

gksu gedit /etc/default/grub

(Or if you're using Kubuntu, run kdesudo kate /etc/default/grub instead.)

You'll get a lot of messages in the Terminal, if you run that command in the Terminal rather than with Alt+F2. You'll notice they don't say they pertain to the file you're editing, so that's fine.

You'll find that part of the file says something like this:

# The resolution used on graphical terminal
# note that you can use only modes which your graphic card supports via VBE
# you can see them in real GRUB with the command `vbeinfo'
#GRUB_GFXMODE=640x480

Uncomment (i.e., remove the leading # from) the line that says GRUB_GFXMODE, and change the resolution from 640x480 to auto. The line should now read:

GRUB_GFXMODE="1024x768x32"
or
GRUB_GFXMODE="1920x1080"
or
GRUB_GFXMODE=auto

Save the file and quit the editor. In the Terminal, run:

sudo update-grub

(This must be run after every modification to /etc/default/grub, to apply the changes.)

Now reboot, and see if that does what you want.

It might not (as it uses the "platform default" which might not be the highest possible). If that is the case, edit /etc/default/grub again, and this time change the line so it says something like:

GRUB_GFXMODE=1600x1200,1280x1024,1024x768,800x600,640x480

You will not necessarily want to use exactly that line. You should list all the resolutions you want to be tried, in the order you want them to be tried. The resolutions I have listed are the most standard resolutions for monitors with a 4:3 aspect ratio, but widescreen monitors (including most laptop screens these days) have different form factors and use different resolutions. Wikipedia has a list of common resolutions which may help you. If you know the specific resolutions you want for each device, you can just list them (highest first). You should probably include 640x480 or auto at the end . I recommend this because I don't know if GRUB2 will always try a safe low resolution, if you don't include that.

Then save the file again, run sudo update-grub again, reboot again, and see if that does what you need.

If it doesn't, you may be out of luck. GRUB2 doesn't display video the same way as Ubuntu does once it's booted. GRUB2 uses VESA BIOS Extensions to display the boot menu with enhanced resolution (and color depth), and a machine's maximum resolution through VBE is not always as high as the maximum resolution supported by the video card and monitor.

Source: The official GRUB2 documentation. (You'll notice the version number is 1.99. It's still GRUB2. A bit confusing, but true.)

Source: https://askubuntu.com/questions/54067/how-to-safely-change-grub2-screen-resolution

Step 1: find the preferred mode

Reboot and press and hold Shift to display your grub. Press C to enter console mode. Then type (for Ubuntu versions before 18.04):

$ vbeinfo

For Ubuntu 18.04 and later:

$ videoinfo

This will display various stuff how grub recognizes your display. At the bottom is "preferred mode" - in your case it should say 1280x800. Note down the value.

Note: sometimes, some buggy video cards incorrectly give Grub the wrong preferred resolution - if the preferred mode is much higher than you were expecting, then select the nearest mode in the list displayed that you were expecting.

Press Esc to return to grub and press Enter to boot.

Step 2: Setting the resolution in grub

Reach for your terminal and type

$ sudo nano /etc/default/grub

find the line

#GRUB_GFXMODE=640x480

remove the # and change 640x480 with the preferred mode you wrote down. E.g.:

GRUB_GFXMODE="1280x800"
or 
GRUB_GFXMODE="1024x768x32"

save, then type

$ sudo update-grub

Note: the preferred mode has to be among those listed by vbeinfo. For example, if your preferred mode is 1920x1080 (a common 16x9 aspect ratio setting), your preferred mode is NOT supported by vbeinfo and may not work correctly. In fact, there do not seem to be any 16x9 modes supported by vbeinfo, as of Ubuntu 13.04. In that case you could try falling back to something common like 640x480, which, it seems most monitors support and vbeinfo supports. Also, not all the modes supported by vbeinfo are necessarily supported by your monitor and you may have to experiment.

Source: https://askubuntu.com/questions/54067/how-to-safely-change-grub2-screen-resolution


Also to set the Mint Theme enter the following:

apt install --reinstall -o Dpkg::Options::="--force-confmiss" grub2-theme-mint


January 27, 2022

How To Fix Broken Ubuntu OS Without Reinstalling It

Just in case if your Ubuntu system is crashed due to power failure or network connectivity issue in the middle of the Upgrade process, you might end up with broken Ubuntu Linux. In such cases, you can easily fix broken Ubuntu OS without reinstalling it from scratch, and also without losing data as described below.

Introduction

Today, I was upgrading my Ubuntu LTS system. Unfortunately, the power has gone in the middle of the upgrade process and the system is powered off while upgrading packages.

When the power is back, I did boot the system again. Right after entering the login password in my Ubuntu system, it's gone blank and didn't respond. Keyboard and mouse also didn't work.

All I see is just a blank screen! Thankfully, It's just a test machine and there were no important data in it. I can simply wipe off the entire OS and install Ubuntu again.

But, I don't want to do that. Since I got nothing to lose, I just wanted to repair my broken Ubuntu system without reinstalling it completely. To my luck, it worked!!!

Now let us see how to recover the broken Ubuntu Linux system, without reinstalling it.

Fix broken Ubuntu OS without reinstalling it

1. First of all, try to login with live cd and backup your data in an external drive. Just in case, if this tutorial didn't work, you can still have your data and reinstall everything!

2. At the login screen, press CTRL+ALT+F1 to switch to tty1. You can learn more about switching between TTYs here.

3. Now, type the following commands one by one to fix the broken Ubuntu Linux:

$ sudo rm /var/lib/apt/lists/lock
$ sudo rm /var/lib/dpkg/lock
$ sudo rm /var/lib/dpkg/lock-frontend
$ sudo dpkg --configure -a
$ sudo apt clean
$ sudo apt update --fix-missing
$ sudo apt install -f
$ sudo dpkg --configure -a
$ sudo apt upgrade
$ sudo apt dist-upgrade

4. Finally, reboot the system using command:

$ sudo reboot

You can now be able to login to your Ubuntu system as usual.

After I followed these steps, all the data in my Ubuntu system were intact and everything was in the same way as I left it.

This method may not work for everyone. However, this small tip worked for me and saved a couple minutes from reinstalling my Ubuntu system from scratch.

If you know any other better way, please let me know in the comment section. I will add them in this guide as well.

January 26, 2022

How To Fix Initramfs Error On Ubuntu


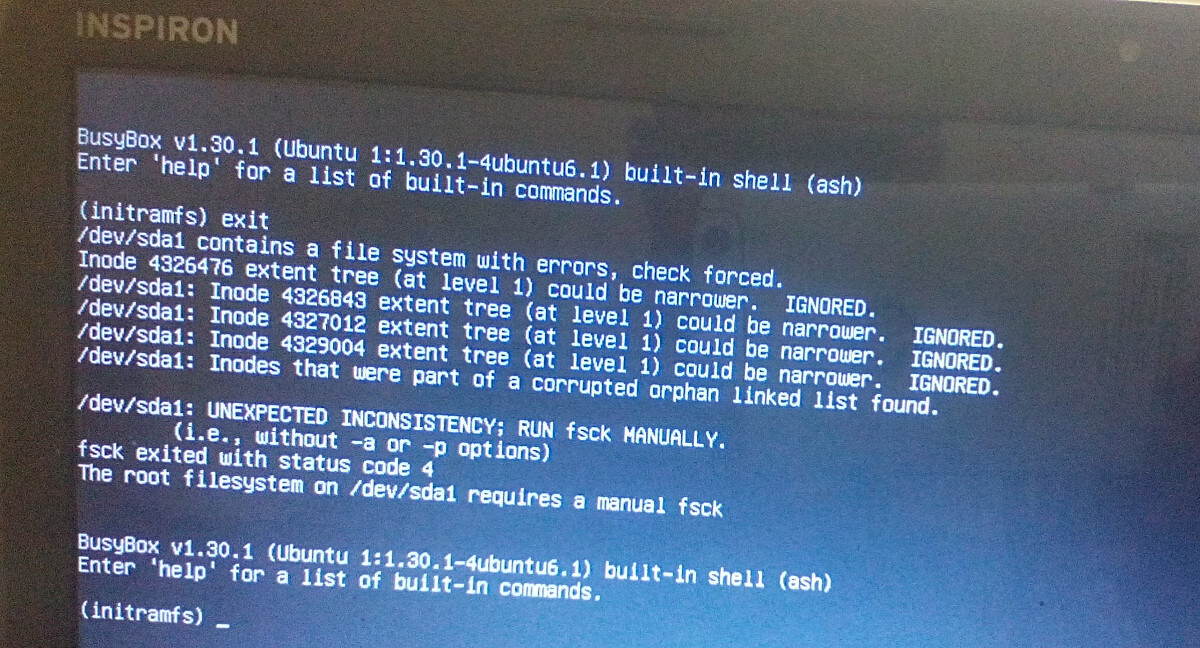
This brief guide explains how to fix Busybox Initramfs error on Ubuntu Linux. I use Ubuntu 20.04 LTS as my daily driver on my Dell Inspiron laptop. Today I turned it on and the boot process dropped to the BusyBox shell and I ended up at the initramfs prompt.

As far as I can remember, I did nothing wrong. I didn't forcibly power off it. It was working just fine yesterday! When I switched it on today, I landed in the BusyBox shell:

BusyBox v1.30.1 (Ubuntu 1:1.30.1-4ubuntu6.1) built-in shell (ash) 
Enter 'help' for a list of built-in commands.

(initramfs)

I can't get past this screen. Also it doesn't show what exactly the problem is. All I see is just a blank busybox shell.

I wasn't sure what to do at this point. So I simply passed the exit command to see what happens.

And then I saw the actual error:

(initramfs) exit
/dev/sda1 contains a file system with errors, check forced.
Inode 4326476 extent tree (at level 1) could be narrower, IGNORED.
/dev/sda1: Inode 4326843 extent tree (at level 1) could be narrower, IGNORED.
/dev/sda1: Inode 4327012 extent tree (at level 1) could be narrower, IGNORED.
/dev/sda1: Inode 4329004 extent tree (at level 1) could be narrower, IGNORED.
/dev/sda1: Inodes that were part of a corrupted orphan linked list found.

/dev/sda1: UNEXPECTED INCONSISTENCY; RUN fsck MANUALLY.
        (i.e., without -a or -p options) 
fsck exited with status code 4. 
The root filesystem on /dev/sda1 requires a manual fsck. 

BusyBox v1.30.1 (Ubuntu 1:1.30.1-4ubuntu6.1) built-in shell (ash)
Enter 'help' for a list of built-in commands.

(initramfs)
Busybox Initramfs Error On Ubuntu

As you can see in the above output, the /dev/sda1 partition is corrupted. The file system in this partition has some errors. If you ever encountered with this type of problem, you need to check and repair the problematic Linux filesystems with fsck command.

Please note that sometimes you don't see any errors after typing the exit command. In that case, try to run fsck on all filesystems.

For those wondering, BusyBox is software suite that provides many common UNIX utilities into a single small executable. It provides replacements for most of the utilities you usually find in GNU fileutils, shellutils, etc.

Initramfs is an initial ram file system based on tmpfs. It contains the tools and scripts required to mount the file systems before the init binary on the real root file system is called.

Fix Busybox Initramfs Error On Ubuntu Linux

1. To solve initramfs error on Ubuntu Linux, you need to repair the filesystem in the corrupted partition using fsck command like below:

(initramfs) fsck /dev/sda1 -y

Replace /dev/sda1 with your partition name. In your system, it could be /dev/sdb1, /dev/sdc1 etc. You can use cat /proc/partitions or blkid commands to get your Linux partition details in Busybox.

2. Now the fsck command will start to fix all bad blocks automatically in the filesystem.

After a couple minutes, you will see an output like below:

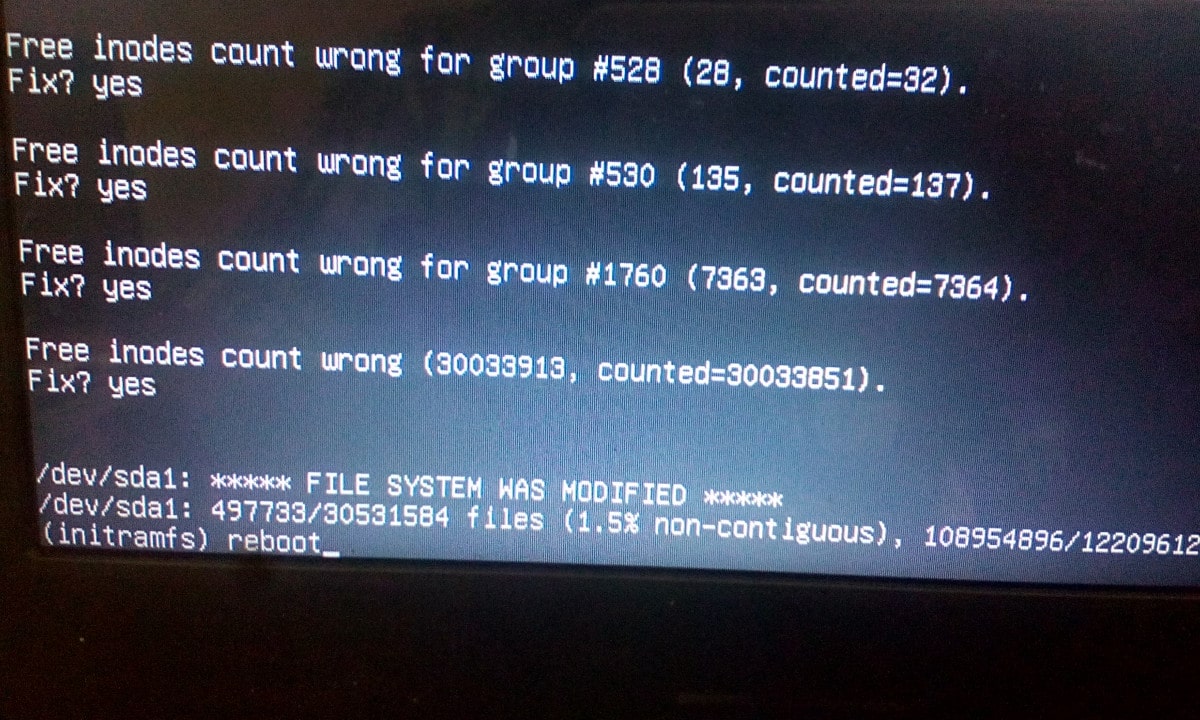
/dev/sda1: ***** FILE SYSTEM WAS MODIFIED *****
/dev/sda1: 497733/30531584 files (1.5% non-contiguous), ........

3. Next, type reboot and hit ENTER to restart your system!

(initramfs) reboot
Fix Busybox Initramfs Error On Ubuntu Linux

If the reboot command doesn't work, type exit and hit ENTER.

Cross your fingers and wait for the system to reboot! If all went well, your system will boot normally without any problem.

These steps helped me and many others (see the comment section below) to solve Busybox Initramfs error on Ubuntu Linux operating system. If you are stuck in initramfs prompt, this guide will definitely help.

Heads Up: If you keep getting this error often, probably your hard disk is getting weaker. In that case, it is recommended to backup the data and replace the hard disk as soon as possible.


If your Ubuntu system is crashed due to power failure or network connectivity issue in the middle of the upgrade process, you might end up with broken Ubuntu. In that case, you can easily fix broken Ubuntu without reinstalling it as described in the following guide.
How To Fix Broken Ubuntu OS Without Reinstalling It


Source: https://ostechnix.com/how-to-fix-busybox-initramfs-error-on-ubuntu/


January 7, 2022

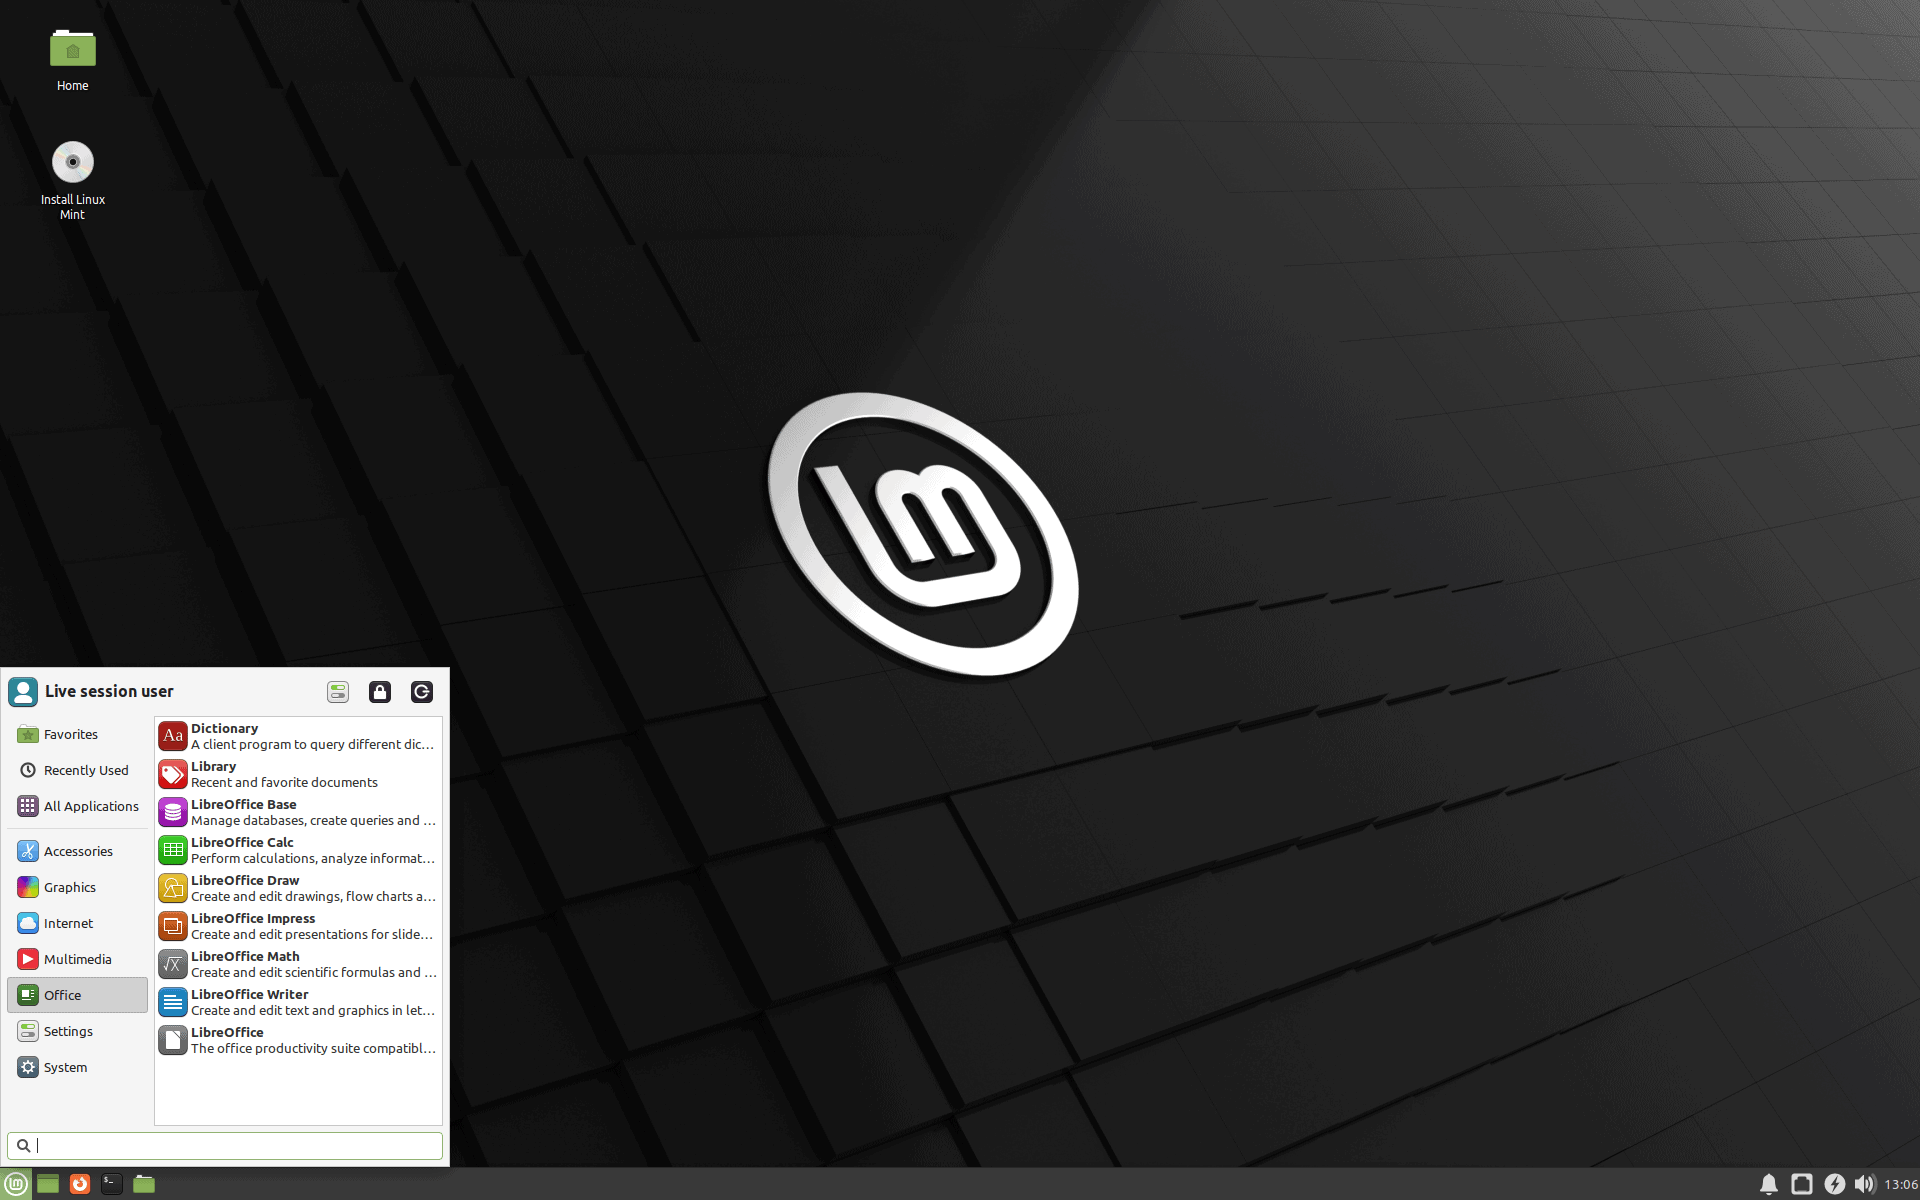
Linux Mint 20.3: here is what is new

 By Martin Brinkmann,Jan 6, 2022

The Linux Mint team started to push the final stable ISO images of Linux Mint 20.3 to its distribution network. The final release comes weeks after the release of Linux Mint 20.3 Beta releases. Read on to find out what is new and changed in the new versions of the popular Linux distribution.

linux mint 20.3 release

Linux Mint 20.3 is a long-term support release, which means that the distribution is supported until 2025. The new version of Linux Mint is available in all three flavors -- MATE, Xfce and Cinnamon -- as usual.

A blog post on the official Linux Mint blog reveals that the new version will be made available as a free download and upgrade, from Linux Mint 20.2, this week. Some mirrors have the new ISO images already, but it will take some time before the release can be announced officially on the site.

Linux Mint 20.3: important links

The release notes list known issues and bugs, the new features links reveal what is new in the particular environment.

  • Linux Mint 20.3 features Cinnamon 5.2, a Linux kernel 5.4 and an Ubuntu 20.04 package base.
  • Linux Mint 20.3 features MATE 1.26, a Linux kernel 5.4 and an Ubuntu 20.04 package base.
  • Linux Mint 20.3 features Xfce 4.16, a Linux kernel 5.4 and an Ubuntu 20.04 package base.

Linux Mint 20.3: new features

The IP TV player Hypnotix received an update in this release. It displays flags now to make it easier to find regional IP TV stations, and a search, which also helps find channels, movies and series using it. Hypnotix supports the Xtream API next to m3u and local playlists.

thingy

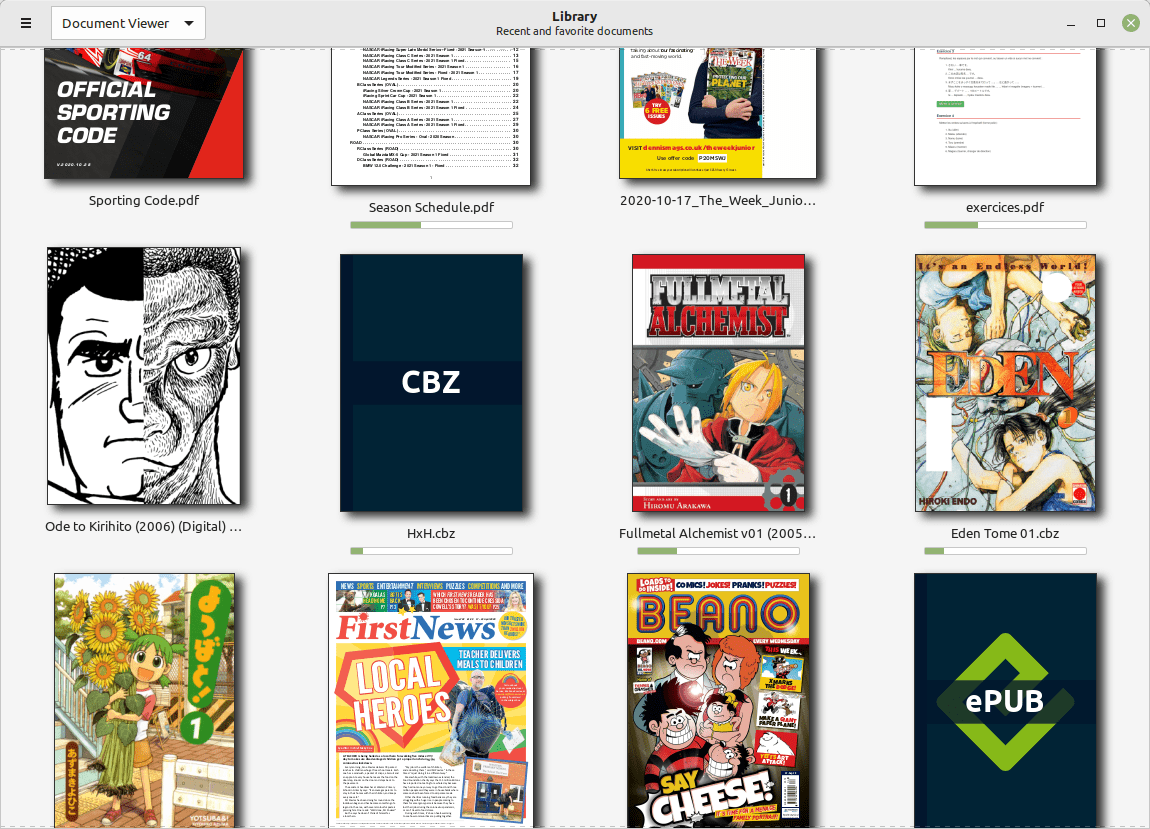
The new document manager Thingy makes an appearance in Linux Mint 20.3. It lists recently opened documents as well as favorites, and keeps track of reading progress.

A search function has been added to the Sticky Notes application to filter notes quickly. Linux Mint users who use the Sticky Notes application may also notice a changed look as the title is now embedded within the note. The app features a new option to control the site of text.

The Linux Mint 20.3 theme features several changes according to the release notes:

Linux Mint 20.3 features an updated look and feel with larger titlebar buttons, rounded corners, a cleaner theme and support for dark mode.

All three desktop environments feature the changes. The "what is new" posts go into great detail and you may want to check these out for a full rundown on the changes. One particular change that needs mentioning is that support for displaying select applications in dark mode while dark mode is not enabled on the desktop.  Four applications, Celluloid, Hypnotix, Xviewer, Gnome Terminal and Pix, support this out of the box.

Linux Mint users who prefer the older style of the desktop may enable the Mint-Y-Legacy theme to restore the previous theme that was used by the Linux distribution.

Cinnamon 5.2's calendar applet features multi-calendar events, which events using the same color as the calendar they belong to for easy recognition. The applet supports online calendars and syncing.

The file manager Nemo has a new feature that adds an option to file copy or move conflicts. Besides the already existing options to skip, ignore or overwrite old ones, it is now possible to have files renamed automatically.

Cinnamon features the following improvements in the new release next to that:

  • Increased support for right-to-left languages in the sound and menu applets and in the window settings
  • NVIDIA Optimus: Support for PrefersNonDefaultGPU field in .desktop files
  • nemo: The clipboard content no longer vanishes if the nemo process dies
  • grouped-window-list applet: icon fix for certain applications (virtualbox)
  • nemo-media-columns: m4a and audio mp4, composer and description columns
  • sound applet: support for base64 URI album art
  • nemo-actions: support for UriScheme
  • capi.py: Support for non x86 architecture
  • menu applet: all applications shows an icon
  • settings daemon: trackball support
  • accessibility: new Alt+Super+S shortcut to active the screen reader
  • Support for 3x fractional scaling when the hardware allows it
  • nemo: xls2csv fixed

Other changes:

  • HPLIP 3.21.8 introduces support for the latest HP printers and scanners.
  • IPP-USB and sane-airscan were backported and may be an option if scanners or printers won't work out of the box.
  • Xreader PDF received manga reading support; this includes right-to-left mode and inverted cursor keys so that the left-arrow key goes forward in a document.
  • The image viewer Xviewer has a new control to fit the image to the height or width of the image.
  • The text editor Xed supports Ctrl-Tab and Ctrl-Shift-Tab to switch tabs.
  • Xed and Xreader support hiding the menubar.
  • Xreader does not show its toolbar anymore in fullscreen mode.
  • System reports run once per day instead of once per hour to save battery.
  • The WebApp manager displays the browser that is used for particular applications.
  • Bluetooth can be turned on or off from the Bluetooth tray menu.


    Source: https://www.ghacks.net/2022/01/06/linux-mint-20-3-here-is-what-is-new/

How to theme the Mint 20.X Grub menu


How to theme the Grub menu

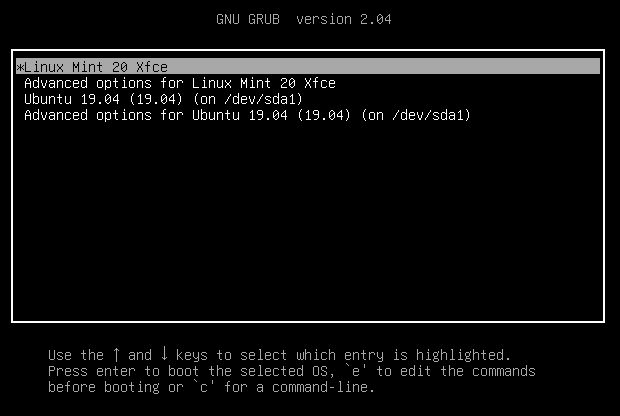
For compatibility reasons, some releases sometimes ship without a Grub theme:

_images/grub.png

You can make it look like this:

_images/grub2-theme-mint.png

To do so, open a terminal and type:

apt install --reinstall -o Dpkg::Options::="--force-confmiss" grub2-theme-mint
Or if you have a HiDPI screen, type this instead:

apt install --reinstall -o Dpkg::Options::="--force-confmiss" grub2-theme-mint-2k


Source: https://linuxmint-user-guide.readthedocs.io/en/latest/grub.html

November 24, 2021

WindowsFX 11 Linux - Windows 11 Without Microsoft


You can get WindowsFX11 Linux here:
https://www.windowsfx.org/index.php/downloads/x86-64-bit-pc


September 16, 2021

Freespire 7.7 XFCE Distro


I have been looking for a replacement to my aging ChalletOS 16.04 XCE favorite distro. It has stopped getting updates due to end of life limits. Mint XFCE has been an excellent replacement. However, recently I tried Freespire 7.7 Linux and it is a slim XFCE distro based on the latest Debian build. From DistroWatch.com :

Roberto Dohnert has announced the release of Freespire 7.7, a new update of the project's Ubuntu-based distribution featuring the Xfce desktop. This version adds the ability to (optionally) incorporate various web applications into the system: "Today, the PC/OpenSystems LLC open-source development team releases Freespire 7.7. This update launches an entirely new direction for our distribution products, Freespire, Linspire and Xandros, by incorporating a cloud app approach. Since this is Freespire, our community-support build, we did not incorporate anyone's specific web apps into the distribution. The selection is entirely the user's choice. And for more traditional use cases, the core of Freespire has not changed at all - it's still a full-featured desktop OS; all of the applications and resources of the Ubuntu repositories are available, as always. The distribution includes: Xfce 4.16 desktop, Linux kernel 5.4, Synaptic, Google Chrome 92, DuckDuckGo as the default search engine and homepage, Ice SSB, KPatience, DreamChess, Geary mail client, KolourPaint, Parole, Rhythmbox, Caja as the default file manager." Read the complete release announcemnet for further details. Download: release-77F.iso (1,427MB, SHA256, pkglist). Link: https://distrowatch.com/?newsid=11313

The distribution includes :
XFCE Desktop 4.16, Kernel 5.4.0-80, Synaptic, Google Chrome 92, DuckDuckGo set as the default search engine and homepage, Ice SSB, Kpatience, Dreamchess , Geary Mail Client, Kolourpaint, Parole video player, Rhythmbox, Caja is now the default file manager (Thunar is still in the base install).

Below is the standard desktop and my own screen shots. I'm using the included Greybird theme. It also has a nice collection of wallpapers. I added OnlyOffice, Brasero, Chromium, Firefox, and Conky. I like this new light distro. Hope you will too.

One thing to suggest is to add the Update Manager by entering the following: sudo apt-get install update-manager


Caja and Nemo file managers (below)


You can get Freespire Linux 7.7 here: https://distrowatch.com/?newsid=11313
Or on their website here: https://www.freespire.net/


August 31, 2021

Cutefish OS on Ubuntu - Early First Look


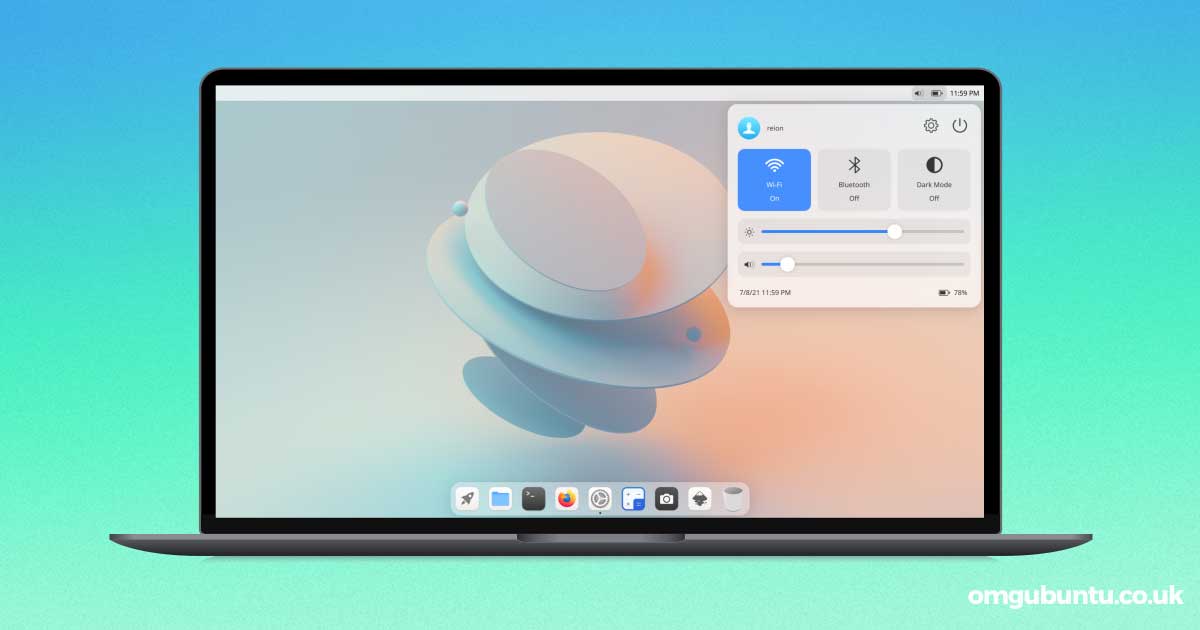
CuteFish Desktop on Ubuntu? This New Distro Offers It


cutefish os ubuntu

You can now try the CuteFish desktop environment on top of an Ubuntu base, with CuteFish OS Ubuntu.

A installable image of the distro is available to download for testing and development purposes. While it can’t be recommended for daily driver status (the desktop environment is under active development) it is nonetheless a great way to sample the promising, Qt-based CuteFish desktop environment.

The current .iso is based off of Kubuntu 21.04, but uses the Qt-based CuteFish desktop by default rather the more familiar KDE Plasma.

A small selection of KDE software come preinstalled, such text editor Kate, screenshot tool Spectacle, and Muon Package Manager, as well as well-known apps like Firefox, VLC, and MPV.

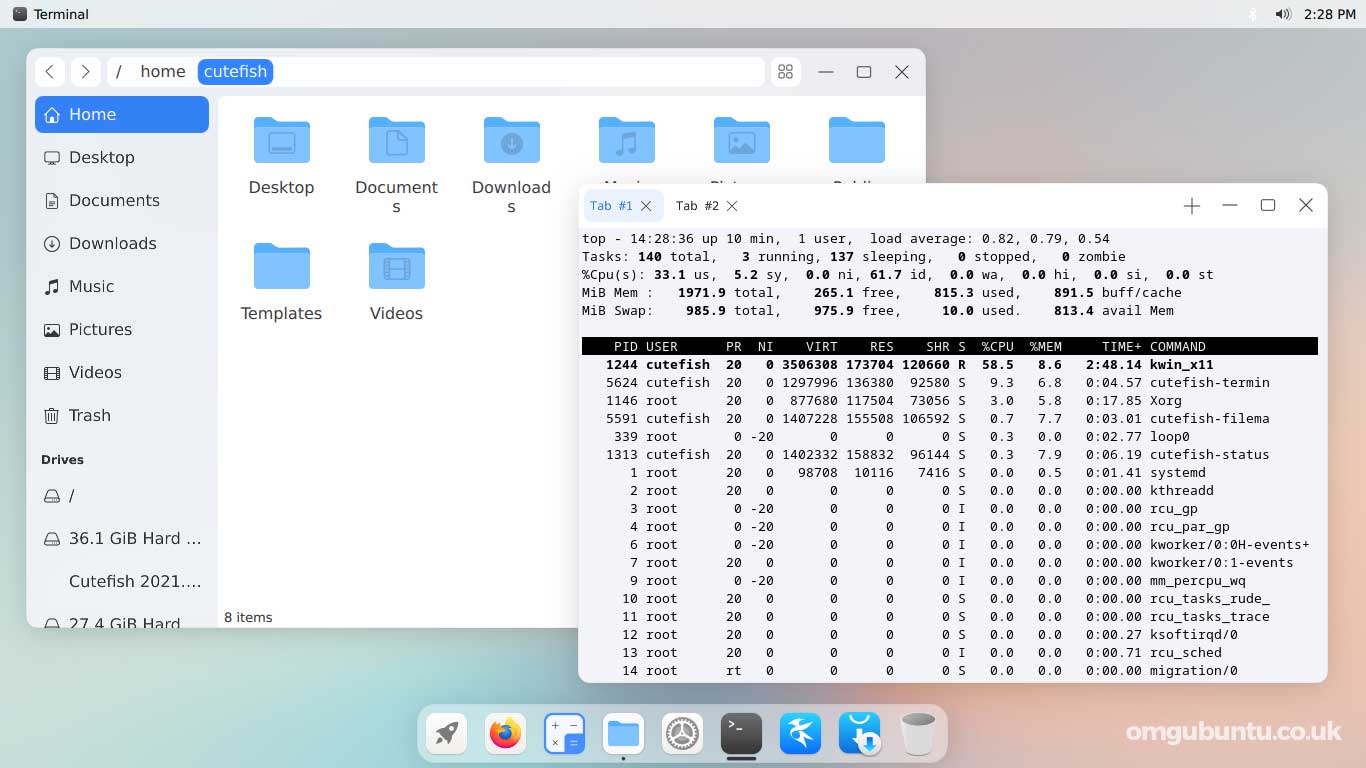
Also included are some native CuteFish apps, including a file manager, calculator, terminal, and settings hub. All of these are very functional, though the file manager is (understandably) rather no-frills at present, compared to something like Dolphin or Index.

screenshot of CuteFish OS Ubuntu - file manager and terminal
CuteFish’s own apps work well

The CuteFish desktop itself is composed of a desktop dock (which can be moved to the left or right), a basic status bar (with global menu), plus a full-screen app launcher (searchable), and session and lock screens.

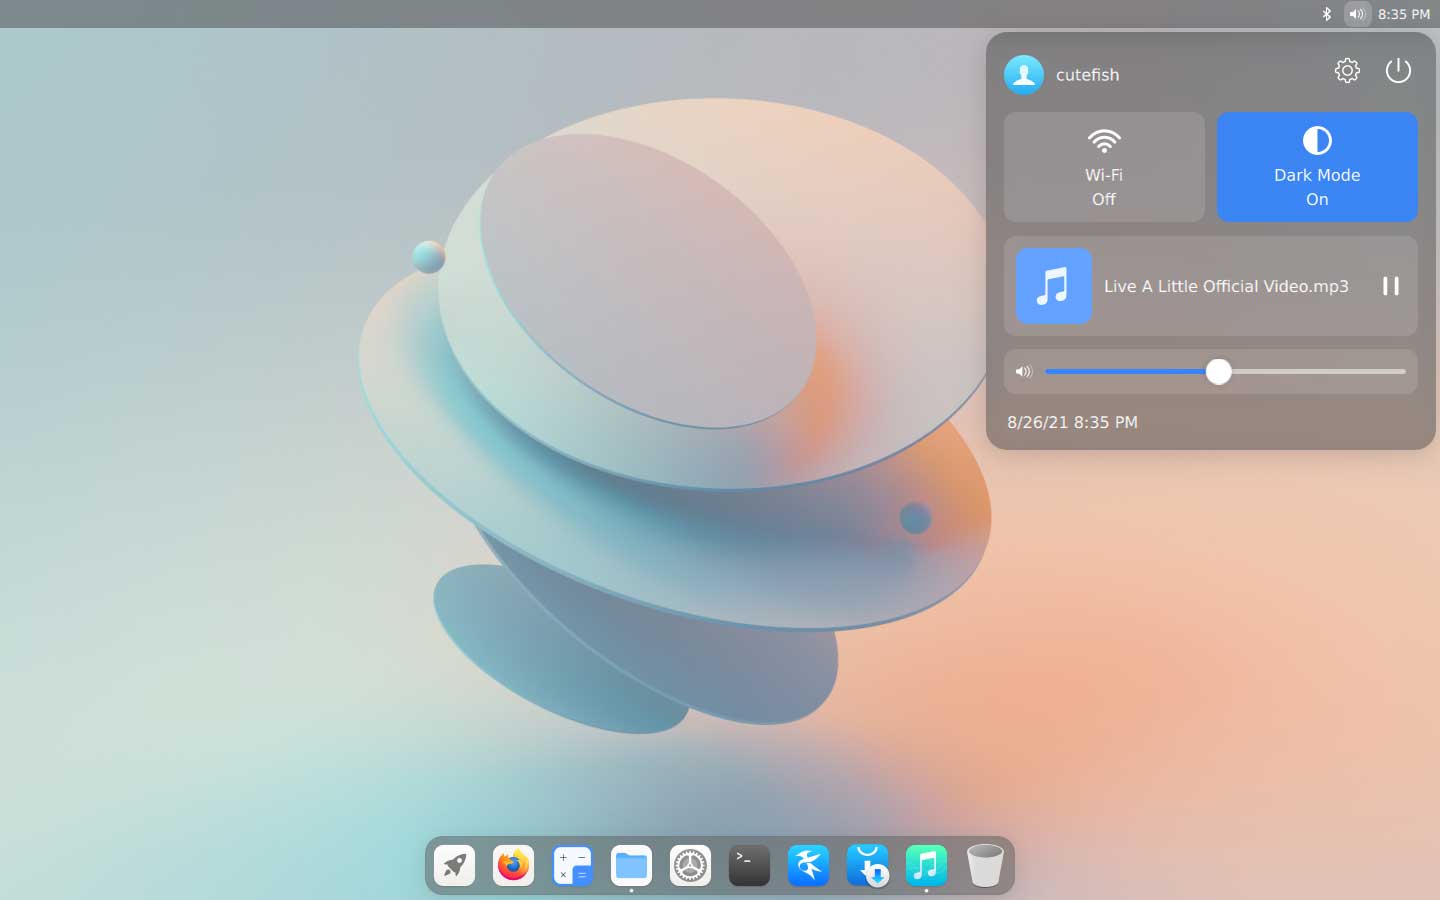
A unified iOS-styled control center provides quick access to settings like wi-fi, volume, MPRIS controls, and dark mode. There’s no calendar applet atm so clicking on the time/date does nothing.

screenshot of CuteFish OS Ubuntu -control center in dark mode
Handy access to common controls

The native Settings app is well stocked. Most core UI functions are present and working, including wired and wireless networking, appearance settings, display resolution and orientation, mouse/touchpad controls, swappable power profiles, and more.

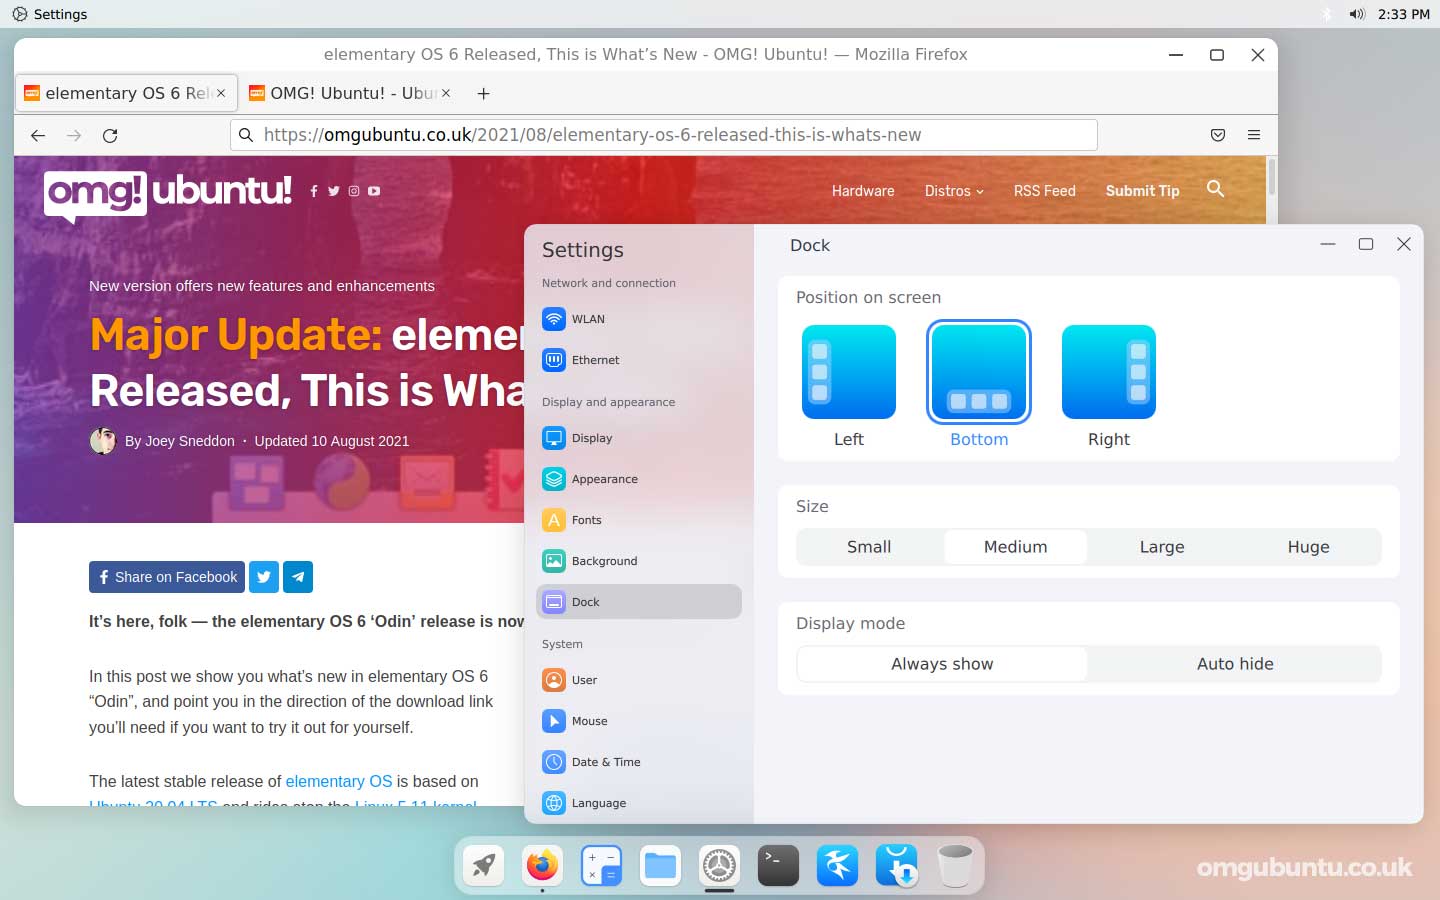
screenshot of CuteFish OS Ubuntu firefox and dock settings
Dock settings

One notable difference to regular Kubuntu is that CuteFish OS Ubuntu comes with two package managers: apt, and tap. The former manages the Ubuntu base. The latter is a bespoke package manager created to handle updates to the CuteFish desktop environment (and associated applications), which are released regularly in a ‘rolling release’ style manner.

To update the CuteFish desktop and associated apps in the OS you need to run tap update from the command line. Other apps, and the underlying distro, are managed by apt.

Download CuteFish OS Ubuntu (Beta)

You can download CuteFish OS Ubuntu from the official project website, linked below:

Download CuteFish OS Ubuntu v0.4 Beta (64-bit .iso)

Do keep in mind that this is a development release. There are bugs, missing features, inconsistencies, and potential for errors.

Source: https://www.omgubuntu.co.uk/2021/08/cutefish-os-ubuntu?utm_source=feedburner&utm_medium=feed&utm_campaign=Feed%3A+d0od+%28OMG%21+Ubuntu%21%29

May 20, 2021

HowTo: Fix Ubuntu “Requires Installation of Untrusted Packages” Update Error

 One of the first things I did after I got my Lenovo IdeaPad Y560 was to make it dual boot to Windows 7 and Ubuntu. After I have installed Ubuntu, I immediately run the Update Manager to update the system. Btw, I always update the system (either Windows or Ubuntu) before I install any programs or do any customizations. This makes sure that all components are up-to-date and helps make the system run smoother and lessens the chances of errors or conflicts with other components.


Anyways, when I tried to download and install the available updates for Ubuntu, I got this error message:


Requires installation of untrusted packages – “The action would require the installation of packages from not authenticated sources.”


I’ve installed Ubuntu lots of times before and this was the first time that I encountered this issue/error. I Googled the error message and found the very short and very simple solution from the Ubuntu forums. I’m sharing this in case someone might encounter the same problem and get the “requires installation of untrusted packages” error while updating Ubuntu.


How To Fix “Requires Installation of Untrusted Packages” Update Error


1. On your Ubuntu panel, click on System > Administration > Update Manager.


2. Look for Settings at the bottom left corner of the Update Manager window, click on it


3. On the Software Sources window, click on the Ubuntu Software tab.
4. Under Downloadable from the Internet, put a check on Source Code


5. Close the window and the changes will be applied.
6. On Update Manager, click on Install Updates.


UPDATE:

As mentioned in one of the comments by Sky WalkeR, this issue can also be fixed by typing in the following command lines in the terminal:


sudo apt-get update

sudo apt-get upgrade


That should do it and you should now be able to download and install the available updates for your system. In my case, the Source Code option was not ticked/checked. After I put a check on it and clicked on Install Updates, the “requires installation of untrusted packages” error went away.


Hope this short and simple tutorial will help you if you encounter the same problem while updating Ubuntu. If you know of a different way to solve this problem when updating Ubuntu, please feel free to share it with us via the comment section. Thank you!


JaypeeOnline is supported by its audience. When you click on the advertisements or purchase through links on our site, we may earn an affiliate commission. Learn more

Source: https://jaypeeonline.net/ubuntu/requires-installation-of-untrusted-packages-error/

March 29, 2021

Linux Mint 20.1 is a desktop anyone can love


 Jack Wallen kicks the tires of Linux Mint 20.1 and comes away astonished at what the developers have accomplished.

I'm glad Linux Mint exists. That's a strange statement, coming from someone who has never opted to make it their default desktop distribution. I've never been a fan of Cinnamon or Mate, and I've always thought Xfce was a solid desktop, but just not for me.

Even though I'm not terribly keen on the offered desktops for Linux Mint, I still believe it to be a fantastic distribution. Why is that? One reason is that it's most ardent fans are almost Apple-like in their fanaticism. From my perspective, that's a good thing. Linux has long needed a desktop distribution which elicited that much excitement from the user base. Once upon a time, that title would have been bestowed upon Ubuntu. Alas, a few bad choices along the way and the rabid fanbase isn't quite so rabid.

That's fine as well, because we all know, without Ubuntu, there'd be no Mint (or Pop!_OS, or elementary OS, etc.), and without Debian, there'd be no Ubuntu. 

But I digress...

Besides, this is supposed to be about Linux Mint. So, let's get on with it.

I'm not going to approach this as the standard review--you know what Linux Mint is about and it's incredibly easy to read the release notes for Ulysses (the 20.1 nickname). With that in mind, I'm going to take a different tack on this and answer the question, "Why can anyone love Linux Mint 20.1?"

SEE: Git guide for IT pros (free PDF) (TechRepublic)

Ease of use

Linux Mint 20.1 is, without a doubt, the most polished release I've seen come from the developers. The improvements they've made to the desktop make it such that anyone jump into this operating system and start using it--and I do mean anyone. By continuing to stick with a most familiar desktop metaphor, Linux Mint is immediately familiar to any user of any skill level. The simplistic desktop menu is a joy to use. It's not filled with bells and whistles, it hasn't reinvented the wheel, it just is and it works to absolute perfection.

Personally, I find desktops like GNOME more appealing, but knowing the average computer user like I do, Cinnamon is far ahead of GNOME, when it comes to user friendliness. The latest release of Cinnamon is a perfectly spiced icing on an already delicious cake--one that would even make the likes of Paul Hollywood offer up the coveted handshake. 

There is one feature, new to Cinnamon, that (for me) really stands out. That feature is the new Web Apps tool. For anyone that likes to create apps from websites, Linux Mint 20.1 makes this incredibly easy. Launch the Web Apps tool from the menu, click the + button, fill out the necessary information, and click OK (Figure A).

Figure A

minta.jpg

Creating a new Web Application in Linux Mint 20.1.

Once you've created the web application, you can search for it by name from the Cinnamon menu. Launch the web app and the site will appear in a web browser window, without the navigation bar or other usual accoutrement (Figure B).

Figure B

mintb.jpg

TechRepublic as a web application.

Web Apps might not be for everyone, but they certainly make using certain websites fast and simple.

So much speed

If you're a user who likes their desktop operating systems to perform with an almost immediate response, Linux Mint 20.1 might be just what you're looking for. The developers have done an outstanding job of eking out as much speed as possible from the desktop. Of course, it helps to have a desktop that's as lightweight and performant as Cinnamon. However, with most lightweight desktops, you feel like you've traded features for speed--that's not the case here. 

With Linux Mint 20.1, you get the best of both worlds, speed and features. Even when running this latest release in a VirtualBox VM, with only 3 GB of RAM, it is astonishingly fast. Apps open almost immediately and nothing seems to slow it down.

So for anyone who prefers speed over eye candy, this distro is for you.

Speaking of eye candy

Cinnamon (the default desktop for Linux Mint) isn't on the level of Deepin or KDE for special effects and "wow" factor. That doesn't mean it's bereft of eye candy, it's just a bit subtle. Anyone who'd like to add a bit of panache to their desktop, Cinnamon makes it really easy to do so, without having to install a single thing.

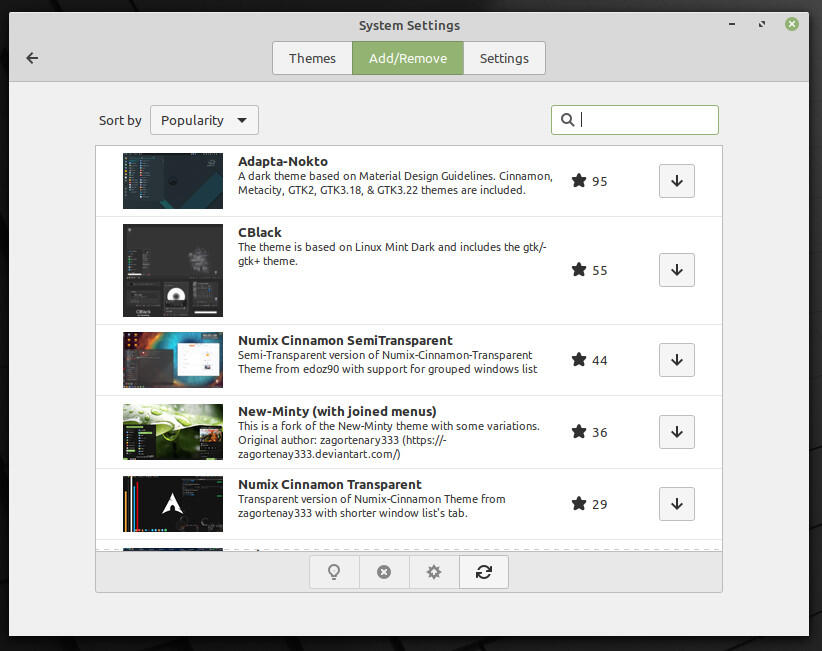
If you open the Settings tool, you'll notice a Themes button. Click that button and then click the Add/Remove tab to reveal a fairly extensive listing of themes you can download and apply (Figure C).

Figure C

mintc.jpg

Finding and adding a new theme to Cinnamon is incredibly easy.

To achieve this in GNOME, it requires the jumping through of a few hoops that new users wouldn't even try. 

Fan of television?

There's a really cool new application to be had with Mint 20.1. Said application is called Hypnotix. With this app, you can watch free TV from around the world. Open the app from the menu, click TV Channels from the main window, and select from the numerous channels, spread across numerous countries (Figure D).

Figure D

mintd.jpg

The channel listing within the Hypnotix application.  

When you click on a channel, Hypnotix will open a new window, where you can view whatever is live at the time. However, don't be fooled, as this isn't a DVR. You can't select programs, it's all about the live experience.

A few things to note about Hypnotix. Chances are pretty good it won't be the application to finally convert you to a "cable cutter." A good number of the channels are obscure and finding something worth watching might take you a bit of time. Also, once you start watching a channel, the only way to close the child window is to close the app itself. This is frustrating, especially when you're just trying to find something interesting with a bit of channel hopping. Hopefully this bug will be ironed out in updates to come. Even with the bugs, Hypnotix looks very promising.

Are you the perfect Mint user?

I'm not because I prefer my desktop to veer a bit more toward the modern. That being said, Linux Mint's latest release will have an exceptionally wide appeal. Anyone looking for an incredibly stable, robust, fast, clean, and user-friendly desktop operating system could do a whole lot worse that Linux Mint 20.1.

Even though I'm not a Mint user, I'm still a big fan. Every Linux desktop distribution should strive to do exactly what Linux Mint 20.1 has accomplished--create a desktop that is the perfect balance of speed, features, and user-friendliness.

Source: https://www.techrepublic.com/article/linux-mint-20-1-is-a-desktop-anyone-can-love/


March 9, 2021

15 best Chromebook tips and tricks 2020

 Millions of people are using Chromebooks, but despite their simple and "for everyone" nature, not every power feature is easy to access. All the best Chromebooks are powerful tools that are just waiting to be used to its full potential, and once you know a few tricks, you'll feel like you're getting even more value out of your inexpensive computer. We've rounded up the top ten tips and tricks for you to try on your Chromebook so you can start making the most of your machine.

1. Use third-party DNS

Chromebook DNSSource: Android Central

There are a lot of reasons to use third-party DNS (Domain Name Server, or the sort of "address book" for the Internet) when you're on the web. Some say they are faster; some claim they are more secure, and using one is a great way to get around any silly content blocks that may be in place on the servers of the people who provide you your Internet.

Using them on your Chromebook is easy. Open the settings page, and click on the name of the network you want to change. In the window that comes up, choose the network tab. At the bottom, you can choose which name servers to use. You'll see automatic and Google options, or you can enter some manually if you know specifically what you want.

2. Type Unicode characters

Your Chromebook has a full keyboard, but sometimes you want to type a character that doesn't have its own key, like æ or Ü or ʓ or even string them together for the perfect look of disapproval ಠ_ಠ. To do it, you'll need to type what's called a Unicode character.

Knowing what the Unicode characters are isn't something you'll be memorizing (here's a cheat sheet) but once you know the Unicode number typing them is easy. Just press Ctrl + U + the number and they'll be inserted in place.

3. Use Chrome overview

Chromebook overviewSource: Android Central

There is a built-in overview mode on your Chromebook that lets you see every open window at a glance. If you've ever used a Mac, this is just like Expose. It's also just as useful!

On the top row of the keyboard, just press the []]] button (above the 6 key) or swipe down from the top with three fingers on your trackpad or touchscreen to go into the overview. Clicking any of the thumbnails will open that window, and clicking in a blank space will return you to the last window you were viewing. If you find yourself with a lot of windowed apps running all the time, this is a great time-saver.

As a bonus, while in overview mode, you can type to filter what you're seeing. For example, typing "Google" will only show windows with the word Google in the title.

4. See all of your keyboard shortcuts

Chrome Keyboard ShortcutsSource: Android Central

By now, you know that Chrome OS is full of handy keyboard shortcuts for things like reloading a page or going to your home page in the browser. In fact, there are so many that it's almost impossible to keep track of them all. Finding out just what you can do so you know which ones to remember is easy.

Press Ctrl + Alt + ?, and you'll see an overlay of the keyboard with all the key functions and shortcuts. Soon you'll be a pro and Shift + Alt + L-ing and Alt + Shift + B-ing all over the place.

5. Refresh your Google Drive cache

Chromebooks can use Google Drive as extra storage and it acts the same as the local storage does. If you know there is a change in your saved Google Drive files but don't see it, you can manually refresh your Chromebook's local Drive cache.

In the Omnibar type chrome://drive-internals/ and click the Clear local cache button and the next time you open the file manager you'll sync again.

6. Take advantage of the Chromebook Perks

Chromebook perksSource: Android Central

Part of the value of a Chromebook is in the extras you get along with your purchase. When you buy a computer running Chrome OS, you don't just get a computer — Google throws some freebies your way as well. After buying your Chromebook and getting logged in, be sure to head to the Chromebook Perks Page to pick up these offers:

  • A three-month trial of Disney+ (worth $21)
  • Free in-game item pack for Fallout Shelter (Worth $20)
  • A free copy of Dead Cells (worth $9)
  • A free copy of DOOM II (worth $5)
  • 100GB of Dropbox storage for 12 months
  • 100GB of Google One storage for 12 months (worth $24)
  • 3 free months of Stadia Pro (worth $30)
  • A free copy of Duet Display (worth $10)
  • 30 days of Calm Premium (worth $13)
  • 12 months of VSCO membership (worth $20)
  • Six months of Squid Premium (worth $6)

The offers expire 60 days after you first associate a Google account with your Chromebook, so make sure to use them before they run out. They also change from time to time, but you'll always find some sweet freebies that are definitely worth grabbing!

7. Change your taskbar position

By default, your Chromebook's shelf (the taskbar) is along the bottom of the screen but you can also set it to be on the right or left side.

Just right-click on it and pick the Shelf position menu for your settings.

8. Use an SD card for extra storage

Chromebook SD cardSource: Android Central

Most Chromebooks offer an SD card slot of some kind — be it microSD or standard. While the SD card slot is useful for transferring pictures off of your camera and getting them up to Google Drive or moving files between computers, for many people, it may be most useful as semi-permanent external storage.

Because you'll often have no more than 32GB of internal storage (unless you feel like upgrading that yourself) on your Chromebook, you may find yourself wanting more. Pop a 64GB SD card into your Chromebook and use it just like you would the local or Google Drive storage. The SD card shows up in the Files app, just like another folder, where you can use it any way you'd like.

9. Show hidden files and folders

The file manager hides folder and file names that start with a dot (like .Filename, for example) and you normally can't see them. These are usually files and folders you don't want to edit unless you know what you're doing.

If you want to see hidden files, open the File manager and press Ctrl +. (period) and they'll appear along with your other files and folders.

10. Share your Chromebook — safely

Multiple users in ChromeSource: Android Central

When you first set up your Chromebook, it feels like it's just locked to your own personal Google account, but one of the perks of Chrome OS is the ability for any machine to work with any Google account. When you're on the lock screen of your Chromebook, you can click "Sign out" in the bottom left corner and let someone else sign in with their own Google account. They won't have access to your main account, and all of their previous activity on any other Chrome device will be set up on this new machine in its own profile.

If you just want to hand your Chromebook to someone else for a quick bit of research or something simple, use the guest mode from the lock screen. Nothing done in the guest mode will be tied to your Google account, and everything will be completely erased as soon as the guest account signs out.

If you'd prefer to lock down your Chromebook so only specific people (or just you) can sign in, head into the settings menu, and under the Users area, you can restrict sign-in on the device to only specific accounts.

11. Do a barrel roll

Barrel rollSource: Android Central

This one serves no purpose except to have fun. Open a window or two on your Chromebook and press Ctrl + Alt + Shift + Reload.

All work and no play something something.

12. Take a screenshot

Chromebook screenshotSource: Android Central

You can take a screenshot on a Chromebook just as easily as you can on any other computer. Whether you need to save a piece of information for reference or just need to help someone out by showing something visually, it's extremely simple. Hold the control key and hit the task switching key []]] to capture the screen.

You'll get a desktop notification to click and view the screenshot, or you can always find later it by opening the Files app.

13. Quit safely and quickly

You would normally shut down your Chromebook using the power button or through the system tray, but like everything in Chrome OS there is also a quick and easy shortcut.

Press Ctrl + Shift + Q twice in a row to open the logout screen and confirm that you want to quit.

14. See all of your nerdy system info

Chromebook System InfoSource: Android Central

In the Omnibox, type chrome://system to see a GUI filled with system information. You'll find everything there is to know about your CPU, your memory, your current X-session, and more here. It's all laid out in an easy-to-read fashion, and you'll know everything there is to know about your Chromebook's insides.

We can't promise you'll understand everything you see in there, but whatever you need (or want) to know is given to you. Since it opens in a browser tab, searching Google for the parts you don't understand is easy!

If you'd rather see things in a graphical interface, you can install the Cog System Info Viewer Chrome app by François Beaufort

15. Use Powerwash to clean up

PowerwashSource: Android Central

If you want to altogether remove your Google account and information from your Chromebook and reset it to a "like new" state, it only takes two clicks of the mouse in the settings to use a feature called "Powerwash." Go into your settings and search for Powerwash in the search bar, or go to advanced settings and find it at the bottom. Click the button, then confirm, and your Chromebook will reboot momentarily, looking just as it did the day you took it out of the box.


Hopefully, after mastering these few tips and tricks you'll be using your Chromebook like a pro, and can maybe even help out another person or two who are getting acquainted with their own Chromebook!

Source: https://www.androidcentral.com/top-chromebook-tips-and-tricks