One of the first things I did after I got my Lenovo IdeaPad Y560 was to make it dual boot to Windows 7 and Ubuntu. After I have installed Ubuntu, I immediately run the Update Manager to update the system. Btw, I always update the system (either Windows or Ubuntu) before I install any programs or do any customizations. This makes sure that all components are up-to-date and helps make the system run smoother and lessens the chances of errors or conflicts with other components.
Anyways, when I tried to download and install the available updates for Ubuntu, I got this error message:
Requires installation of untrusted packages – “The action would require the installation of packages from not authenticated sources.”
I’ve installed Ubuntu lots of times before and this was the first time that I encountered this issue/error. I Googled the error message and found the very short and very simple solution from the Ubuntu forums. I’m sharing this in case someone might encounter the same problem and get the “requires installation of untrusted packages” error while updating Ubuntu.
How To Fix “Requires Installation of Untrusted Packages” Update Error
1. On your Ubuntu panel, click on System > Administration > Update Manager.
2. Look for Settings at the bottom left corner of the Update Manager window, click on it
3. On the Software Sources window, click on the Ubuntu Software tab. 4. Under Downloadable from the Internet, put a check on Source Code
5. Close the window and the changes will be applied. 6. On Update Manager, click on Install Updates.
UPDATE:
As mentioned in one of the comments by Sky WalkeR, this issue can also be fixed by typing in the following command lines in the terminal:
sudo apt-get update
sudo apt-get upgrade
That should do it and you should now be able to download and install the available updates for your system. In my case, the Source Code option was not ticked/checked. After I put a check on it and clicked on Install Updates, the “requires installation of untrusted packages” error went away.
Hope this short and simple tutorial will help you if you encounter the same problem while updating Ubuntu. If you know of a different way to solve this problem when updating Ubuntu, please feel free to share it with us via the comment section. Thank you!
JaypeeOnline is supported by its audience. When you click on the advertisements or purchase through links on our site, we may earn an affiliate commission. Learn more
Jack Wallen kicks the tires of Linux Mint 20.1 and comes away astonished at what the developers have accomplished.
I'm glad Linux Mint
exists. That's a strange statement, coming from someone who has never
opted to make it their default desktop distribution. I've never been a
fan of Cinnamon or Mate, and I've always thought Xfce was a solid
desktop, but just not for me.
Even though I'm not terribly keen on the offered desktops for Linux
Mint, I still believe it to be a fantastic distribution. Why is that?
One reason is that it's most ardent fans are almost Apple-like in their
fanaticism. From my perspective, that's a good thing. Linux has long
needed a desktop distribution which elicited that much excitement from
the user base. Once upon a time, that title would have been bestowed
upon Ubuntu. Alas, a few bad choices along the way and the rabid fanbase isn't quite so rabid.
That's
fine as well, because we all know, without Ubuntu, there'd be no Mint
(or Pop!_OS, or elementary OS, etc.), and without Debian, there'd be no
Ubuntu.
But I digress...
Besides, this is supposed to be about Linux Mint. So, let's get on with it.
I'm not going to approach this as the standard review--you know what Linux Mint is about and it's incredibly easy to read the release notes for Ulysses
(the 20.1 nickname). With that in mind, I'm going to take a different
tack on this and answer the question, "Why can anyone love Linux Mint
20.1?"
Linux
Mint 20.1 is, without a doubt, the most polished release I've seen come
from the developers. The improvements they've made to the desktop make
it such that anyone jump into this operating system and start using
it--and I do mean anyone. By continuing to stick with a most familiar
desktop metaphor, Linux Mint is immediately familiar to any user of any
skill level. The simplistic desktop menu is a joy to use. It's not
filled with bells and whistles, it hasn't reinvented the wheel, it just
is and it works to absolute perfection.
Personally, I find
desktops like GNOME more appealing, but knowing the average computer
user like I do, Cinnamon is far ahead of GNOME, when it comes to user
friendliness. The latest release of Cinnamon is a perfectly spiced icing
on an already delicious cake--one that would even make the likes of
Paul Hollywood offer up the coveted handshake.
There is one
feature, new to Cinnamon, that (for me) really stands out. That feature
is the new Web Apps tool. For anyone that likes to create apps from
websites, Linux Mint 20.1 makes this incredibly easy. Launch the Web
Apps tool from the menu, click the + button, fill out the necessary
information, and click OK (Figure A).
Figure A
Creating a new Web Application in Linux Mint 20.1.
Once
you've created the web application, you can search for it by name from
the Cinnamon menu. Launch the web app and the site will appear in a web
browser window, without the navigation bar or other usual accoutrement (Figure B).
Figure B
TechRepublic as a web application.
Web Apps might not be for everyone, but they certainly make using certain websites fast and simple.
So much speed
If
you're a user who likes their desktop operating systems to perform with
an almost immediate response, Linux Mint 20.1 might be just what you're
looking for. The developers have done an outstanding job of eking out
as much speed as possible from the desktop. Of course, it helps to have a
desktop that's as lightweight and performant as Cinnamon. However, with
most lightweight desktops, you feel like you've traded features for
speed--that's not the case here.
With Linux Mint 20.1, you get
the best of both worlds, speed and features. Even when running this
latest release in a VirtualBox VM, with only 3 GB of RAM, it is
astonishingly fast. Apps open almost immediately and nothing seems to
slow it down.
So for anyone who prefers speed over eye candy, this distro is for you.
Speaking of eye candy
Cinnamon
(the default desktop for Linux Mint) isn't on the level of Deepin or
KDE for special effects and "wow" factor. That doesn't mean it's bereft
of eye candy, it's just a bit subtle. Anyone who'd like to add a bit of
panache to their desktop, Cinnamon makes it really easy to do so,
without having to install a single thing.
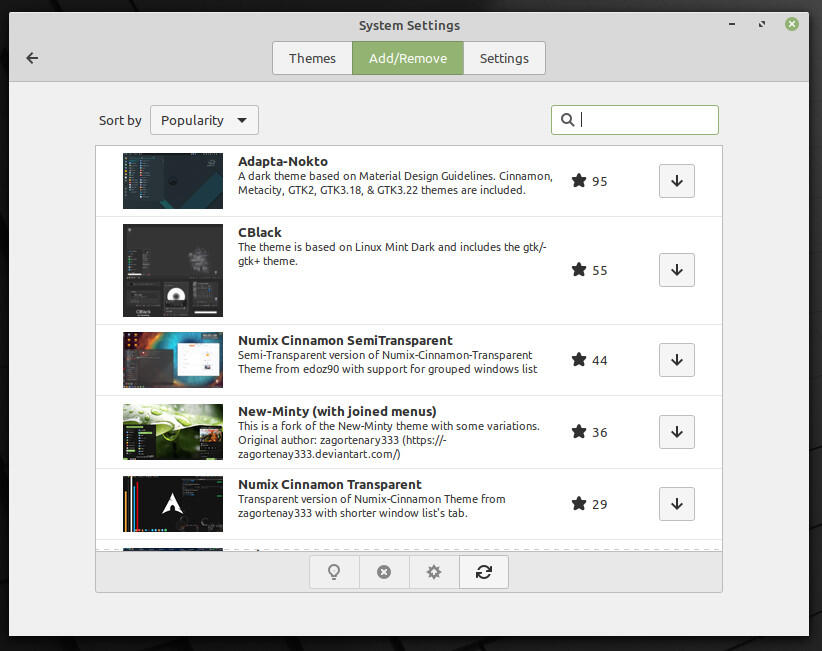
If you open the
Settings tool, you'll notice a Themes button. Click that button and then
click the Add/Remove tab to reveal a fairly extensive listing of themes
you can download and apply (Figure C).
Figure C
Finding and adding a new theme to Cinnamon is incredibly easy.
To achieve this in GNOME, it requires the jumping through of a few hoops that new users wouldn't even try.
Fan of television?
There's
a really cool new application to be had with Mint 20.1. Said
application is called Hypnotix. With this app, you can watch free TV
from around the world. Open the app from the menu, click TV Channels
from the main window, and select from the numerous channels, spread
across numerous countries (Figure D).
Figure D
The channel listing within the Hypnotix application.
When
you click on a channel, Hypnotix will open a new window, where you can
view whatever is live at the time. However, don't be fooled, as this
isn't a DVR. You can't select programs, it's all about the live
experience.
A few things to note about Hypnotix. Chances are
pretty good it won't be the application to finally convert you to a
"cable cutter." A good number of the channels are obscure and finding
something worth watching might take you a bit of time. Also, once you
start watching a channel, the only way to close the child window is to
close the app itself. This is frustrating, especially when you're just
trying to find something interesting with a bit of channel hopping.
Hopefully this bug will be ironed out in updates to come. Even with the
bugs, Hypnotix looks very promising.
Are you the perfect Mint user?
I'm
not because I prefer my desktop to veer a bit more toward the modern.
That being said, Linux Mint's latest release will have an exceptionally
wide appeal. Anyone looking for an incredibly stable, robust, fast,
clean, and user-friendly desktop operating system could do a whole lot
worse that Linux Mint 20.1.
Even though I'm not a Mint user, I'm
still a big fan. Every Linux desktop distribution should strive to do
exactly what Linux Mint 20.1 has accomplished--create a desktop that is
the perfect balance of speed, features, and user-friendliness.
Millions of people are using
Chromebooks, but despite their simple and "for everyone" nature, not
every power feature is easy to access. All the best Chromebooks
are powerful tools that are just waiting to be used to its full
potential, and once you know a few tricks, you'll feel like you're
getting even more value out of your inexpensive computer. We've rounded
up the top ten tips and tricks for you to try on your Chromebook so you
can start making the most of your machine.
1. Use third-party DNS
Source: Android Central
There are a lot of reasons to use third-party DNS (Domain Name
Server, or the sort of "address book" for the Internet) when you're on
the web. Some say they are faster; some claim they are more secure, and
using one is a great way to get around any silly content blocks that may
be in place on the servers of the people who provide you your Internet.
Using them on your Chromebook is easy. Open the settings page, and
click on the name of the network you want to change. In the window that
comes up, choose the network tab. At the bottom, you can choose which
name servers to use. You'll see automatic and Google options, or you can
enter some manually if you know specifically what you want.
2. Type Unicode characters
Your Chromebook has a full keyboard, but sometimes you want to type a
character that doesn't have its own key, like æ or Ü or ʓ or even
string them together for the perfect look of disapproval ಠ_ಠ. To do it,
you'll need to type what's called a Unicode character.
Knowing what the Unicode characters are isn't something you'll be memorizing (here's a cheat sheet) but once you know the Unicode number typing them is easy. Just press Ctrl + U + the number and they'll be inserted in place.
3. Use Chrome overview
Source: Android Central
There is a built-in overview mode on your Chromebook that lets you
see every open window at a glance. If you've ever used a Mac, this is
just like Expose. It's also just as useful!
On the top row of the keyboard, just press the []]]
button (above the 6 key) or swipe down from the top with three fingers
on your trackpad or touchscreen to go into the overview. Clicking any of
the thumbnails will open that window, and clicking in a blank space
will return you to the last window you were viewing. If you find
yourself with a lot of windowed apps running all the time, this is a
great time-saver.
As a bonus, while in overview mode, you can type to filter what
you're seeing. For example, typing "Google" will only show windows with
the word Google in the title.
4. See all of your keyboard shortcuts
Source: Android Central
By now, you know that Chrome OS is full of handy keyboard shortcuts
for things like reloading a page or going to your home page in the
browser. In fact, there are so many that it's almost impossible to keep
track of them all. Finding out just what you can do so you know which
ones to remember is easy.
Press Ctrl + Alt + ?, and you'll see an overlay of
the keyboard with all the key functions and shortcuts. Soon you'll be a
pro and Shift + Alt + L-ing and Alt + Shift + B-ing all over the place.
5. Refresh your Google Drive cache
Chromebooks can use Google Drive as extra storage and it acts the same as the local storage does. If you know
there is a change in your saved Google Drive files but don't see it,
you can manually refresh your Chromebook's local Drive cache.
In the Omnibar type chrome://drive-internals/ and click the Clear local cache button and the next time you open the file manager you'll sync again.
6. Take advantage of the Chromebook Perks
Source: Android Central
Part of the value of a Chromebook is in the extras you get along with
your purchase. When you buy a computer running Chrome OS, you don't
just get a computer — Google throws some freebies your way as well.
After buying your Chromebook and getting logged in, be sure to head to
the Chromebook Perks Page to pick up these offers:
The offers expire 60 days after you first associate a Google account
with your Chromebook, so make sure to use them before they run out. They
also change from time to time, but you'll always find some sweet
freebies that are definitely worth grabbing!
7. Change your taskbar position
By default, your Chromebook's shelf (the taskbar) is along the bottom
of the screen but you can also set it to be on the right or left side.
Just right-click on it and pick the Shelf position menu for your settings.
8. Use an SD card for extra storage
Source: Android Central
Most Chromebooks offer an SD card slot of some kind — be it microSD
or standard. While the SD card slot is useful for transferring pictures
off of your camera and getting them up to Google Drive or moving files
between computers, for many people, it may be most useful as
semi-permanent external storage.
Because you'll often have no more than 32GB of internal storage (unless you feel like upgrading that yourself)
on your Chromebook, you may find yourself wanting more. Pop a 64GB SD
card into your Chromebook and use it just like you would the local or
Google Drive storage. The SD card shows up in the Files app, just like
another folder, where you can use it any way you'd like.
9. Show hidden files and folders
The file manager hides folder and file names that start with a dot
(like .Filename, for example) and you normally can't see them. These are
usually files and folders you don't want to edit unless you know what
you're doing.
If you want to see hidden files, open the File manager and press Ctrl +. (period) and they'll appear along with your other files and folders.
10. Share your Chromebook — safely
Source: Android Central
When you first set up your Chromebook, it feels like it's just locked
to your own personal Google account, but one of the perks of Chrome OS
is the ability for any machine to work with any Google account. When
you're on the lock screen of your Chromebook, you can click "Sign out"
in the bottom left corner and let someone else sign in with their own
Google account. They won't have access to your main account, and all of
their previous activity on any other Chrome device will be set up on
this new machine in its own profile.
If you just want to hand your Chromebook to someone else for a quick
bit of research or something simple, use the guest mode from the lock
screen. Nothing done in the guest mode will be tied to your Google
account, and everything will be completely erased as soon as the guest
account signs out.
If you'd prefer to lock down your Chromebook so only specific people
(or just you) can sign in, head into the settings menu, and under the Users area, you can restrict sign-in on the device to only specific accounts.
11. Do a barrel roll
Source: Android Central
This one serves no purpose except to have fun. Open a window or two on your Chromebook and press Ctrl + Alt + Shift + Reload.
All work and no play something something.
12. Take a screenshot
Source: Android Central
You can take a screenshot on a Chromebook just as easily as you can
on any other computer. Whether you need to save a piece of information
for reference or just need to help someone out by showing something
visually, it's extremely simple. Hold the control key and hit the task
switching key []]] to capture the screen.
You'll get a desktop notification to click and view the screenshot, or you can always find later it by opening the Files app.
13. Quit safely and quickly
You would normally shut down your Chromebook using the power button
or through the system tray, but like everything in Chrome OS there is
also a quick and easy shortcut.
Press Ctrl + Shift + Q twice in a row to open the logout screen and confirm that you want to quit.
14. See all of your nerdy system info
Source: Android Central
In the Omnibox, type chrome://system to see a GUI filled
with system information. You'll find everything there is to know about
your CPU, your memory, your current X-session, and more here. It's all
laid out in an easy-to-read fashion, and you'll know everything there is
to know about your Chromebook's insides.
We can't promise you'll understand everything you see in there, but
whatever you need (or want) to know is given to you. Since it opens in a
browser tab, searching Google for the parts you don't understand is
easy!
If you'd rather see things in a graphical interface, you can install the Cog System Info Viewer Chrome app by François Beaufort
15. Use Powerwash to clean up
Source: Android Central
If you want to altogether remove your Google account and information
from your Chromebook and reset it to a "like new" state, it only takes
two clicks of the mouse in the settings to use a feature called
"Powerwash." Go into your settings and search for Powerwash in the
search bar, or go to advanced settings and find it at the bottom. Click
the button, then confirm, and your Chromebook will reboot momentarily,
looking just as it did the day you took it out of the box.
Hopefully, after mastering these few tips and tricks you'll be using
your Chromebook like a pro, and can maybe even help out another person
or two who are getting acquainted with their own Chromebook!
Supercharge your Chrome OS experience with these time-saving tricks and techniques.
Chromebooks may be all about simplicity, but don't be fooled:
Beneath their intuitive outer layer lies a web of advanced options. And
you don't have to be a power user to embrace it.
Make your way through this massive collection of next-level tips, and you'll be zipping around Chrome OS like a pro in no time.
Getting around Chrome OS
1.
The Chrome OS launcher — the drawer-like interface that appears when
you tap the Search key or hit the circle icon in the lower-left corner
of the screen — is actually a powerful universal search tool. Just start
typing as soon as it appears, and you can find and open apps, pull up
websites, and even get answers to specific questions right then and
there — no clicking or digging required.
2. The launcher has some
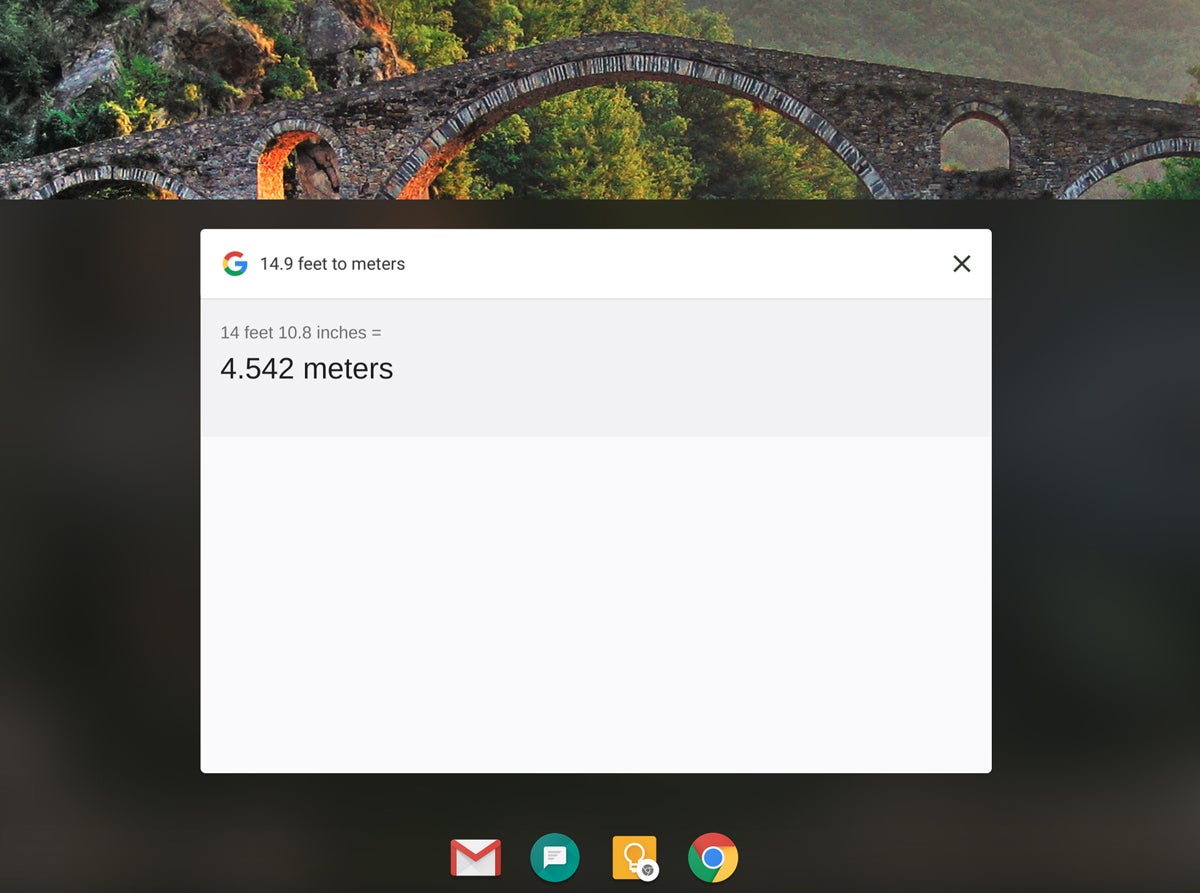
easily overlooked extra powers, too. Try typing in calculations
("172.4/3"), for instance, or unit conversions ("14.9 feet to meters")
to put Google to work at the system level.
JR Raphael/IDG
The launcher's search box can pull up apps and websites and perform
all sorts of other functions. (Click the image to enlarge it.)
3. If you use an Android phone, keep an eye on the very top
part of your Chromebook's launcher. Anytime you've had an article open
recently in Chrome on your phone, you'll see that page's title appear as
the first suggested item directly beneath the launcher's search bar.
Click or tap it to open the article and pick up where you left off.
4. Chrome OS has a hidden gesture for accessing the launcher, which is especially useful when you're using a Chromebook as a tablet: Simply swipe up from an open area at the bottom of the screen, and — just like with Android on Google's Pixel phones — the full launcher will appear.
5.
You can hide the shelf — the row of pinned "favorites" at the bottom of
your screen — by right-clicking it (clicking with two fingers) or
long-pressing on it and then selecting the "Autohide shelf" option that
appears. That'll cause the shelf to disappear anytime you have an app or
window open and then reappear when you mouse over its area or swipe
upward from the bottom of the screen. It'll also always show up when
you're viewing your desktop.
6. Quickly open any item on your
shelf by pressing Alt and then the number key that corresponds with its
position: Alt-1 for the first app in the list, Alt-2 for the second, and
so on.
7.
Right-click or long-press on any app in your shelf or within the main
launcher to reveal a series of program-specific shortcuts. You'll find
the most options with Android apps, many of which offer one-touch links
to functions like composing new messages, starting new documents, or
jumping to specific folders or accounts.
8. As of 2018, Chrome OS boasts a distinctly Android-like
combined Quick Settings and notification panel in its lower-right
corner. You can open it without moving your hands off your keyboard by
pressing Shift-Alt-N from anywhere in the system.
9. Just like on
Android, it's possible to clear out all of your Chrome OS notifications
in one fell swoop — but the command is curiously tough to find. Here's
the secret: With your notification panel open, scroll up as far as you
can on the area of the screen showing notifications. Once you've moved
past the bottommost notification, you'll reveal a "Clear all" button.
JR Raphael/IDG
Scroll all the way up on a Chromebook's notifications, and you'll see
a "Clear all" command to dismiss them all at once. (Click the image to
enlarge it.)
10. Got a Chromebook with a stylus? You can take notes right from the lock screen with the Google Keep Android app.
Install the app and then look in the "Stylus" section of your device's
settings to make sure the option for lock-screen note-taking is enabled.
Once it's active, you'll see an icon in the upper-right corner of your
lock screen that'll let you scribble away.
Managing apps and windows
11.
You might not realize it, but your Chromebook has a handy Overview
interface for juggling open apps and windows. You can get to it by
pressing the button that looks like a box with two lines on your
keyboard (in the function row, directly to the left of the brightness
controls) or by pressing the similarly shaped icon that appears in the
lower-right corner of the screen when a Chromebook is in its tablet
mode.
12. Prefer to get around with your trackpad? Make a mental
note of this handy hidden trick: You can swipe downward with three
fingers on your trackpad from anywhere in the system to open the
Overview interface and see all of your open apps. You can then swipe
back upward with three fingers to return to your most recently used
process.
13. One more nifty Overview access trick: When your
convertible Chromebook is in its tablet mode (with the keyboard either
detached or swiveled around the back), swipe down from the top of the
screen while any app is open. That'll shrink the app down into the
Overview screen, where you can drop it and then select any other active
app or window you want to open.
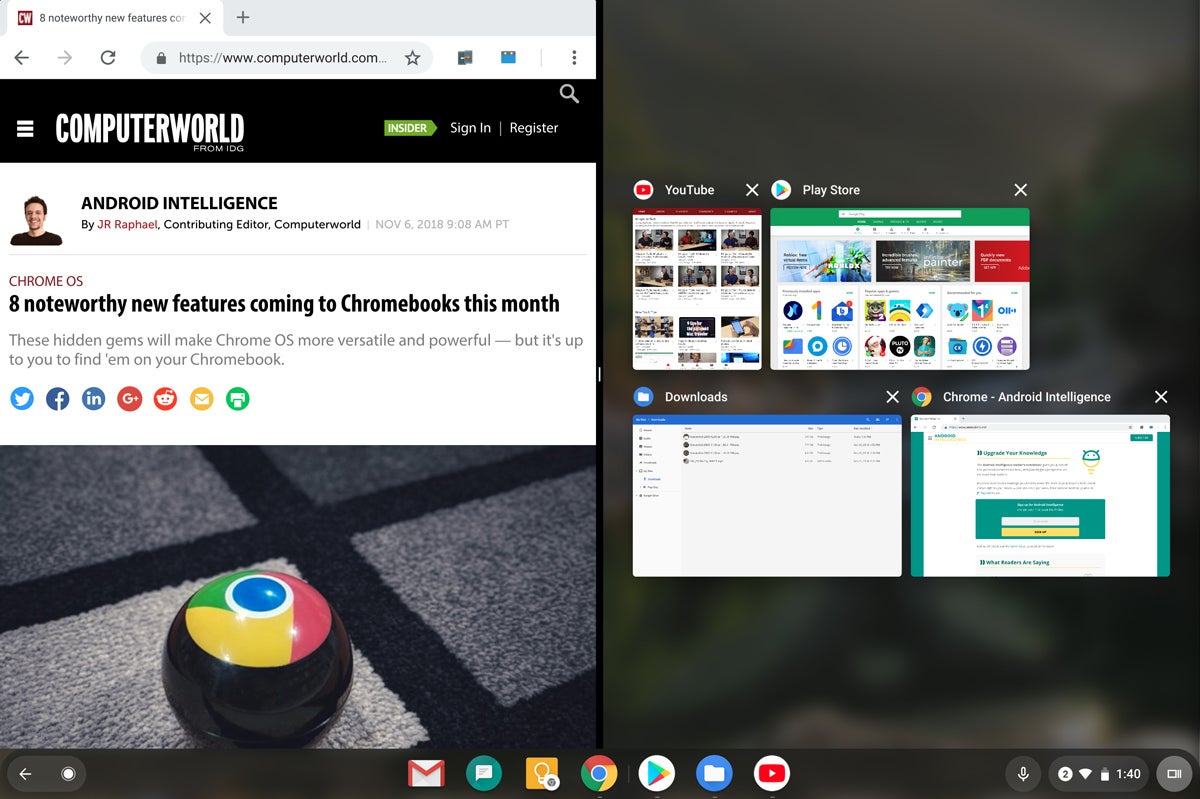
14. You can open two apps side by
side in a split-screen mode by following the same step described above
but then dragging the app to the left or right side of the screen. When
you see that half of the screen light up, let go — then either select
another active app from the Overview interface or open a new app from
your launcher to fill the other half. You can do this with any
combination of websites, Chrome apps, Android apps, and even Linux apps
(more on those in a moment).
JR Raphael/IDG
Chrome OS's split-screen mode can be a helpful way to multitask while
using a Chromebook in its tablet mode. (Click the image to enlarge it.)
15. While viewing two apps in a split-screen setup, press
and hold the black bar in the center and drag it in either direction to
make either side larger or smaller.
16. If you have a lot of apps
and windows open, try going into Chrome OS's Overview screen and then
typing the name of the process you want. The system will gray out
nonmatching items as you type and highlight only those that include
whatever letters you've entered.
17. Prefer a faster Alt-Tab-like
method of switching between processes? Your Chromebook has that, too —
quite literally: Just press Alt-Tab once to toggle back and forth
between your two most recently used apps or windows, or press and hold
Alt-Tab to pull up a quick switching utility that'll let you tab between
all of your actively open items.
18. Want to move backwards in
your Alt-Tab list — from right to left instead of left to right? Hold
down Shift along with Alt and Tab.
19. Snap any app or window to
the side of your screen by hitting either Alt and [ (left bracket) for
the left side or Alt and ] (right bracket) for the right side. Repeat
the command a second time to return the app or window to its default
centered position.
20. Minimize an app or window by pressing Alt
and - (the minus key). Press that same key sequence again to bring the
app or window back up into its previous position.
21. Maximize an
app or window by pressing Alt and = (the equals key). Press that same
key sequence again to move the app back into its previous size.
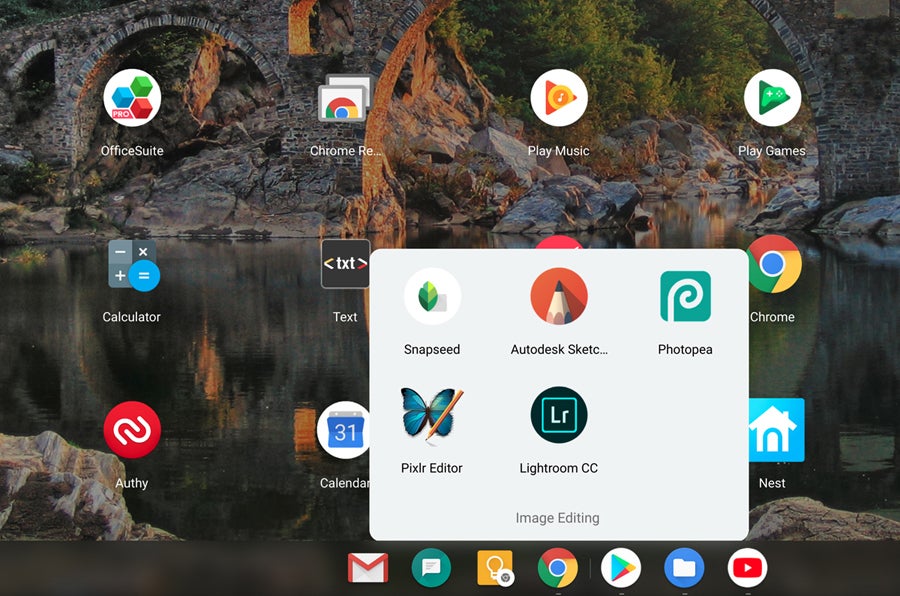
22.
Give your Chromebook's apps some extra organization by creating folders
within the Chrome OS launcher. All you've gotta do is click or tap on
any app and then drag it on top of another app's icon. You can then
click or tap to open the folder and give it a name. And if you ever want
to take an app out of a folder, just click or tap the app in question and drag it out.
JR Raphael/IDG
Organize your Chromebook's launcher by grouping similar apps together into folders. (Click the image to enlarge it.)
Getting around the web
23.
Within a regular browser window, swipe left on the screen — or on your
trackpad, using two fingers — to go back one page in your browsing
history. Swipe right to go forward.
24. You can also press Alt and the left or right arrow key to accomplish the same thing.
25. In a window with multiple tabs, swipe left or right on your trackpad with three fingers to move among the tabs.
26.
Next time you want to open a link as a new tab, save yourself a step
and simply click the link with three fingers on your trackpad. It'll
automatically open into a new tab in the background — no right-clicking
and menu-selecting required.
27. Close a tab quickly by hovering over its title bar and then clicking your Chromebook's trackpad with three fingers.
28. Pull up the browser's main menu in a jiff by hitting Alt-E while in an active window.
29.
Need to open up a new browser window from the Chrome OS desktop — or
pretty much anywhere else in the operating system? Just hit Ctrl-N.
30.
Add any website you visit regularly into your device's shelf for easy
on-demand access by opening Chrome's menu (while viewing the site),
selecting "More tools," and then selecting "Create shortcut."
31.
If you have a shortcut to a website in your Chromebook's shelf and you
want it to look more like a regular app — without the browser-oriented
elements — right-click or long-press its icon, hover over the arrow next
to "New tab," and select "New window" from the panel that appears.
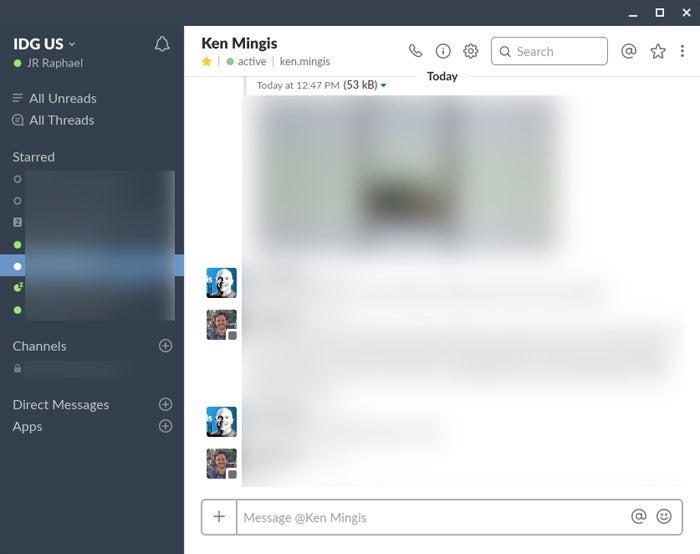
32.
If you're really feeling ambitious, you can go a step further and turn
any website into an actual native Chrome app — with any icon and color
scheme you want — by following the steps outlined on this page.
JR Raphael/IDG
You can make any website look and act like a native Chrome app, as seen here with Slack.
33. Some websites — such as Sling TV — somehow still don't
recognize a Chromebook as a valid type of computer and consequently
won't let you sign in and use their services. You can get around this by
installing the free User-Agent Switcher for Google Chrome
extension. Then, just select a different operating system within the
extension's menu, and that's it: The silly website will be tricked into
thinking you're on a different type of device — and whaddya know,
everything will suddenly work fine.
Improving your text input
34.
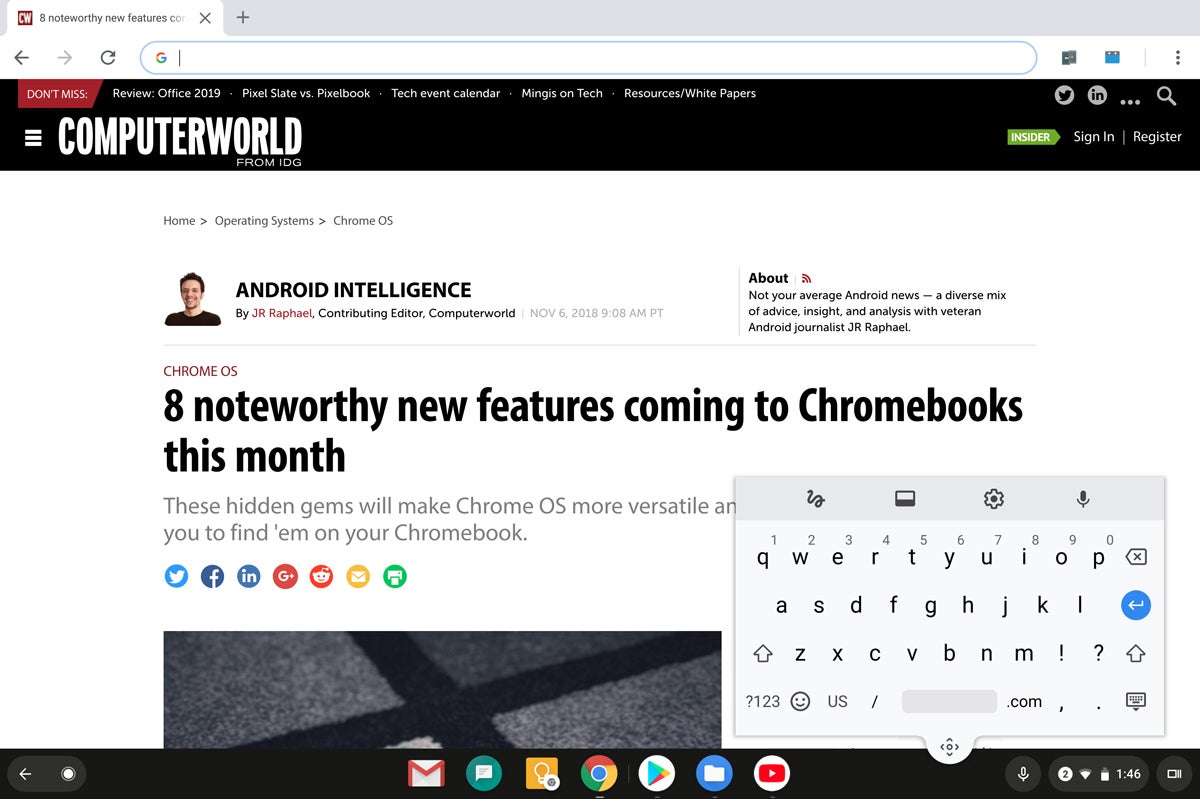
Don't make yourself use that oversized on-screen keyboard that comes up
by default in a Chromebook's tablet mode. Instead, tap the second icon
along the keyboard's top row — the one that looks like a rectangle with a
small, dark rectangle inside it. That'll shrink Chrome OS's keyboard
down into a far more manageable phone-like keyboard that you can move
around (using the "handle" at the keyboard's bottom) and place anywhere
you like.
JR Raphael/IDG
The floating on-screen keyboard is much easier to use than Chrome
OS's default full-width version. (Click the image to enlarge it.)
35. If handwriting is more your thing, be it with your
finger or a stylus, tap the first icon along the Chrome OS keyboard's
top row — the one that looks like a hand-drawn squiggle. That'll give
you an open canvas on which you can write anything you want by hand and
have it converted into text as you go.
36. Chrome OS's on-screen
keyboard has a built-in microphone icon that makes voice-to-text simple
for tablet-style usage, but you can actually tap into the same superb
dictation system even when using a Chromebook with a physical keyboard:
Open up your Chromebook's settings, scroll all the way down to the
bottom, and tap "Advanced." Scroll down more until you see the
"Accessibility" header, then tap "Manage accessibility features" beneath
it. Next, activate the toggle next to "Enable dictation (speak to
type)," beneath the "Keyboard and text input" header. That'll put a
small microphone icon in the lower-right corner of your screen, next to
the notification panel; you can then tap it anytime to start speaking
and have your words transcribed wherever your cursor is active.
37.
Find yourself missing the Caps Lock key? Press the Search key and Alt
together to activate Caps Lock. When you're ready to STOP SHOUTING,
press Search and Alt again to switch back to normal text.
38. Alternatively, if you really
miss Caps Lock — and don't mind giving up Chrome OS's Search key to
have it — you can remap the Search key so that it functions as a Caps
Lock key by opening your Chromebook's settings and selecting "Keyboard"
(beneath the "Device" header).
39. Give your Chromebook extra typing smarts by installing Text Blaze, an extension that lets you create complex custom macros
for your most commonly used phrases. You could set it up to
automatically fill in your mailing address anytime you type "/add" or
even to fill in a complicated email template whenever you type something
like "*go." The possibilities are practically endless, as is the
potential for saving time.
Managing files
40. Chromebooks are all
about the cloud and keeping your data perpetually synced — but by
default, any files you download are actually stored in a local device
folder. Fix that by opening up your Chromebook's settings, scrolling to
the bottom, and selecting "Advanced." Find the line labeled "Location"
under the "Downloads" header. Click "Change" and select a folder (or
make a new folder specifically for downloads) within your Google Drive
storage. Now, anything you download will automatically be saved to Drive
and thus be instantly available wherever you sign in.
41. If you really
want to get wild, you can crank up your Chromebook's cloud-connecting
power even more by having your Windows or Mac computer and Android phone
also sync downloads with that same Drive folder — effectively
creating a single device-agnostic and internet-based "Downloads" folder.
That way, anything you download will always be available on any device
you're using. You can find the full instructions, if you dare, in this Android Intelligence column.
42.
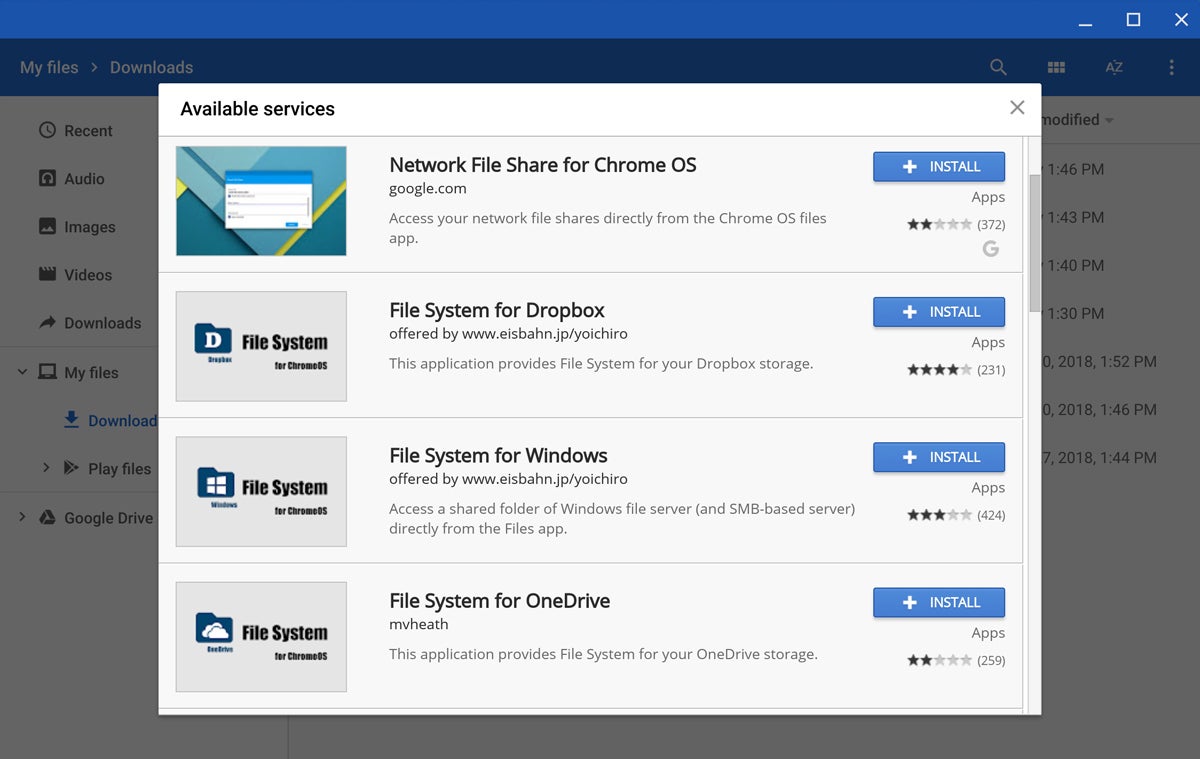
Want your Chromebook to integrate with cloud storage beyond just Google
Drive? No problem: Open up Chrome OS's Files app, click or tap the
three-dot menu icon in its upper-right corner, and select "Add new
service" from the menu that appears. You can then select to add a new
SMB file share — if you have a network server you want to be able to
access — or to install a new service, if you want to integrate Dropbox,
OneDrive, or other remote storage services into the Files app for
system-wide use.
JR Raphael/IDG
A few quick clicks are all it takes to integrate Dropbox, OneDrive,
and other cloud services directly into Chrome OS's file system. (Click
the image to enlarge it.)
43. You can create custom shortcuts to commonly used folders
— from either your local storage or any connected cloud service — in
the left panel of your Chromebook's Files app for easy ongoing access.
Find the folder you want and right-click it, then select "Create
shortcut" to add it into the list.
44. Speaking of your Files app, a shortcut to remember: You can quickly open it anytime, from anywhere, by hitting Shift-Alt-M.
45.
While in the Files app, you can switch between different sections by
hitting Ctrl and then the number keys that correspond with their
position (Ctrl-1 for Recent, Ctrl-3 for Images, and so on).
46.
Chrome OS's Files app has a built-in photo editor that's perfect for
basic image manipulation. While viewing an image in Files, click the
pencil-shaped icon in the upper-right corner — or hit "e" on your
keyboard — to get started.
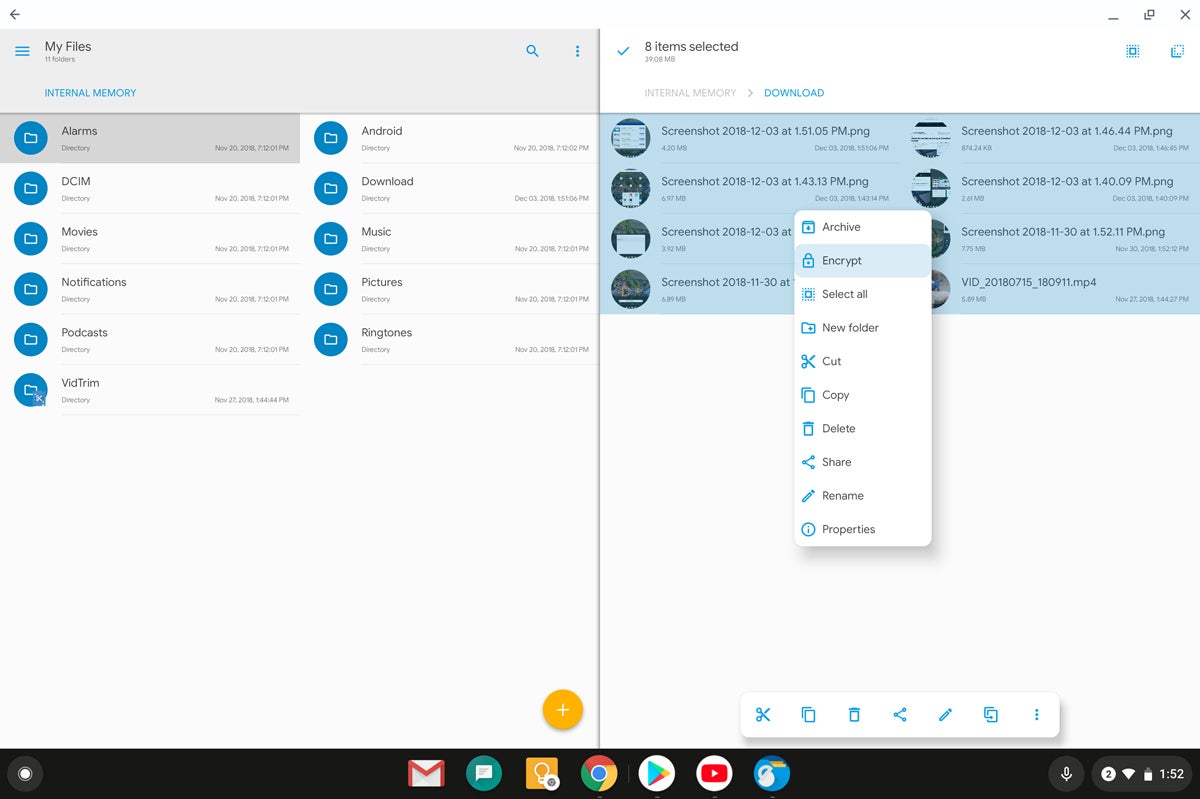
47. For an even more robust file management experience, try installing the Solid Explorer Android app (also my top pick for advanced file management on Android)
onto your Chromebook. It's optimized for Chrome OS support and gives
you a two-panel view for fast dragging and dropping of files between
different locations — including your regular Chrome OS storage, the area
of your storage reserved for Android apps, and a huge variety of
cloud-based storage accounts you can opt to connect. It also empowers
you to add extra encryption onto specific files or folders and even to
create password-protected ZIP or 7ZIP archives. The app costs $2 after a
two-week trial.
JR Raphael/IDG
Solid Explorer gives you advanced file management functions like a
two-panel view and additional layers of encryption. (Click the image to
enlarge it.)
Simplifying security
48. Your Android phone can serve as a virtual key to your Chromebook. All you have to do is set up Smart Lock,
which lets you avoid typing in your password whenever your phone is
unlocked and nearby. Open the "Connected devices" section of your
Chromebook's settings to enable the feature and configure its options.
49.
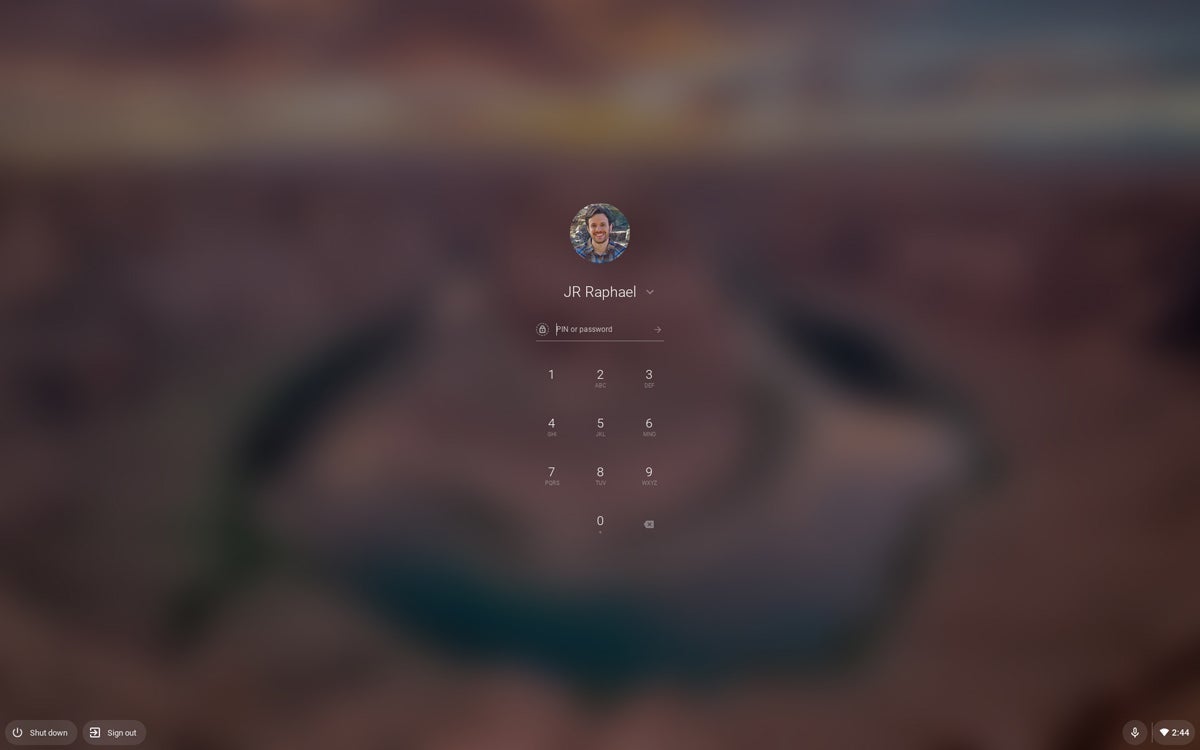
If you're using a convertible Chromebook as a tablet, you probably
don't want to type in your full password on a giant virtual keyboard
every time the system wakes up — especially if you're in a public place
with lots of wandering eyes. Luckily, there's a better way: In the
"Screen lock and sign-in" section of your device's settings (under the
"People" header), you'll find an option to create a PIN that can be
tapped in more discreetly on the screen, similar to how you'd unlock a
phone.
JR Raphael/IDG
Setting a PIN makes it more practical to unlock a Chromebook in its tablet mode. (Click the image to enlarge it.)
50. Let someone else use your Chromebook without gaining
access to all your info with the help of Chrome OS's Guest Mode. Just
look for the "Browse as Guest" option on the lock screen when no one is
actively signed in. That'll open up an incognito-like environment where
no personal or account-related data is available and nothing that
happens is saved beyond that session.
51. By default, Chromebooks
make it easy for anyone to add an account and sign in from the lock
screen — something you may not want to have happen on your work device.
You can turn this feature off by opening the "Manage other people"
section in your Chromebook's settings. Activate the toggle next to the
line labeled "Restrict sign-in to the following users" and then make
sure only your account and any others you want on the device are
included in the list.
52. Next time you're stepping away from your
Chromebook, secure it quickly by hitting the Search key and then L.
That'll take you back to the lock screen and the account sign-in prompt.
53.
If you want to go a step further, hitting Ctrl-Shift-Q twice will sign
you out of the Chromebook completely — closing any open apps, windows,
and so on — no matter where you are in the system or what you're doing.
Embracing system tools
54.
Chromebooks have multiple ways to capture screenshots, three of which
are particularly useful: To capture the entire screen, either hit Ctrl
and the Overview key if your physical keyboard is handy — or press your
device's physical power and volume-down buttons if you're using a
Chromebook in its tablet mode. To capture a specific limited area of the
screen, hit Ctrl, Shift, and the Overview key and then use the
on-screen guides to select the area you want.
55. Need to focus?
Open up Chrome OS's notification panel — at the bottom-right of the
screen — and click the icon that looks like a circle with a line through
it (above the word "Notifications"). That'll put your Chromebook into
Do Not Disturb mode, and no notifications will alert you until you turn
it off.
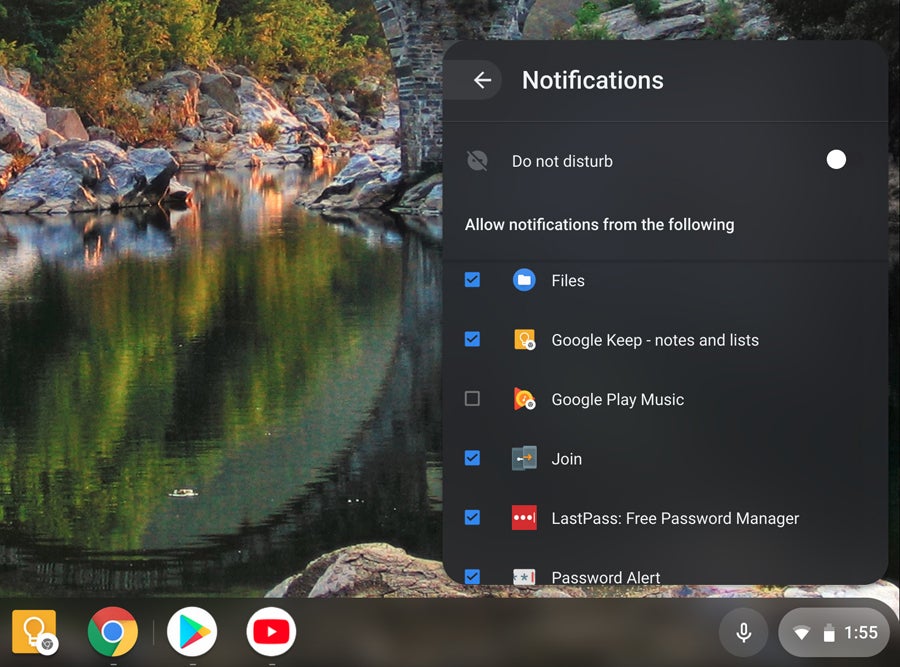
56. You can also limit which apps and processes are
allowed to notify you in general. Just click the word "Notifications" in
that same area of the notification panel and then uncheck any titles
you don't want to be able to generate alerts.
JR Raphael/IDG
Stop individual apps and processes from notifying you to cut down on distractions. (Click the image to enlarge it.)
57. Give your eyes a break from the glare and take advantage
of Chrome OS's Night Light mode whenever you're staring at your screen
in the dark. Night Light adjusts the temperature of your display to make
it less harsh in dim conditions (just like the same-named feature on
certain Android phones, such as Google's Pixel devices). You can
activate it by looking for the Night Light button within the Quick
Settings panel — and you can customize its appearance and even tell it
to turn on and off automatically based on the time of day by looking in
the "Displays" section of the Chrome OS settings.
58. Speaking of
visual optimization, take a moment to explore Chrome OS's recently
updated wallpaper tool, which allows you to pick a category of images —
things like cityscapes, landscapes, and art — and then have the system
automatically refresh your device's wallpaper with a new image every
day. After all, a pleasant work environment is critical for
productivity, right? Right-click (or long-press) on an open area of your
desktop and select "Set wallpaper" to check out the options.
59.
If your Chromebook is running slowly or an app is acting up, hold the
Search key and then hit Esc to open Chrome OS's Task Manager. There, you
can see memory and CPU use for every active process and manually end
any item as needed.
60. Pressing Alt and then the brightness up or
down keys (in your keyboard's function row) will let you manually
adjust your keyboard's backlighting — assuming, of course, that your
Chromebook has a backlit keyboard.
61. Stylus users, listen up: If
your Chromebook came with a connected stylus, be sure to look for the
stylus menu in the lower-right corner of the screen (alongside the
settings and notification panels). It'll give you quick-tap options for
changing your stylus's current function and taking full advantage of
everything it can do.
Breaking down boundaries
62. Don't forget about Chrome Remote Desktop.
It's a simple and effective way to access another computer (Windows,
Mac, Chrome OS, or Linux) from your Chromebook without any costly or
complicated software.
63. If you need to show your Chromebook's
screen on a larger display, meanwhile — like a Chromecast-connected TV
in your office, conference center, or abode — look for the "Cast" option
in the Chrome OS Quick Settings panel. It'll automatically pull up any
compatible Cast targets on the same Wi-Fi network, and with one more
tap, your computer's screen will be mirrored.
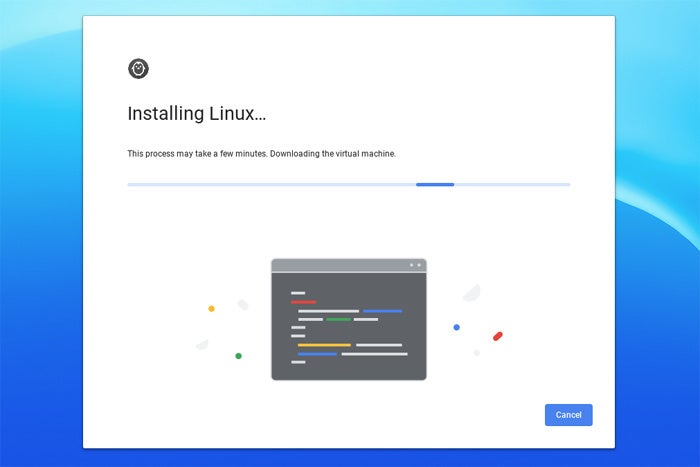
64. Remember that
many recent Chromebooks can now run Linux apps — something that won't be
sensible or necessary for most people but can be an interesting way for
advanced users to expand Chrome OS's horizons. See my detailed Linux apps on Chrome OS guide to get started.
JR Raphael/IDG
Setting up your Chromebook to run Linux apps isn't exactly simple,
but for certain types of advanced users, it can open up a lot of
intriguing possibilities.
65. Want to use a browser other than Chrome on your
Chromebook for a while? That's actually now possible, thanks to the
availability of Android apps on Chromebooks. Provided your Chromebook is recent enough to support the Google Play Store, just open it up and take your pick. You can install common favorites like Firefox and Opera along with more niche-oriented titles like Dolphin and Puffin. Heck, if you really want to get crazy, you can even install the Chrome Android app and run it on your Chromebook. Just be prepared to see the ghost of M.C. Escher cackling off in the distance.
This story was originally published in November 2017 and updated in December 2018.
First, you should know that the experts always knew Edge would run on Linux. Today's Microsoft Edge isn't the one that first shipped. This model, which went into beta on Windows last year, is built on the open-source Chromium codebase. Besides being the foundation for Google Chrome, Chromium is the bedrock that almost all web browsers, with the exception of Firefox, are built on these days. So, bringing Edge over to Linux isn't anything as difficult as, say, bringing on-premise Microsoft Office to Linux.
Now, the first beta of Edge on Linux is here. The new release comes ready to run on Ubuntu, Debian, Fedora, and openSUSE Linux distributions. It should run on any Linux using DEB or RPM packaging. Microsoft is planning to release weekly builds, just as it does with the Dev Channel builds for other platforms.
This initial release is meant for developers who want to build and test their sites and apps on Linux. It's not meant for ordinary users. This preview does come with the key web platform and developer tools features. These include core rendering behaviors, extensions, browser DevTools, and test automation features. These should work just as they do with Edge on macOS and Windows.
Some end-user features and services aren't fully enabled. In particular, the initial release only supports local accounts. It doesn't support signing in to Microsoft Edge via a Microsoft Account or Azure Active Directory (AAD) account. Therefore, you also can use features such as syncing your settings and bookmarks, which require you to sign in to a Microsoft service. These features will appear in a future beta.
Since I've been benchmarking web browsers since Mosaic rolled off the bit assembly line, I benchmarked the first Edge browser and Chrome 86 and Firefox 81 on my main Linux production PC. This is a Dell Precision Tower 3431. It's powered by an 8-Core 3GHz Intel Core i7-9700. For graphics, it uses a built-in Intel UHD Graphics 630 chipset. On this, I run my favorite Linux desktop distribution, Linux Mint 20. For networking, the system uses a 100Mbps internet connection via a Gigabit Ethernet switch.
JETSTREAM 2
First up: JetStream 2.0, which is made up of 64 smaller tests. This JavaScript and WebAssembly benchmark suite focuses on advanced web applications. It rewards browsers that start up quickly, execute code quickly, and run smoothly. Higher scores are better on this benchmark.
JetStream's top-scorer -- drumroll please -- was Edge with 136.971. But, right behind it within the margin of error, was Chrome with a score of 132.413. This isn't too surprising. They are, after all, built on the same platform. Back in the back was Firefox with 102.131.
KRAKEN 1.1
Next up: Kraken 1.1. This benchmark, which is based on the long-obsolete SunSpider, measures JavaScript performance. To this basic JavaScript testing, it added typical use-case scenarios. Mozilla, Firefox's parent organization, created Kraken. With this benchmark, the lower the score, the better the result.
To no great surprise, Firefox took first place here with 810.1 milliseconds (ms). Following it was Chrome with 904.5ms and then Edge with 958.8ms.
OCTANE 2.0
Octane 2.0, Google's JavaScript benchmark, is no longer supported, but it's still a useful benchmark thanks to its scenario testing for interactive web applications. Octane is not Chrome-specific. For example, it tests how fast Microsoft's TypeScript compiles itself. In this benchmark, the higher the score, the better.
On this Google benchmark, Edge took the blue ribbon with a score of 52,149. Right behind it in second place was Chrome with 51,389. Then, way back in last place, you'll find Firefox at 37,405.
WEBXPRT 3.0
The latest version of WebXPRT is today's best browser benchmark. It's produced by the benchmark professionals at Principled Technology This company's executives were the founders of the Ziff Davis Benchmark Operation, the gold-standard of PC benchmarking.
WebXPRT uses scenarios created to mirror everyday tasks. These include Photo Enhancement, Organize Album, Stock Option Pricing, Local Notes, Sales Graphs, and DNA Sequencing. Here, the higher the score, the better the browser.
On this benchmark, Firefox shines. It was an easy winner with a score of 272. Chrome edges out Edge 233 to 230.
HTML 5 WEB STANDARD
You'd think by 2020, every browser would comply with the HTML 5 web standard, which became a standard in 2014. Nope. You'd be wrong. This "test" isn't a benchmark. It just shows how close each browser comes to being in sync with the HTML 5 standard. A perfect score, which none got, would have been 550.
Here, Chrome and Edge tied for first with 528. Firefox scored 511.
That said, I can't see myself moving to it. No, it's not because I'm still mad at what Microsoft did to Linux as revealed in the Halloween documents of 1998. It's that Chrome is more than fast enough for my purposes and I don't want my information tied into the Microsoft ecosystem. For better or worse, mine's already locked into the Googleverse and I can live with that.
Honestly, I don't see any compelling performance reasons to switch from Chrome or Firefox to Edge on Linux. I've been happily using Chrome for years now across platforms, and I won't be changing. If you're happy using Firefox or one of the others, go ahead and stick with it. There's no compelling reason to switch to Edge.
That said, Edge is a good, fast browser on Linux. If you're a Windows user coming over to Linux or you're doing development work aimed at Edge, then by all means try Edge on Linux. It works and it works well.
I got to try the recently released Linux Lite 5.2 based on Ubuntu 20.04. It uses an XFCE desktop and has a great set of themes, wallpapers, LibreOffice suite, and new user add-ins. The developers succeeded in making it look a lot different than the standard XFCE desktop. It reminds me of the Budgie desktop in some ways. It features a Welcome screen with shortcuts to update and add software. It also has the Synaptic package manager, LibreOffice, Gimp, VLC, firewall, and conky installed out of the box. It also features a Help File for new users. To the standard build, I added OnlyOffice office suite, Audacious and Rhythmbox music players, Deluge torrent client, Nemo and Caja file managers, and Chrome and Edge web browsers. Because it is uses the XFCE desktop, it only uses only 577 MB memory. Below is the release announcement from www.DistroWatch.com, and a link where you can get it. This is a great distro to enjoy on any PC. Enjoy.
Jerry Bezencon has announced the release of Linux Lite 5.2. The project's latest release is based on Ubuntu 20.04.1 and introduces a number of small changes and improvements. The firewall can now be managed through a module in the settings panel, old GTK2 software and themes have been removed, Adobe Flash is no longer included in the distribution, and new packages have been added to the Lite Software package manager. The distribution also includes some package updates: "Details: kernel: 5.4.0-52 ( custom kernels also available via our Repository for versions 3.13 - 5.9); Firefox: 82.0; Thunderbird: 68.10.0; LibreOffice: 6.4.6.2; VLC: 3.0.9.2; GIMP: 2.10.18; Base: 20.04.1. Known Issues: No prompt to eject Media at the end of the Legacy install, prompt is available at the end of the UEFI install. Release Notes - not working on first installer slide. Desktop icons - English support only. GRUB - holding shift down whilst booting in UEFI mode does not bring up the GRUB menu (works in Legacy mode), waiting for Ubuntu fix. GRUB menu shows Linux Lite as 'Ubuntu'. After you install Linux Lite, you can change GRUB to show 'Linux Lite'." Further information and screenshots can be found in the project's release
You can download Linux Lite 5.2 here: https://www.linuxliteos.com/download.php
We all love listening to music. Well, at least most of us do. Whether it’s just listening to cool ambient music as we work on our PC or unwinding after a long day’s work, music plays a crucial role in our everyday lives.
In this article, we have put together a list of some of the most popular music players that you can install on your system and play your favorite music as you blow off some steam.
1. Rhythmbox Audio Player
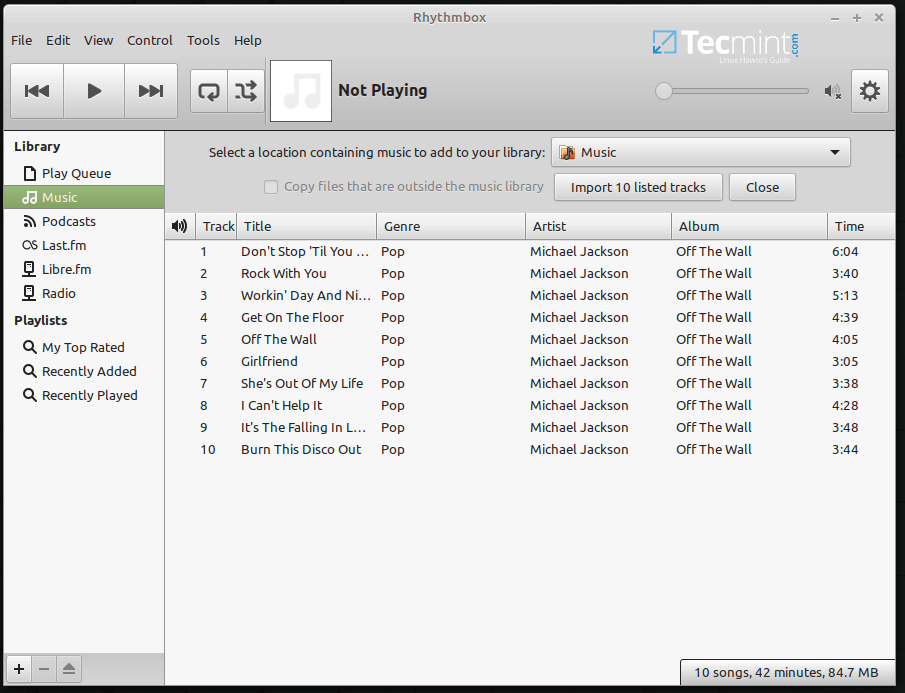
Rhythmbox is an opensource and easy-to-use audio player that ships by default with Linux systems running the GNOME desktop environment. It comes with a neat UI and helps you organize your audio files into playlists for better user experience.
Users can make a few tweaks such as repeating or shuffling music and changing the appearance of the music player using the ‘Party mode’ option which scales the window to full screen.
In addition to playing audio files, you can stream a wide array of internet radio stations and listen to podcasts from around the world. You can also link to last.fm online platform that will create a profile of your most listened to music either locally or streaming online radio. And to extend its functionality, it packs with 50 third-party plugins and many more official plugins.
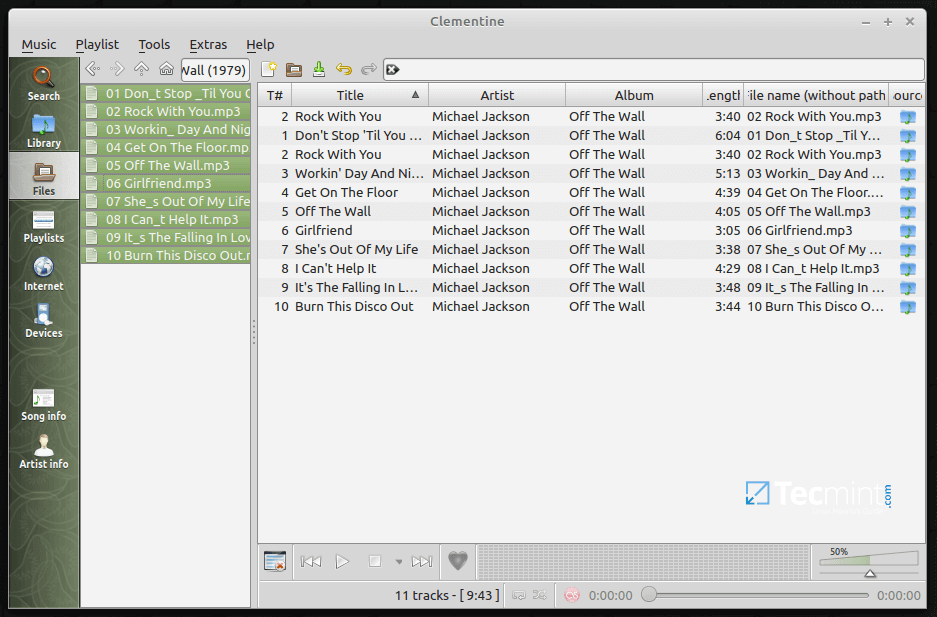
Written in Qt, Clementine is a cross-platform feature-rich music player that lets you do so much more than just playing audio files. The audio player comes with a tree-navigation menu that makes searching for audio files a walk in the part.
Under the hood, the player is replete with a sea of advanced options. You can get almost everything: from a visual and equalizer to a built-in music transcoding tool that allows you to convert your audio files to 7 audio formats. Clementine also allows you to search and play music files backed up on cloud platforms such as OneDrive, Google Drive, and DropBox for music on online
If you are an online-streaming enthusiast, listening to online radio stations and podcasts is on a whole new level. Clementine accords you the luxury of streaming up to 5 internet radio platforms such as Jamendo, Sky FM, Soma FM, Jazzradio.com Icecast, Rockradio.com and even stream from Spotify and SoundCloud.
Other features include desktop notifications, playing and ripping audio CDs, editing playlists and ability to import music from external drives.
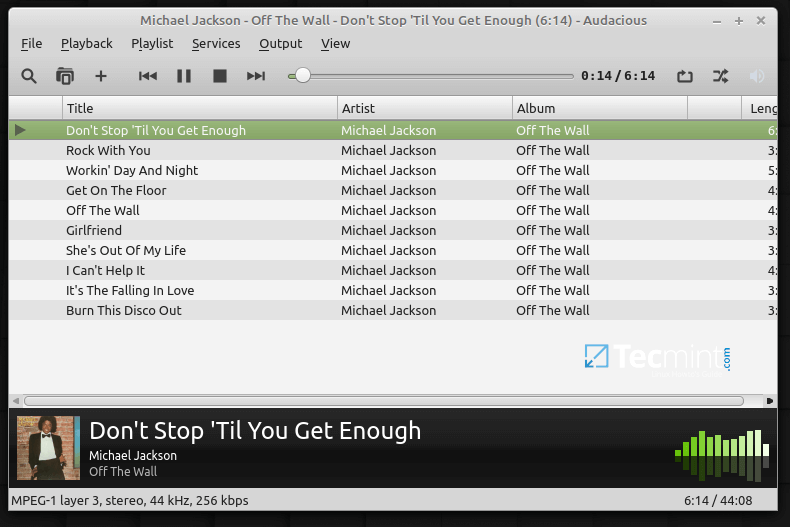
Audacious is yet another free and opensource audio player that is especially recommended for Linux systems with low CPU and RAM specifications. The reason is simple: Audacious is resource-friendly while at the same time producing high and satisfactory audio quality. Unlike Clementine, It lacks advanced features & functionalities.
Nevertheless, it comes with a simple and intuitive user interface which is just okay if you are looking into playing your saved audio files. You can perform basic tasks like creating playlists, importing audio files or folders into the player, shuffling music, and playing music from CDs.
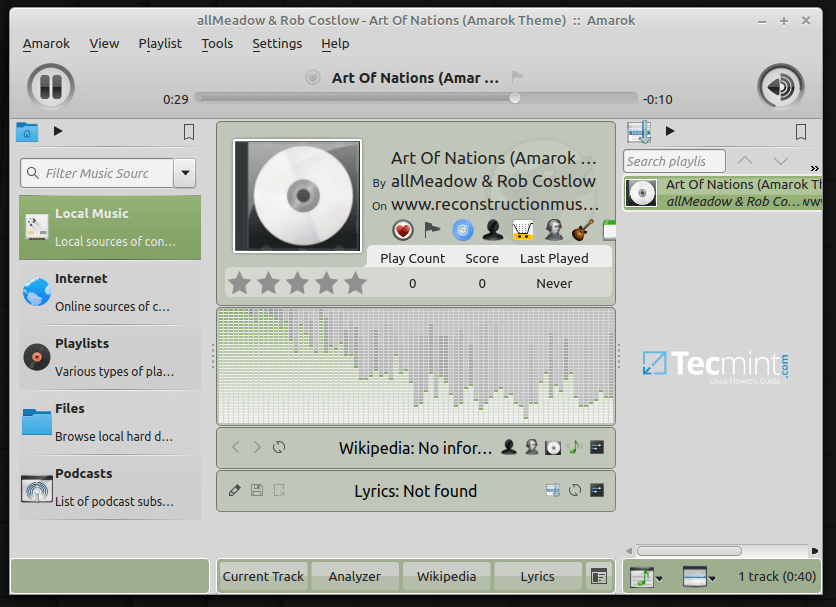
Written in C++, Amarok is yet another cross-platform and opensource audio player with a few striking features. First off, the audio player detected duplicate entries in the playlist and give you an option to ignore adding the duplicate files. It comes with a visually-appealing UI that easy to use and navigate.
Another thing that stands out with Amarok is its ability to pull cover art and artistes’ bio from Wikipedia as shown in the attached screenshot. The application scores highly in the high-quality music output and underlying nifty features such as creating playlists, viewing music lyrics, creating custom shortcuts, and changing the application language. Given its features, it’s by the greatest music player that you can install and reap from its war chest of features.
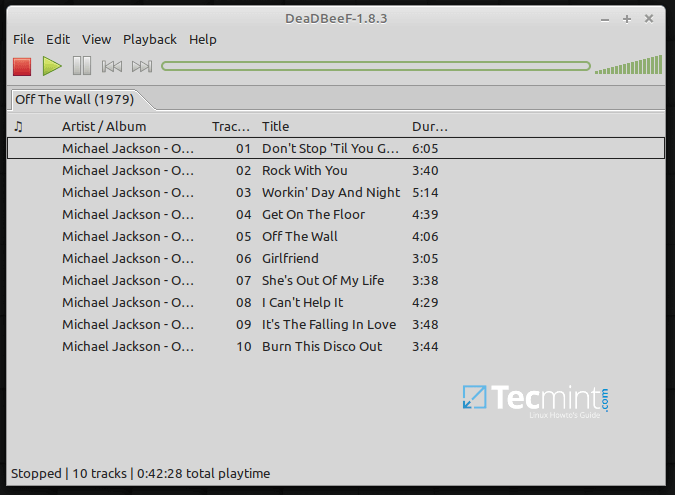
DeaDBeef is a compact and efficient audio player that is written in C++ and comes with a native GTK3 GUI. IT supports a wide range of media formats and packs with multiple plugins.
It’s stripped down in terms of any advanced features and users will have to make do with playlist-based music and basic tasks such as shuffling, repeating music, and editing metadata to mention a few.
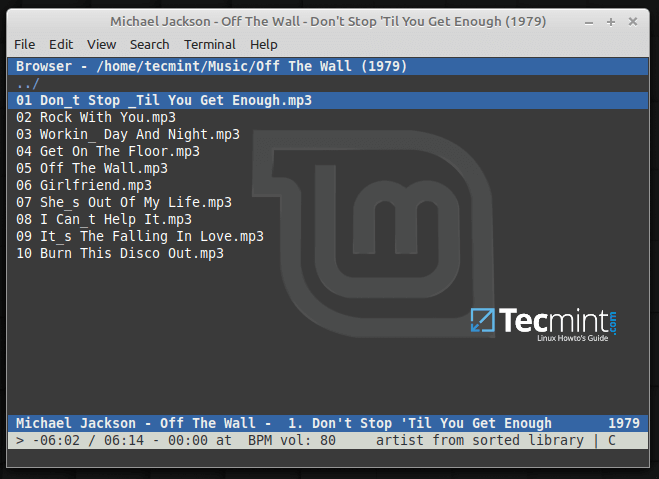
The audio players we have covered to far have a graphical user interface with menus, buttons, and panels. As you might have observed, CMUS is devoid of any GUI tools and is basically a command-line media player.
Install CMUS in Ubuntu and Linux Mint
To install CMUS, simply run the commands:
$ sudo apt update
$ sudo apt install cmus
To start cmus, simply run the command cmus on the terminal and press 5 on the keyboard to display a hierarchical list of your directories. From there, you can navigate to your destination folder that contains audio files and select the file you want to play.
CMUS – Console Music Player
7. Sayonara Audio Player
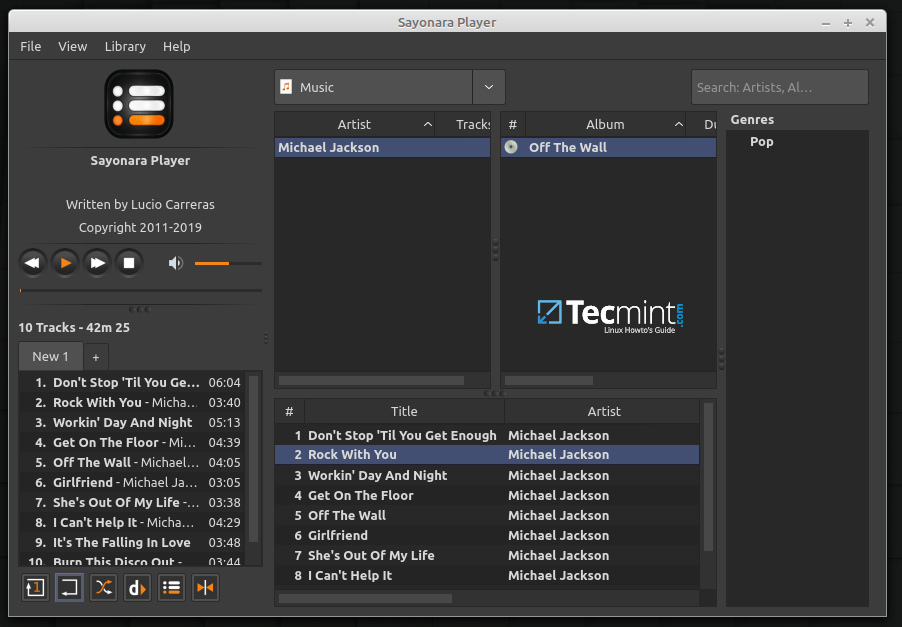
Another application worth mentioning is Sayonara. The application ships with a cool looking UI with features and functionalities that are more or less what you’d find in Rhythmbox. You can add files and create playlists, listen to online radio ( SomaFM, and Soundcloud), and make numerous other tweaks such as changing the default theme.
Sayonara, however, is stripped of overblown advanced features, and just like Rhythmbox, users are restricted to only a few online streams and listening to music saved on their PC.
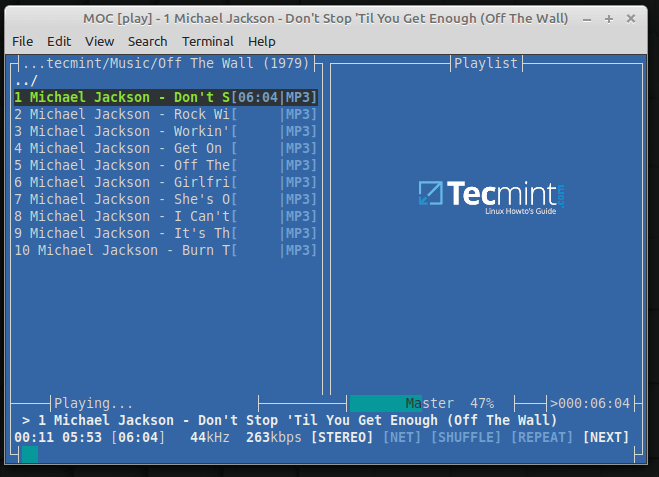
Just like CMUS, MOC is another lightweight and terminal-based music player. Surprisingly, it’s quite efficient with features including key mapping, a mixer, internet streams, and the ability to create playlists and search for music in the directories. Additionally, it supports output types such as JACK, ALSA, and OSS.
MOC – Terminal Music Player
Install MOC in Ubuntu and Linux Mint
$ sudo apt-get update
$ sudo apt-get install moc moc-ffmpeg-plugin
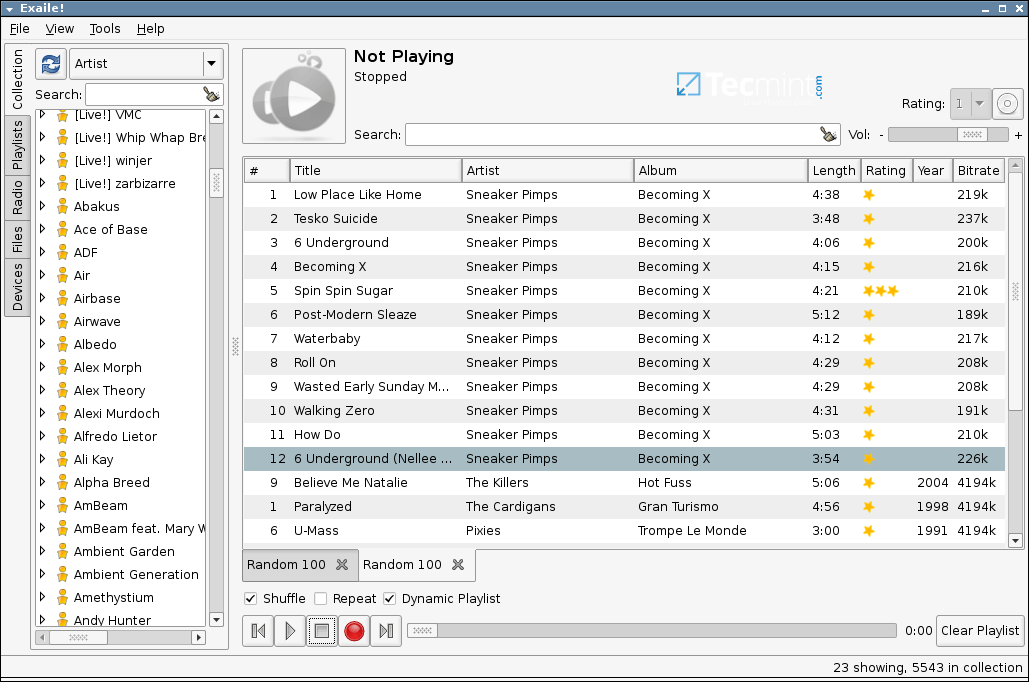
9. Exaile Music Player
Exaile is an opensource and cross-platform music player that is written in Python and GTK+. It comes with a simple interface and is replete with powerful music management functionalities.
Exaile enables you to create and organize your playlists, fetch album art, stream online radio stations such as Soma FM and Icecast and so much more.
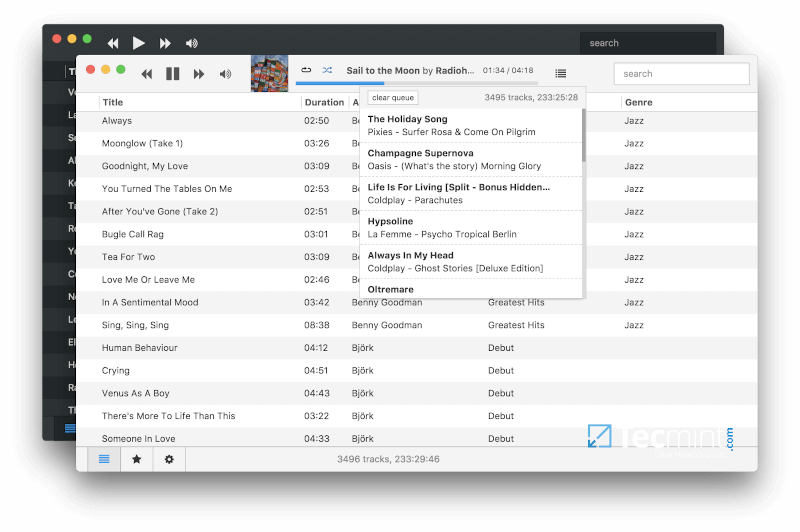
Museeks is another cross-platform simple and clean audio player that is lean on advanced features but still provides the simplicity in playing your music and creating playlists.
You can still perform simple tasks like changing the theme to dark theme, repeating, and shuffling music. This is by far the simplest of all the audio players in terms of features and functionality.
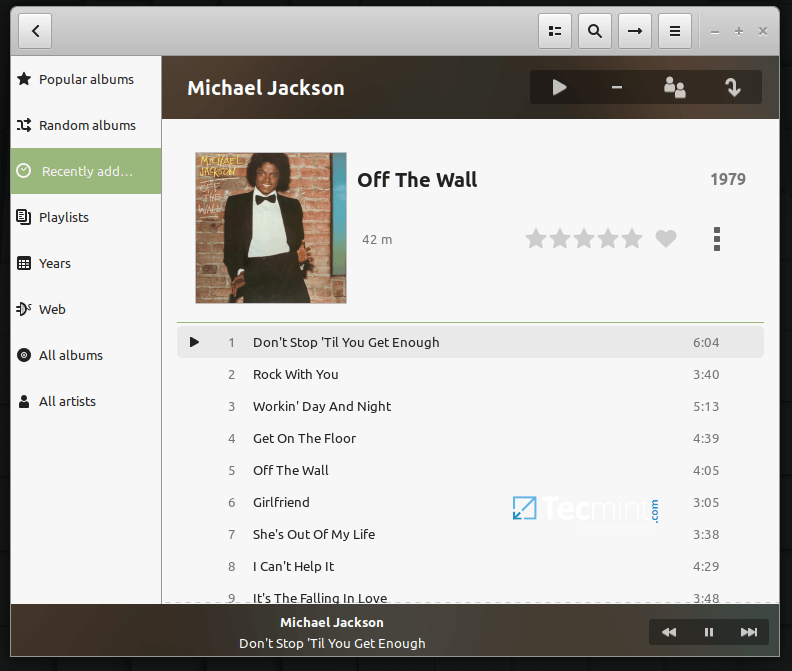
Lollypop is an opensource and free-to-use graphical music player that is very user-friendly and also does quite a good job of organizing your music. It’s tailored for GTK-based desktop environments such as GNOME and intuitively organizes your music collection into categories such as music genres, year released, and artist names. It’s super easy to navigate the application and get what you want.
It supports a vast array of file formats including MP3, MP4, and OGG audio files. You can stream online radio, and perform other application tweaks such as configuring keyboard shortcuts, changing theme appearance, enabling cover art & smooth transitions and importing playlists to mention a few.
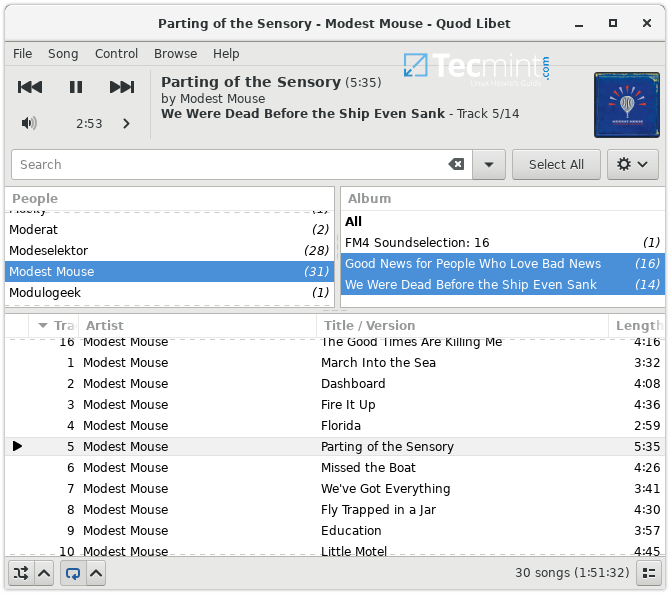
Written in Python, Quod Libet is a GTK-based music player that uses the Mutagen tagging library. It comes with a clean and simple UI, completely stripped off any fancy features.
The player is plugin-rich and supports tag editing, replay gain, album art, library browsing & internet radio with hundreds of stations to tune into. It also supports mainstream audio formats such as MP3, MPEG4 AAC, WMA, MOD, and MIDI to mention a few.
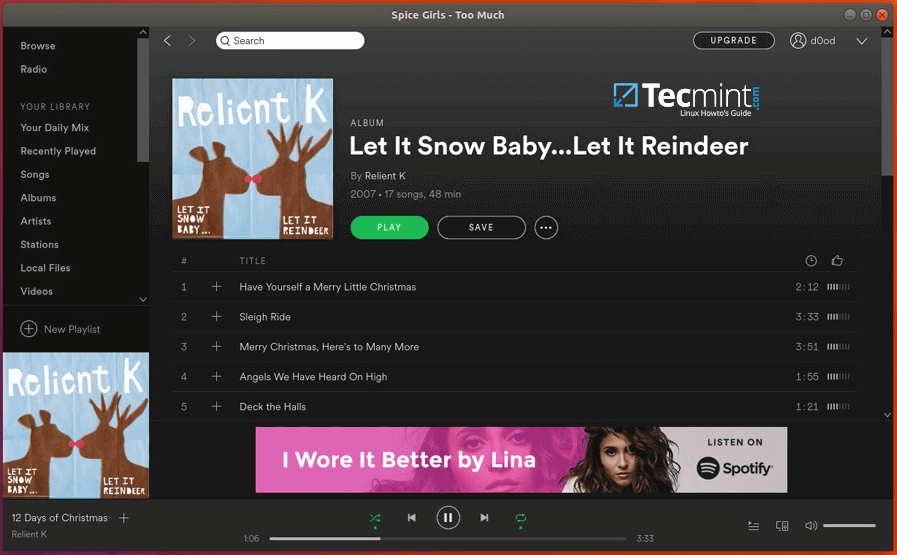
Spotify is arguably the most popular streaming service with millions of active users from across the globe. What strikes me the most about this application is its beautifully-designed UI that lets you navigate easily and browse your music genres. You can search and listen to different music genres from thousands of artists across the world.
You can install the Spotify application on Ubuntu & Linux and enjoy your favorite music. Be cautious though, the application is resource-intensive and hogs a lot of memory & CPU and may not be ideal for older PCs.
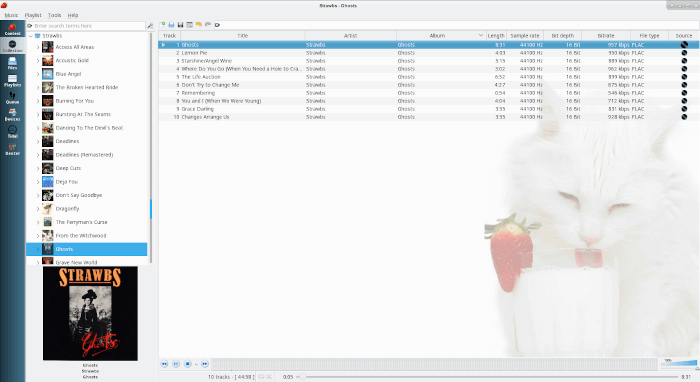
Strawberry is an open-source music player for enjoying large collections of music, that supports almost all common audio formats and comes with more advanced features like metadata tag editing, fetch album art and song lyric, audio analyzer, and equalizer, transfer music to devices, streaming support and more.
Strawberry is a fork of most popular Clementine player which was based on Qt4. Strawberry was developed in C++ using a more modern Qt5 toolkit for its graphical interface.
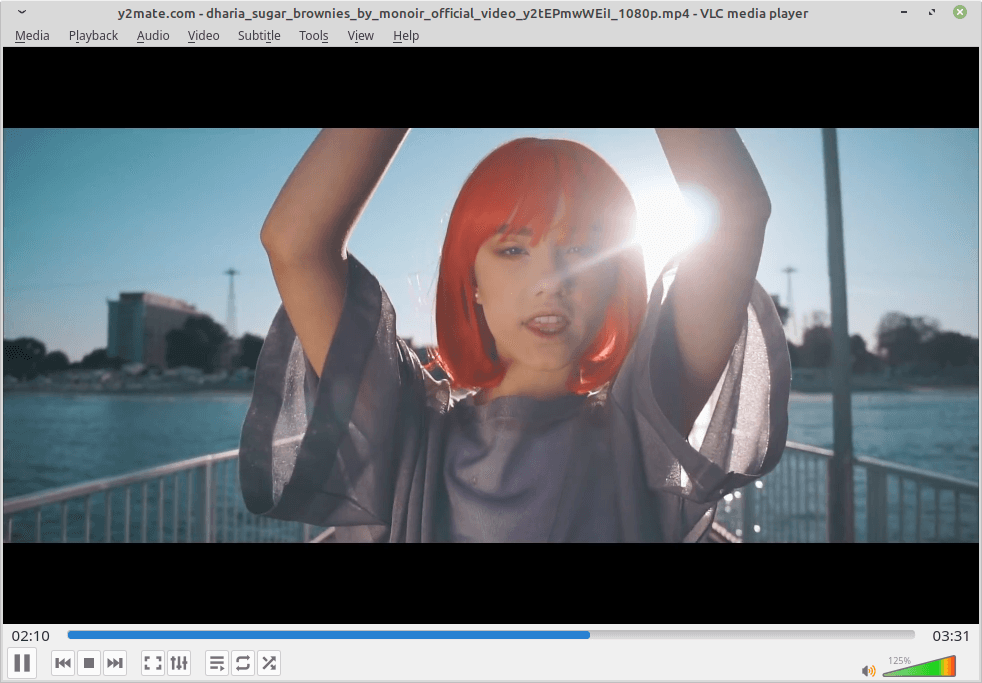
VLC is a free, open-source, and cross-platform portable media player software and streaming media server created by the VideoLAN team. It supports almost all video and audio file formats, compression methods, steaming protocols to stream media over networks, and transcode multimedia files.
VLC is cross-platform, which means it available for desktop and mobile platforms, such as Linux, Windows, macOS, Android, iOS, and Windows Phone.
That was a round-up of what we consider to be the best media players that you can install on your system to help you enjoy your music. There could be others out there, no doubt, but feel free to reach out and share with us if you feel we have left out any audio player worth mentioning.





 JR Raphael/IDG
 JR Raphael/IDG