GIMP vs Photoshop: Which One is Right for You? GIMP vs Photoshop: Which One is Right for You? Photoshop is the most popular image editing app out there and GIMP is the best free alternative to it. Which should you use? Read More If you’re just looking for some basic cropping and resizing to help with a project or even to make an image easier to upload to your favorite social networks, try these tools.
ImageMagick
Your first stop for a good, efficient image-cropping tool for Linux will probably be ImageMagick.In short, this has been around for years. You may have already heard of it. ImageMagick has two main options: usage via command line or via the desktop. We’re looking at the latter option as cropping via command line can be hit and miss (although it is often ideal for making those incisive, memorable crops) and certainly isn’t easy.
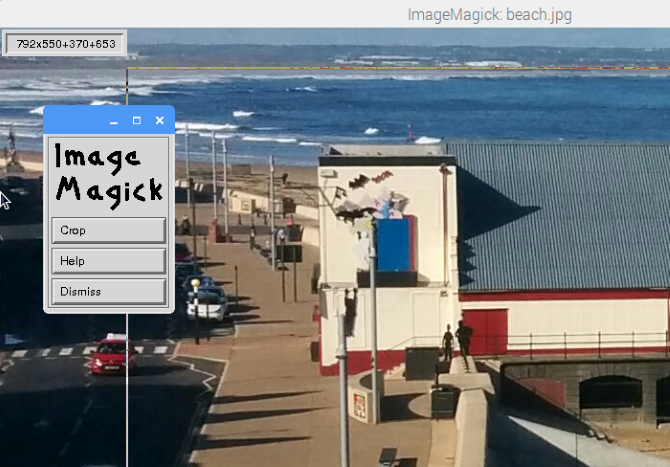
The ImageMagick app doesn’t have the cleanest UI design, but it is functional and efficient.

Install with:
sudo apt-get install imagemagickTo use ImageMagick to crop, first open the app, or right-click your image and select it from the Open With option. Next, left-click anywhere on the image, and select Transform > Crop. Left-click and drag to create box around the area you wish to crop to, and when you’re happy, click Crop.
Remember to save your changes with File > Save.
Gthumb
Perhaps even simpler to use, and complete with a slick, modern UI, is Gthumb.Packed with editing tools and image management options (you can view and edit metadata and add tags for easy image search), the crop function is arguably easier to use than the one found in ImageMagick.

To get started, install with:
sudo apt-get install gthumbOnce done, launch from the menu, or find the image to crop in your desktop’s file manager and right-click, selecting Gthumb from the Open With option.
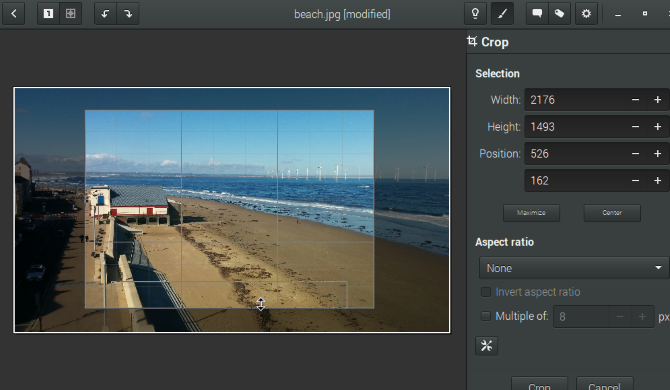
In the app, open your image, then select the paintbrush button to begin editing. You’ll see a number of interesting features here that you’ll probably want to try — you’ll find Crop at the bottom, next to Resize and listed under Format.
To crop, click the button and use the overlaid box to drag the boundary of the intended crop until you’re happy. You can also fine-tune the crop using the + and – symbols on the right-hand pane, specifying numerical values for the crop. The aspect ratio of the crop can also be changed, giving you the option of Instagram-style square crops.
When you’re happy with the selection, click Crop. You can Save via the Settings menu.
Phatch
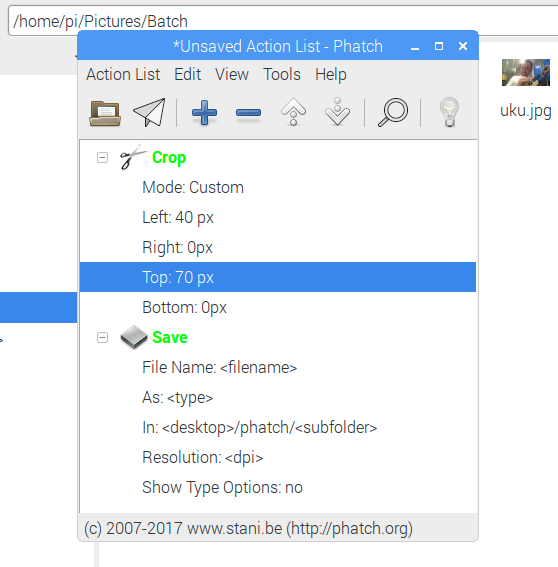
We’ve looked at two good mouse-based cropping options so far, but what if your requirements are little more time-intensive? The solution here would be to employ a batch processing tool to crop many images with a single command.While useful, this can have imprecise results, so should only be used with images that are very similar require the same area to be cropped.

You can install Phatch with:
sudo apt-get install phatchClick + again to select Save, and pay attention to the In: field, which displays the location of the cropped images.
When you’re ready, click the Execute button (the paper airplane) and browse for the images to be cropped. Phatch does the cropping at the directory level, so ensure your images have been gathered together in a single location. When you’re done, click Batch and wait for the files to be cropped.
You’ll find the cropped images in the destination file, as explained above. The default location for this is on the Linux desktop.
Edit Your Photos
We’ve been looking at lightweight image editing tasks so far, but if you’ve stumbled upon this page looking for something with a bit more power for editing photos, for instance, why not try Darktable or Shotwell? These are two great apps that can really bring out the best in your digital photos.Darktable vs. Shotwell: Two Great Photo Editing Applications For Linux Darktable vs. Shotwell: Two Great Photo Editing Applications For Linux Until recently, Linux only had GIMP as an acceptable photo editing tool. That's changed, thanks to a couple new tools that provide impressive features: Darktable and Shotwell. Read More Our look at managing and editing your digital snaps, meanwhile, features many more apps. If you’re a photographer, meanwhile, your focus might be on editing RAW images, and these four tools can help you there.
GIMP is a great tool. So are Shutter and the various other photo editing apps. But if you want a quick way to simply resize or crop your images, and then export them, then there is no point wasting resources on large, feature-packed apps. You know what you need to do — use the right tools. You wouldn’t put a screw in with a hammer, would you?
Of course, our research brought these apps together. Perhaps you know of some other tools for effortlessly resizing or cropping images. If so, we’d love to hear about them, so tell us in the comments.
Source: https://www.makeuseof.com/tag/easily-crop-resize-images-linux/