April 2, 2015
The Most Useful Media Converter For Linux Just Got Better: Meet The New Handbrake
There are so many different codecs out in the world — some are
extremely popular, and others are barely used. While you’re using Linux,
you may come across all sorts of codecs, and you might want to use some
codecs rather than others.
Thankfully, the cross-platform Handbrake utility has gotten a significant update that makes it even better at converting videos between various codecs. Let’s check out all of the exciting stuff in the newest Handbrake.

First of all, there’s lots of under-the-hood improvements in Handbrake. For instance, the utility can now use H.265 (which compresses video even better than the famous codec H.264) as well as VP8. If you don’t know much about these codecs, just know that they’re pretty modern codecs that a lot of videos will be encoded with. Transcoding videos into these codecs will save you space on your hard drive as well as keep you future proof for a good while. Besides support for more codecs, there are also a few changes on how other codecs are handled. For example, several backends that handle certain codecs have been swapped with other backends. This is done to improve license compatibility (to make everything follow the GPL) and to improve quality of the output media.

Handbrake’s graphical interface also got a nice spruce up. While nothing major, you’ll now be able to access just about all possible settings straight from the GUI, making it quicker and easier to do what you’re wanting to do.
Once you’ve changed all the settings that you want, you can also save your own presets so you can quickly get back to those same settings at a later time. Of course, you can also delete presets you no longer need.
Once you’ve run these commands, you should have Handbrake installed and ready to go.

However, if you’re looking for a tool that has the greatest flexibility between codecs, you’d probably be better served with Arista Transcoder, as it can take advantage of the GStreamer framework to transcode videos. The GStreamer framework is plugin-based, and there are tons of plugins available that give it support for almost any codec under the sun. So, again, if you need to transcode to newer codecs, then Handbrake should be fine. Otherwise, if you need greater flexibility, try Arista Transcoder instead. Once you’ve installed Arista, you can just check your package manager for gstreamer packages — you’ll see plenty of plugins there. If you’re running a distribution like Fedora that doesn’t include “non-free” software, you may need to add third-party repositories (such as RPMFusion for Fedora) or make other similar tweaks to your system to make those packages available.
Source: http://www.makeuseof.com/tag/useful-media-converter-linux-just-got-better-meet-new-handbrake/
Thankfully, the cross-platform Handbrake utility has gotten a significant update that makes it even better at converting videos between various codecs. Let’s check out all of the exciting stuff in the newest Handbrake.
Support for More Codecs
First of all, there’s lots of under-the-hood improvements in Handbrake. For instance, the utility can now use H.265 (which compresses video even better than the famous codec H.264) as well as VP8. If you don’t know much about these codecs, just know that they’re pretty modern codecs that a lot of videos will be encoded with. Transcoding videos into these codecs will save you space on your hard drive as well as keep you future proof for a good while. Besides support for more codecs, there are also a few changes on how other codecs are handled. For example, several backends that handle certain codecs have been swapped with other backends. This is done to improve license compatibility (to make everything follow the GPL) and to improve quality of the output media.
Improved Performance
In a future release, it’s also planned for Intel’s QuickSync functionality to be implemented to drastically improve transcoding times. In the meantime, you can still use AMD’s or Intel’s OpenCL functionality to somewhat improve performance via their respective GPUs. NVIDIA doesn’t support OpenCL in their GPUs at this time.
Modified Interface
Handbrake’s graphical interface also got a nice spruce up. While nothing major, you’ll now be able to access just about all possible settings straight from the GUI, making it quicker and easier to do what you’re wanting to do.
Presets
There’s also support for presets. There are several presets that come with the program that set the settings to optimized values for what you want handbrake to output.
Once you’ve changed all the settings that you want, you can also save your own presets so you can quickly get back to those same settings at a later time. Of course, you can also delete presets you no longer need.
How to Install
The latest version, Handbrake 0.10, should be available in most distributions. Ubuntu users can install it via a PPA, which makes it quick and easy. To add the PPA, refresh your package lists, and install the latest version of Handbrake, just run these three commands:
sudo add-apt-repository ppa:stebbins/handbrake-releases

sudo apt-get update

sudo apt-get install -y handbrake-gtk
Once you’ve run these commands, you should have Handbrake installed and ready to go.
Arista Transcoder as an Alternative
However, if you’re looking for a tool that has the greatest flexibility between codecs, you’d probably be better served with Arista Transcoder, as it can take advantage of the GStreamer framework to transcode videos. The GStreamer framework is plugin-based, and there are tons of plugins available that give it support for almost any codec under the sun. So, again, if you need to transcode to newer codecs, then Handbrake should be fine. Otherwise, if you need greater flexibility, try Arista Transcoder instead. Once you’ve installed Arista, you can just check your package manager for gstreamer packages — you’ll see plenty of plugins there. If you’re running a distribution like Fedora that doesn’t include “non-free” software, you may need to add third-party repositories (such as RPMFusion for Fedora) or make other similar tweaks to your system to make those packages available.
Handy Tools at Your Fingertips
Handbrake has always been an excellent tool available on Linux, and improvements like these will continue to come — all thanks to the fact that it’s open source. If you like Handbrake and want other great tools for Linux, don’t forget to check out some of the Best Linux Software out there!
Source: http://www.makeuseof.com/tag/useful-media-converter-linux-just-got-better-meet-new-handbrake/

February 27, 2015
Ubuntu MATE 15.04 Vivid Vervet Beta 1 Released, Gets Official Ubuntu Flavor Status
|
|
|
Ubuntu MATE 15.04 Vivid Vervet Beta 1 was released today. Let's take a look at what's new since alpha 2.

Unfortunately I didn't have time to
test the other flavors (and for most of them, there's not much to say
anyway), so I'll only cover Ubuntu MATE for this first beta release.
However, I'll add links to the other flavors' release notes (download
links included), below:
- Ubuntu GNOME
- Kubuntu
- Xubuntu
- Lubuntu (download link only; the official release notes are not available yet)
- Ubuntu Kylin
You may also want to read:
- Ubuntu Flavors 15.04 Vivid Vervet Alpha 2 Available For Testing
- Ubuntu MATE 15.04 Vivid Vervet Alpha 2 Released
I should also mention that as usual, Ubuntu (w/ Unity) doesn't take part in alpha and first beta releases.
Now back to Ubuntu MATE 15.04 Vivid
Vervet beta 1. The most important news is that Ubuntu MATE is now an
official member of the Ubuntu family.
The first Ubuntu MATE release was 14.10, followed by 14.04
(that's not a typo, the 14.04 release was after 14.10 because the
Ubuntu MATE devs wanted to provide a LTS, since non-LTS versions are
only supported for 9 months), but both versions were unofficial and used
PPAs to provide the latest MATE Desktop 1.8, which is no longer the
case with Ubuntu MATE 15.04 Vivid Vervet beta 1.
Since Ubuntu MATE is now an
official Ubuntu flavor, all the packages it ships with are now available
in the Ubuntu repositories - that include MATE Menu, MATE Tweak, its
default GTK theme(s) and so on.
Speaking of MATE Tweak, the tool has received a pretty important new feature, which allows switching between different panel layouts,
including: Ubuntu MATE (default), Eleven (with a top panel for the
menu, systray, etc. and Plank at the bottom, as the app
switcher/launcher) and more:


This also means that Plank, the default elementary OS application launcher, is now installed by default in Ubuntu MATE (but it's not used by default).
+Martin Wimpress posted a video which demonstrates this new MATE Tweak feature so check it out HERE.
Note that in the video there are more panel layouts than there are
available in Ubuntu MATE 15.04 Vivid Vervet beta 1 by default, because
it depends on the packages installed on the system and for instance, the
Ubuntu Indicator Applet, which was available in previous Ubuntu MATE
releases, is no longer available in Ubuntu MATE 15.04 Vivid Vervet beta 1.
The reason for this is that the
default Indicator Applet / Ubuntu Indicators don't support GTK2 by
default. For the previous Ubuntu MATE releases, the Indicator Applet was
patched to support MATE and it was available in a PPA, but since Ubuntu
MATE 15.04 is now an official Ubuntu flavor, it can't ship with PPAs
enabled by default and thus, it can't use Ubuntu Indicators out of the
box.
However, you can install the Ubuntu Indicator Applet along with the Sound Indicator package (patched for MATE) in Ubuntu MATE 15.04 by following THESE instructions.
Another change in the latest Ubuntu MATE 15.04 Vivid Vervet beta 1 is the addition of Folder Color by default:

Folder Color is a tool which allows
changing individual folder colors (useful to organize your folders, make
some important folder stand out, etc.) and besides Caja, it supports Nautilus and Nemo.
Other changes include:
- added menu categories to System > Preferences;
- LightDM GTK Greeter Settings was updated to version 1.10;
- updated the default GTK theme (Yuko) with better GTK 3.14 support;
- thanks to a GTK2 bugfix, MATE should have better multi-monitor support;
- MATE Tweak allows switching between Marco and Compiz without requiring a logout/login;
- added PowerPC as an officially supported architecture;
- updated LightDM GTK Greeter to 2.0.0 which now includes a MATE logo in the session switcher;
- merged MATE Compatibility integration into upstream Compiz .
Here are a few more Ubuntu MATE 15.04 Vivid Vervet beta 1 screenshots:


This being a beta, there are a few known issues,
most importantly: MATE 1.8x is not fully compatible with
glibc>=2.43.1 and while this was fixed upstream, it's not available
in 15.04 yet so for now, you'll have to use a PPA to get the fixes.
Other known issues include: the
notification tray crashes on first start and randomly from time to time
(32bit only), live switching between Compiz and Marco is experimental
and may result in missing window decorations on some old GPUs (and in
VirtualBox, at least that was the case in my test) and more.
Default applications/packages
Ubuntu MATE 15.04 Vivid Vervet beta 1
ships with the following applications installed by default: Caja 1.8.2,
Pluma 1.8.1, Firefox 34, Thunderbird 31.4.0, LibreOffice 4.4.0, VLC
2.2.0, Rhythmbox 3.1, Shotwell 0.20.2, Pidgin 2.10.9, HexChat 2.10.1,
Transmission 2.84, Cheese 3.14.1, two terminals - MATE Terminal 1.8.1
and Tilda 1.2.2 (which can be triggered via the F12 key), and Eye of
Mate 1.8.0, on top of MATE Desktop 1.8.1.
Under the hood, the first Ubuntu
MATE Vivid beta ships with the Ubuntu Linux Kernel 3.18.0-13, based on
the upstream 3.18.5 Linux Kernel, Xorg server 1.16.2.901 and Mesa 10.5.0
RC1 (with RC2 available in the Proposed repository).
Download Ubuntu MATE 15.04 Vivid Vervet beta 1
The link above includes the official
release notes so make sure you read them before testing the latest
Ubuntu MATE 15.04 beta 1!
Up next: Ubuntu MATE (and
flavors) 15.04 Vivid Vervet final beta, which should be released on
March 26th. All the Ubuntu flavors as well as Ubuntu (w/ Unity) will
take part in the final beta release.
Source: http://www.webupd8.org/2015/02/ubuntu-mate-1504-vivid-vervet-beta-1.html
Source: http://www.webupd8.org/2015/02/ubuntu-mate-1504-vivid-vervet-beta-1.html
February 21, 2015
How to enable the Composting Manager in Ubuntu Mate
I've noticed that the Ubuntu Mate Tweak utility has been removed. For anyone looking to enable the Composting Manager. Here is how to do it from the Terminal. Enjoy....
first ensure you have installed compiz:
Under EFFECTS, enable Window Decorations.
This is where I got stuck for 2 months. In most distros, this is all you have to do, but there is another step in Mate:
Open a terminal and type:
You should now have compositing enabled.

Source: http://askubuntu.com/questions/536717/mate-compositing-windows-manager
sudo apt-get install compiz compiz-plugins compizconfig-settings-manager
ccsm in the terminal, or just find it in the dash.Under EFFECTS, enable Window Decorations.
This is where I got stuck for 2 months. In most distros, this is all you have to do, but there is another step in Mate:
Open a terminal and type:
dconf write /org/mate/marco/general/compositing-manager true
You should now have compositing enabled.
Source: http://askubuntu.com/questions/536717/mate-compositing-windows-manager
February 9, 2015
Why Evolve OS could win you over to Linux and me away from Ubuntu
Jack Wallen has found the one take on Linux that could possibly move him away from his distribution of choice since 2006.

There are so many Linux distributions, each one claiming that they are the one flavor best designed for the new user in mind. Ubuntu, Linux Mint, PCLinuxOS -- all outstanding distributions and very much ready for users who want a platform built on the premise that Linux isn't nearly as challenging as many people assume.

In 2014, a new distribution appeared out of nowhere, one that cut straight to the heart of the matter and promised to deliver a Linux distribution like no other. That distribution is Evolve OS. For the longest time, the distribution was in a state of limbo, and the best you could do was download an alpha and hoped it would run. I tried a number of times and finally opted to just install the Budgie desktop on a Ubuntu distribution. That attempt gave me an idea of how Evolve OS would look, but not much more.
All of that changed last week when the beta of Evolve OS was finally released, and the distribution could finally be tested against what's considered the gold standard of user-friendly Linux distributions.
It not only fared well, it crushed the competition.
I should probably preface this by saying that I'm already a bit biased towards the Budgie interface. It's a near clone of the Chrome OS UI -- beautiful, elegant, and simple (Figure A). It makes lesser hardware sing, and it's quite stable for a beta.
Figure A

The Budgie desktop in action.
Evolve OS is built from scratch, using a fork of the PiSi package manager, and it's integrated with the GNOME stack to avoid technical debt and needless overhead.What's underneath the hood will not concern the new user -- but what will is the complete lack of a learning curve. Any user could hop onto Evolve OS and feel right at home. At the heart of that is the similarity to the Chrome OS UI. Although the Chromebook, by nature of its design, does have limitations (I should also mention that I'm a big fan of the Chromebook), the UI is as flawless an interface as you'll ever find. Evolve OS takes perfect advantage of this and re-creates that platform, sans limitations.

Imagine the Chromebook with the ability to run full-blown applications and work seamlessly offline. That's the very heart and soul of Evolve OS. With a simple menu, notification area, and panel, Evolve OS enjoys a familiar desktop metaphor that has worked for decades with the modern, minimal twist of Chrome OS.
From the user's perspective, Evolve OS borrows the following from the GNOME stack:
- Files -- GNOME file manager
- Maps -- GNOME map tool
- Weather -- GNOME weather app
Why Evolve?
The answer to this question is quite simple. If you're a fan of Chromebooks but long to be able to add an addition layer of usability and power on top, Evolve OS is for you. If you're looking for the epitome of elegance on a desktop, Evolve OS is for you. If you're looking for the single lowest barrier to entry for Linux, Evolve OS is for you.Why not Evolve?
It's very important to remember that Evolve OS is in beta. This means that you'll find tiny corners that are a bit rough. Take, for instance, the Software Center (Figure B).Figure B

The Evolve Software Center.
The Software Center is quite limited at the moment. With a minimal amount of available packages to install, you'll find yourself having to go the old-school route and install manually. Evolve OS uses the eopkg, which is a fork of the PiSi package manager. You can install a package with a command similar to:sudo eopkg install audacity
Personally, I'll be following Evolve OS closely to see when the distribution comes out of beta. When it does, it's quite possible that I could evolve from Ubuntu to this incredibly easy-to-use take on the Linux environment. That's a fairly impressive task for any new distribution -- to take me away from my Linux distribution of choice since 2006.
What do you think? Is Evolve OS just what the Linux platform needs to win over new users? Why or why not?
Source: http://www.techrepublic.com/article/why-evolve-os-could-win-you-over-to-linux-and-me-away-from-ubuntu/
January 30, 2015
Windows 10 Theme for Linux (GTK & XFCE)
One of the great things about Linux is the ability to customize your system any way you want. I had some fun with this one. I used the Orion Theme with the Windows 8 metacity title bars and windows icons. Below are links where you can get theme. Enjoy.


You can get the GTK3 metacity Win8 theme here:
http://gnome-look.org/content/show.php/Windows+8+theme+By+Kunal?content=165937
You get the Orion GTK3 theme here:
http://satya164.deviantart.com/art/Orion-GTK3-Theme-281431756
You can get the Win8 icons here:
http://gnome-look.org/content/show.php/Windows+8+Icons+Theme?content=167957
You can get the wallpapers here:
http://www.windows8core.com/download-the-all-new-desktop-hd-wallpapers-from-windows-10-consumer-preview-build-9901/

You can do the same for your XFCE desktop as well....and see the links below...


You can get the XFCE theme, XFCEight here:
http://xfce-look.org/content/show.php/Xfceight?content=158227
January 17, 2015
Ambiance & Radiance Flat Themes
Many of the new themes are heavily influenced by Android & Apple phone & tablets. Minimal flat themes are increasingly being developed for Windows 8 and Linux. Below is the Ambiance Flat theme along with the Vibrancy series icons. There are several color options in the theme. They both give my linux desktop a fashionable look these days. Below are links to get the theme and wallpaper. Enjoy.


The Ambiance Flat Theme can be found here:
http://www.ravefinity.com/p/download-ambiance-radiance-flat-colors.html
The Vibrancy Icons set can be found here:
http://www.ravefinity.com/p/vibrancy-colors-gtk-icon-theme.html
The Ubuntu red squares wallpaper can be found here:
http://www.wallpapershunt.com/wallpaper/ubuntu-logo-orange-2560x1600_w2954.html
January 9, 2015
How To Install The Official Spotify App in Ubuntu
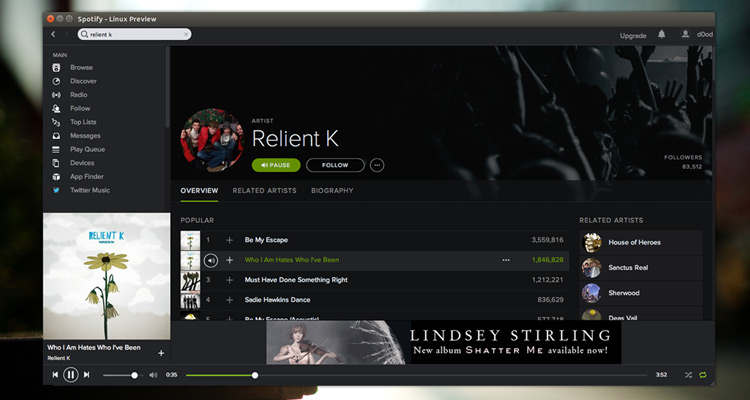
Spotify is the king of music streaming. Every day tens of millions of users listen to thousands of tracks using it through a variety of different ways.
There are mobile apps for Android, iOS, Windows Phone and Blackberry; a beta web-based player for browser-bound users; and dedicated desktop apps for Windows, Mac and Linux.
It’s the latter of these choices that this guide will show you how to install.
How to Install Spotify in Ubuntu
Spotify for Linux Preview can be installed on Ubuntu 12.04 LTS and 14.04 LTS straight from the Spotify repository. This method is the recommended way to install the player as it allows you to get automatic upgrades to new releases of Spotify through Ubuntu’s Software Updater/Update Manager tool.To add it you first need to open the Software Sources app via the Unity Dash:
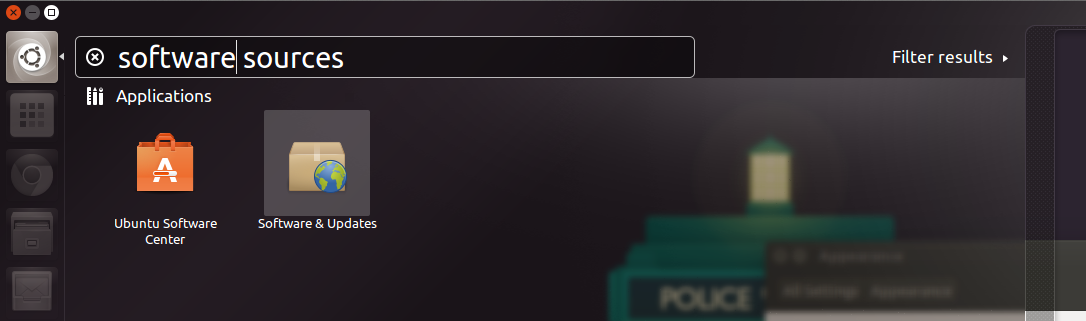
Select the ‘Other Software’ tab in Software Sources [1]

Click ‘Add’ [2] and paste the following the entry field of the box that appears:
deb http://repository.spotify.com stable non-freeClick ‘Add Source’ [3] to confirm the change, then close Software Sources.
Add The Spotify Repository Key
The next step is to add the repository key. This allows Ubuntu to verify that packages installed from the repository are made by who they say they are.Open a new Terminal window, paste the following command, and then hit return/enter:
sudo apt-key adv --keyserver keyserver.ubuntu.com --recv-keys 94558F59
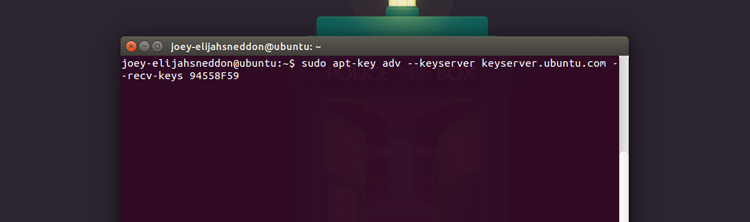
That’s that! You can now install Spotify through the Ubuntu Software Center (after checking for new software updates first) or by running the following command in the Terminal window:
sudo apt-get update && sudo apt-get install spotify-clientOnce installed you can launch Spotify from the Unity Dash.

From Spotify:
Debian
# 1. Add this line to your list of repositories by
#    editing your /etc/apt/sources.list
deb http://repository.spotify.com stable non-free

# 2. If you want to verify the downloaded packages,
#    you will need to add our public key
sudo apt-key adv --keyserver hkp://keyserver.ubuntu.com:80 --recv-keys 94558F59

# 3. Run apt-get update
sudo apt-get update

# 4. Install spotify!
sudo apt-get install spotify-client
Another way to run Spotify is through your web browser. Chrome has a Spotify extension here:
https://chrome.google.com/webstore/detail/spotify-music-for-every-m/cnkjkdjlofllcpbemipjbcpfnglbgieh?hl=en-US

Source: http://www.omgubuntu.co.uk/2013/01/how-to-install-spotify-in-ubuntu-12-04-12-10
Subscribe to:
Posts (Atom)