As you all know, Unity Greeter is now the default login manager in Ubuntu 11.10 (Oneiric Ocelot), and it will still be available in the upcoming Ubuntu 12.04 LTS (Precise Pangolin), due for release next month, on April 26th. Unity Greeter uses LightDM to provide a very nice and modern login screen, which has the ability to display the current wallpaper used on users' desktops. Now, there's a problem with that, as it is limited to only the default Ubuntu wallpaper pack offered by Canonical. Yes, you can add you own wallpapers, but there is now normal way to make them appear on the login screen, as it will display the default Ubuntu wallpaper. How do we resolve this issue? Well, this is why we've created this short tutorial. To teach you guys how to make that beautiful desktop background you love so much, appear at the login prompt. Of course, this is only a temporary workaround, until Canonical will develop a tool to make it easy for users to select a wallpaper for the login screen. What you need? A healthy Ubuntu 11.10 (Oneiric Ocelot) installation and that amazing wallpaper! Step 1 - Install Simple LightDM Manager No matter what Ubuntu operating system you are running, open a terminal by hitting the CTRL+ALT+T key combination and paste the following commands, one by one (hitting enter after each one): sudo apt-add-repository ppa:claudiocn/slm sudo apt-get update && sudo apt-get install -y simple-lightdm-manager Wait for the installation to finish and close the terminal window. Proceed to the next step! Step 2 - Set a wallpaper for the login screen Open the newly installed application, called Simple LightDM Manager, from Unity Dash... ... and select the wallpaper you want to set as default, for both your desktop and login screen, by clicking the "Location" button... Click the "Apply" button. It will ask for your password, so enter it and click OK. That's it. Yes, it was that simple! Now log out and you'll see that the wallpaper you have on your desktop is also displayed on the login prompt. If you have problems with the tutorial, do not hesitate to comment below! | |||||||
March 30, 2012
Change the Login Screen Wallpaper on Ubuntu 11.10
March 18, 2012
Download web videos with Movgrab
Download Web Videos With The Command Line Using Movgrab [Linux]
February 25, 2012, By Justin Pot
Use the command line to quickly download videos from YouTube, Vimeo, Ted, Discovery and over 40 other sites using one simple program. It’s called MovGrab and it’s a great, free program for Linux.
We’ve shown you a few easy ways to download online videos, and Linux and Mac users can check out check out Clipgrab for basic video downloading. It’s hard to match Movgrab, though, in terms of the sheer number of sites it supports. As of this writing, 45 different sites are supported. Combine this with a simple command-line interface – all you need to do is type the name of the program followed by the URL of the file – and MovGrab is a program worth having for anyone who likes to watch their online video offline.
For example: if you’d like to download Nyan Cat (and you would), the command would would be
Here’s what the command looks like when it’s running:

You should do this right now, and watch Nyan Cat on a continuous loop for the rest of your life. At the very least there should be a computer in your house that is always playing it, music and all.
The basic process is pretty much the same for any video, regardless of where it’s hosted. Here’s me dowloading a video about trick photography from Ted:

Once the download is done, you’ll find the video in the folder your Terminal was set to. Here’s me watching my Ted download:

Wasn’t that easy?
There’s a lot more this program can do, so be sure to check out the
You’ll need a relatively recent version of Ubuntu for the first command to work.
Users of other operating systems can grab the source code at the movgrab homepage. You’ll need to compile the source code yourself, but it’s not anymore complicated than the standard configure, make and make install.
Get a Linux geek to help you out if you’re not sure what that means!
How do you like this program? Please leave a note in the comments below, along with any recommended similar software.
Source: http://www.makeuseof.com/tag/download-web-videos-command-line-movgrab-linux/
February 25, 2012, By Justin Pot
Use the command line to quickly download videos from YouTube, Vimeo, Ted, Discovery and over 40 other sites using one simple program. It’s called MovGrab and it’s a great, free program for Linux.
We’ve shown you a few easy ways to download online videos, and Linux and Mac users can check out check out Clipgrab for basic video downloading. It’s hard to match Movgrab, though, in terms of the sheer number of sites it supports. As of this writing, 45 different sites are supported. Combine this with a simple command-line interface – all you need to do is type the name of the program followed by the URL of the file – and MovGrab is a program worth having for anyone who likes to watch their online video offline.
Basic Usage
Are you familar with the terminal? The basic command here isn’t that hard, then. Just browse usingcd to the folder where you’d like to store your download, then type movgrab followed by the URL of the video you’d like to download.For example: if you’d like to download Nyan Cat (and you would), the command would would be
movgrab http://www.youtube.com/watch?v=QH2-TGUlwu4.Here’s what the command looks like when it’s running:
You should do this right now, and watch Nyan Cat on a continuous loop for the rest of your life. At the very least there should be a computer in your house that is always playing it, music and all.
The basic process is pretty much the same for any video, regardless of where it’s hosted. Here’s me dowloading a video about trick photography from Ted:
Once the download is done, you’ll find the video in the folder your Terminal was set to. Here’s me watching my Ted download:
Wasn’t that easy?
A Few Advanced Features
Do you want to know what this program can really do? Typemovgrab -h
to see the full instructions. Command line experts will be able to
figure out pretty much everything based on that, but let’s go over the
highlights.- If you want the download to happen in the background just add
-bto the command. The download will happen in the background, letting you use your terminal for other things. - If you want to continue a download you started earlier, you can add
-rto the command. - If you want to pick a particular format, you’ll need to do two things. First: use the
-Toption to get a list of your options. Then, run the command again using the-foption followed by the format of your choice. For example, downloading Nyan Cat, I would use this command:movgrab http://www.youtube.com/watch?v=QH2-TGUlwu4 -f webm:845x480It’s the same command, just followed by-fand the format I’d like to download the video from.
movgrab -test-sites and your computer will test each and every supported site. If many are broken, it may be time to update Movgrab.There’s a lot more this program can do, so be sure to check out the
-h option to get a complete rundown.Installing MovGrab
I found this program thanks to a great article on WebUpd8, a site I recommend you all check out. That site’s PPA is probably the simplest way for Ubuntu users to install MovGrab, and all you need to do is enter the following three commands in the terminal:sudo add-apt-repository ppa:nilarimogard/webupd8sudo apt-get updatesudo apt-get install movgrabYou’ll need a relatively recent version of Ubuntu for the first command to work.
Users of other operating systems can grab the source code at the movgrab homepage. You’ll need to compile the source code yourself, but it’s not anymore complicated than the standard configure, make and make install.
Get a Linux geek to help you out if you’re not sure what that means!
Supported Services
This program supports a lot of different sites. Some may or may not be working, but here is a currently complete list:- YouTube
- Metacafe
- Dailymotion
- Vimeo
- Break.com
- eHow
- 5min.com
- vbox7
- lip.tv
- Ted
- MyVideo
- ClipShack
- MyTopClip
- RedBalcony
- Mobando
- Yale University
- Princeton University
- Reuters
- LiveLeak
- Academic Earth
- Photobucket
- VideoEmo
- VideosFacebook
- Aljazeera
- Mefeedia
- IViewTube
- Washington Post
- CBS News
- Euro News
- MetaTube
- MotionFeeds
- Escapist
- Guardian
- RedOrbit
- Sciive
- Izlese
- uctv.tv
- royalsociety.tv
- British Academy
- Kitp
- Dotsub
- Astronomy.com
- Teachertube.com
- Discovery
- Bloomberg.com
Conclusion
This is simply a must-have video downloader for anyone who wants to download from a wide variety of sites. The command-line interface may make it inaccessible to some, but those who take the time to figure it out won’t be disappointed.How do you like this program? Please leave a note in the comments below, along with any recommended similar software.
Source: http://www.makeuseof.com/tag/download-web-videos-command-line-movgrab-linux/
March 16, 2012
Lubuntu 12.04 Beta 1 is a winner
I tried the new Lubuntu 12.04 Beta 1 image and was very impressed with the polished theme they have given it. It comes with a new Elementary /OSX silver style theme, Chromium browser 17.0963, Abiword, Gnumeric, Pidgin 2.10, Sylpheed email client, Audacious media player 3.2.1, along with a new fresh looking wallpaper. What a veteran Linux user like me appreciates is that Lubuntu is 100% workable right out of the box without any tweaking. No having to install classic Gnome, moving title buttons back to the right, downloading and tweaking the installed theme & wallpaper, or needing to add must-have programs like Chromium and Pidgin. Everything is there for you on one CD ISO image. I find this so amazing. Lubuntu 12.04 has got it right, and is everything a top Linux distro should be: fast, good looking, simple, and stable. Very nice job Lubuntu. Below are some screen shots and a link where to get it.
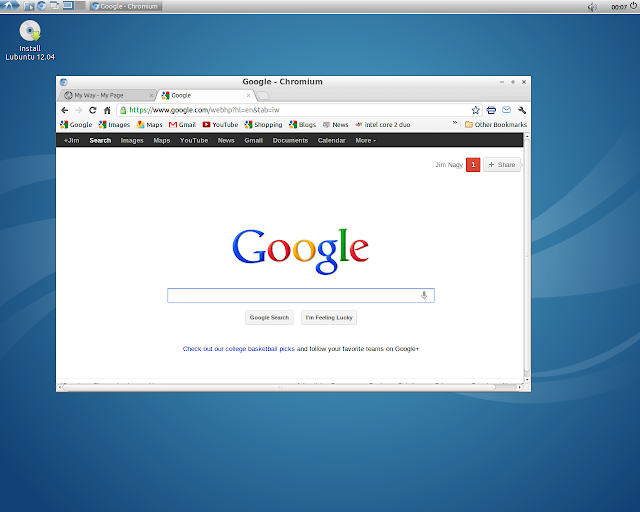
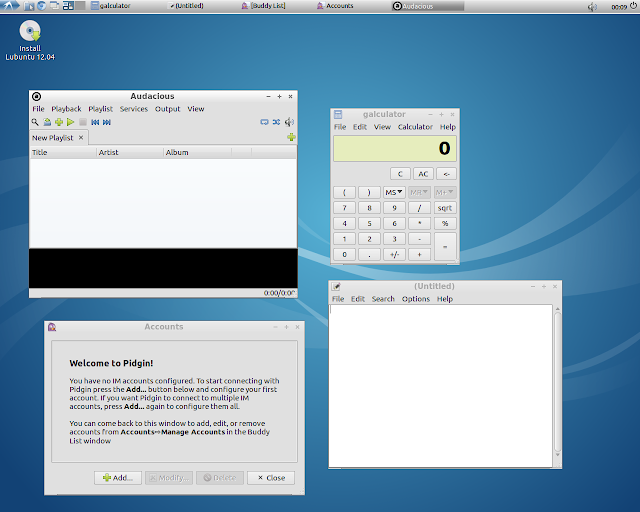
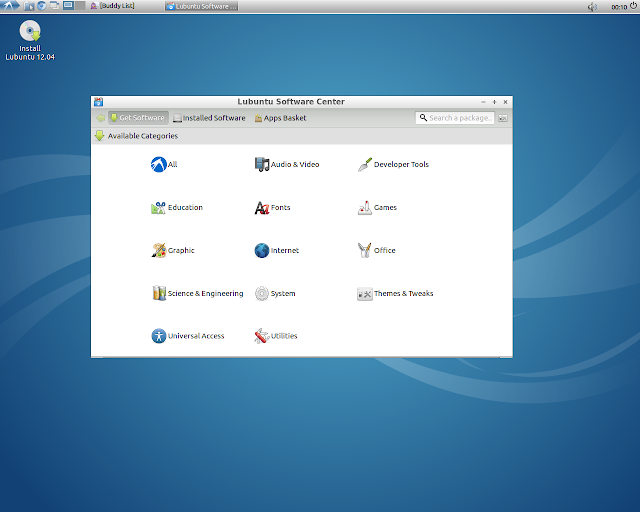
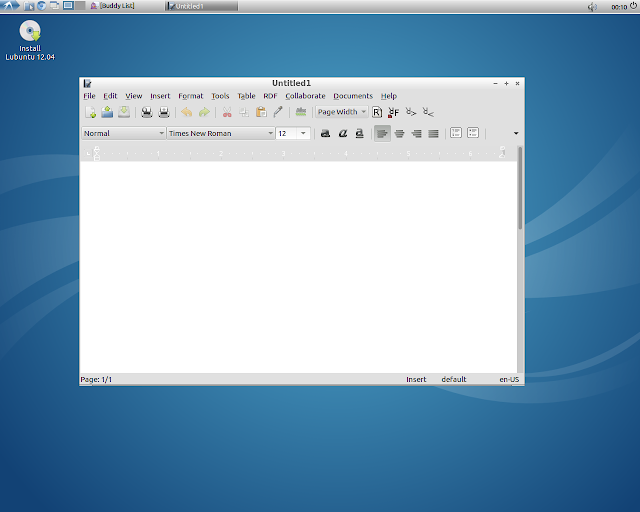
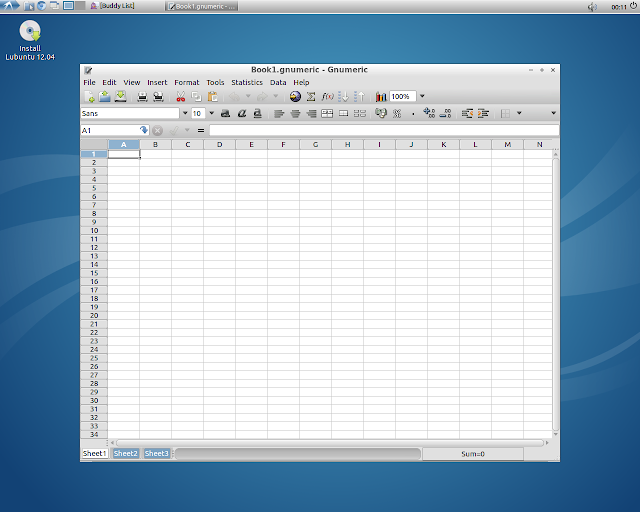
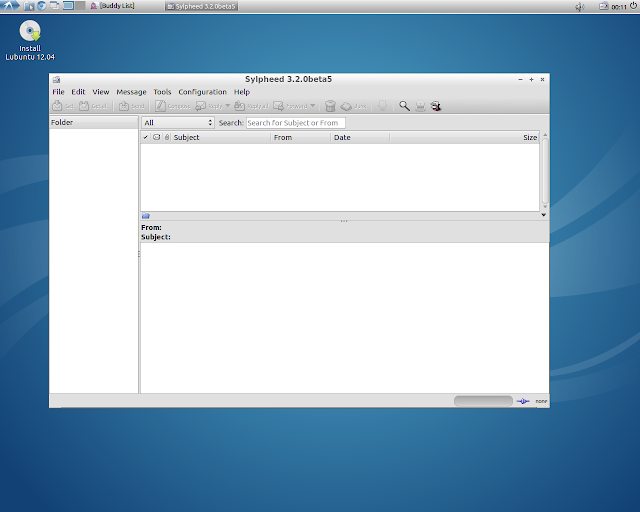
You can download the 12.05 Beta 1 here:
http://cdimage.ubuntu.com/lubuntu/releases/precise/beta-1/
March 7, 2012
Nightingale Music Player Released
First Official Release of Songbird Fork - Nightingale Music Player - Just Happened!
Posted by
Manuel Jose
on Monday, March 5, 2012
/
Labels:
Multimedia,
Music Player,
Nightingale,
Ubuntu 11.10
Quoting our previous article on the topic, "Not so long ago, Songbird
was one of the most loved music player app among Linux users. It all
changed when Songbird developers decided to stop supporting Linux and
concentrate on Mac and Windows platforms. But some hardcore Songbird
users were not ready to give up yet." They forked the project and after
more than an year of hard work, Nightingale 1.11.0 is officially
released.
What's New in Nightingale 1.11.0?
- Based on the latest Songbird changes and provides better performance.
- Based on the latest Gecko 1.9.2, adds a play queue.
- Refreshed feather, looks a lot sleeker now.
- Brand new update feature which will download and install future releases automatically.
- A good number of Songbird add-ons already ported. Ported add-ons can be installed into both Nightingale and Songbird.
- Tons of bug fixes.
- More details and changelog can be found here.
Download First Official Release of Nightingale Music Player
- Nightingale is cross-platform is can be easily installed on Windows, Mac and Linux
- If you have installed earlier developer preview release of Nightingale (Nightingale 1.8 ie.) before, you need to remove it first.
Source: http://www.techdrivein.com/2012/03/first-official-release-of-songbird-fork.html?utm_source=feedburner&utm_medium=feed&utm_campaign=Feed%3A+techdrivein+%28Tech+Drive-in%29
March 4, 2012
Favorite Gnome GTK3 Themes
For March I've been testing the new Ubuntu, Xubuntu, and Lubuntu 12.04 beta 1 builds.
Below is my March desktop which resembles the older OSX Tiger look and a collection of favorite Gnome GTK3 themes. It is nice to have these all in one place.
The above theme is GrayDay theme and can be downloaded here:
http://gnome-look.org/content/show.php/GrayDay?content=149310
To install the Elements-GS Gnome 3.x theme:
sudo add-apt-repository ppa:webupd8team/themes
sudo apt-get update
sudo apt-get install elements-gs-theme
Source: http://www.webupd8.org/2011/10/4-beautiful-gnome-32-compatible-gtk.html
========================
You can add the Elementary and Evolve PPA repositories below:
Then just search for Evolve theme from the Synaptic package manager.
sudo add-apt-repository ppa:webupd8team/themes
sudo apt-get update
sudo apt-get install evolve-gtk-theme
==========================
To get the updated Ambiance and Radiance light themes
type the following on a terminal:
sudo add-apt-repository ppa:victored/light-themes-evolved
sudo apt-get update
sudo apt-get dist-upgrade
You can also go into Synaptic and search for "light themes" to avoid upgrading everything.
=============================
Remove overlay toolbars, from root terminal:
sudo apt-get remove overlay-scrollbar liboverlay-scrollbar3-0.2-0 liboverlay-scrollbar-0.2-0
March 3, 2012
How to easily move button layouts to the right
As of Ubuntu 10.04, the minimize, maximize, and close buttons on all windows were moved to the left side and the system menu was removed. Prior to version 11.10, you could use several methods to restore the original button arrangement.
To move the windows buttons in 10.04, 10.10, and 11.04, you could use Ubuntu Tweak or the Gnome-Art Manager or manually move the buttons using the Configuration Editor(gconf-editor). However, in Ubuntu 11.10 with the Gnome 3 desktop environment, these methods for moving the buttons are obsolete. The only way to move the buttons now is to use a program called Mwbuttons (Metacity Window Buttons) that allows you to specify the availability and position of the window buttons.
To install Mwbuttons, download the Debian/Ubuntu DEB ALL file, not the tar.gz file.
Go to the desktop or open the file manager (from the Places menu) and navigate to the
folder where you saved the .deb file. Double-click on the file.
folder where you saved the .deb file. Double-click on the file.
To install software, you must authenticate. Enter your password in the Password edit box
on the Authenticate dialog box and click Authenticate.
on the Authenticate dialog box and click Authenticate.
The progress of the installation displays where the Install button was.
When the installation is done, “Installed” displays next to a check mark. To close the Ubuntu Software Center, click the X button on the window’s title bar.
To start mwbuttons, click the Dash home icon on the Unity desktop.
Enter “mwbuttons” (without the quotes) in the search box. You don’t need to press Enter.
Results are displayed as you type. Click the Metacity Window Buttons icon that displays.
Results are displayed as you type. Click the Metacity Window Buttons icon that displays.
The Metacity Window Buttons window displays. There are eight drop-down lists from which
you can choose which buttons will be available and the order of the buttons on all windows
in
Ubuntu.
you can choose which buttons will be available and the order of the buttons on all windows
in
Ubuntu.
For example, to put the close button back in its usual place, select the X button from the drop-down list on the far right side of the Metacity Window Buttons window.
NOTE: The buttons available in each drop-down list are as follows, in this order: system
menu, maximize, minimize, close. The maximize button is a toggle button. Clicking it once maximizes the window, if it isn’t already, and clicking it again returns it to its previous
state.
menu, maximize, minimize, close. The maximize button is a toggle button. Clicking it once maximizes the window, if it isn’t already, and clicking it again returns it to its previous
state.
We selected the buttons as shown on the following image to put the window buttons back
in
their usual places.
in
their usual places.
Any window you open now will display the window buttons where you placed them.
You can also quickly set the buttons to the way they were in Karmic Koala (9.10). To do
this, move your mouse to the top panel on the desktop to access the menu bar for
Metacity
Window Buttons and select Karmic style from the Settings menu. You can also use this
menu to go back to the style from Lucid Lynx (10.04) or you can even select the
Mac OS X style. To go back to the previously set button arrangement, select Restore style.
When you maximize a window on the Unity desktop in Ubuntu 11.10, the buttons go
back to the left side in the following order: close, minimize, maximize. They also move
to the top panel along with the menu. If you click the maximize button again, the
buttons go back to where you placed them.
back to the left side in the following order: close, minimize, maximize. They also move
to the top panel along with the menu. If you click the maximize button again, the
buttons go back to where you placed them.
Subscribe to:
Comments (Atom)


